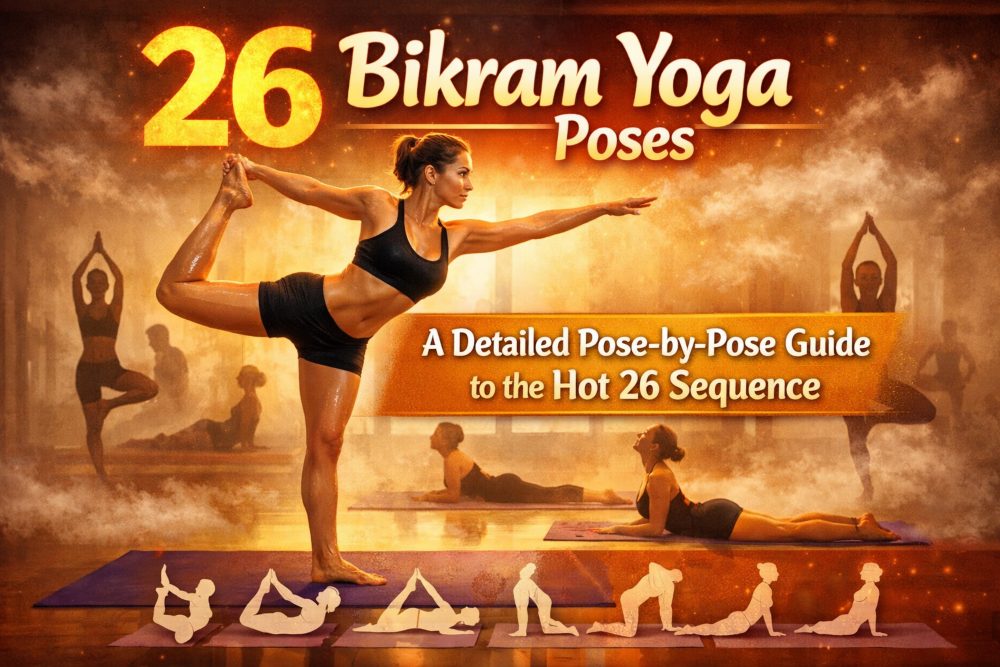
Bikram yoga is also known as “Hot 26” and consists of a sequence of comfortable postures that are performed in the same order every time. The room (or space) is usually heated to around 40 °C/105 F, with humidity levels ranging between 40 – 60 per cent depending on the studio and location. Traditional Hot yoga is usually practised to a predetermined sequence that changes by class, and everything happens across 90 minutes.
People adore this style because you always know what to expect: you can gauge progress, adjust alignment and build stamina over time. That’s how many describe it: 26 postures + 2 breathing exercises = the familiar “26+2.”
One quick note on names: Some of the pose names in the sequence given below might not be what you’re used to from practising other styles of yoga (eg, Bikram calls Tree Pose “Tadasana”).
Safety First (Especially in the Heat)
Hot yoga is no joke and comes with its own particular risks of overheating and dehydration. If you’re pregnant, of advanced age, or have health problems, talk to a healthcare professional and an experienced instructor about modifications.
If you feel sick, stop and rest (or get out). Symptoms of heat exhaustion may include headache, nausea, dizziness, weakness, heavy sweating, and feeling faint.
Practical hot-room safety cues:
- Hydrate much more than usual before and after class; take drinks as you need them.
- Avoid forcing depth. Heat can make you feel more limber than your tissues are actually prepared for.
- Pain is a stop sign. It is fine to be highly aware; it’s not okay to experience sharp pain.
- Take it slow getting up from the floor.
The 26 Bikram Yoga Poses at a Glance (In Order)
Standing series + transition
- Half Moon (Ardha Chandrasana)
- Hands to Feet (Pada Hastasana)
- Awkward (Utkatasana)
- Eagle (Garudasana)
- Head to Knee Pose (Dandayamana Janushirasana)
- Standing Bow Pulling (Dandayamana Dhanurasana)
- Balancing Stick (Tuladandasana)
- Toes Reading pose (Dandayamana Bibhaktapada Paschimottanasana)
- Triangle (Trikonasana – Bikram variation looks more like a side-angle shape)
- Head to Knee (Stand separate leg head to knee pose Dandayamana Bibhaktapada Janushirasana)
- Tree (Tadasana – Bikram name)
- Toe Stand (Padangustasana – that’s the Bikram name)
- Savasana / Dead Body (Savasana)
Floor series
- Wind Removing (Pavana Muktasana)
- Sit-Up (Bikram Sit-Up)
- Cobra (Bhujangasana)
- Locust (Salabhasana)
- Full Locust (Poorna Salabhasana)
- Bow (Dhanurasana)
- Fixed Firm (Supta Vajrasana)
- Half Tortoise (Ardha Kurmasana)
- Camel (Ustrasana)
- Rabbit (Sasangasana)
- Head to Knee (Janushirasana)
- Intense Stretching (Paschimottanasana)
- Spine Twisting (Ardha Matsyendrasana)
The “+2” breathing exercises: Standing Deep Breathing (at the beginning) and Kapalbhati/Blowing in Firm (at the end) are often included as the two breath practices that bookend the sequence.

Standing Series: Detailed Breakdown (Poses 1 - 13)
1) Half Moon Pose (Ardha Chandrasana)
Half Moon is a beginner standing posture in the Bikram series. Activating your entire body gently by stretching the spine in many ways – forward, side, and bending backward. This sitting-waking practice sets the muscles, joints, and nervous system for the intensity of the class, creating a body consciousness about posture, balance, and breath.
Intention: Warm-up, spine freedom, stretching the side body.
")
How to do it:
- Stand with feet together (or hip-width apart if necessary).
- Fingers are laced, index fingers together, arms up over the head.
- Come up tall first, and then side bend right and left.
- “Bring it back to centre,” a soft standing backbend, where the chest rises, and only the hips are pushed slightly forward, may be included in some classes.
Key cues:
- Stretch before you bend: up and then over.
- Weight should be evenly distributed on both feet.
- Use the glutes and lower belly in the backbend to assist the lower back.
Common mistakes:
- Crunching the waist (instead of lengthening).
- Allowing the hips to pop out in one direction.
- Dumping into the low back on the back bend.
Modifications:
- Place your feet a little wider than hip-width apart to support your weight.
- Omit the backbend entirely as a modification if you have issues with low-back sensitivity.
2) Hands to Feet Pose (Pada Hastasana)
Utthita Hasta Padangustasana (Hands to Feet Pose) Hands to Feet Pose is a strong standing forward bend that has an intense stretch along the entire back of your body – hamstrings, calves, and spine included. This position in the Bikram Yoga series allows the release of framework throughout daily work, allowing circulation to increase to the brain and upper body. Taught toward the beginning of class, it gradually opens up the body into deeper stretching later in the sequence.
Purpose: Hamstrings and calves, posterior-chain warm-up.
How to do it:
- Hinge at the hips and fold forward.
- Bend knees generously at first.
- Slide hands under heels (or hold ankles/shins if that’s more accessible).
- Gradually straighten legs only if your spine stays comfortable.
")
Key cues:
- Think hinge, not collapse.
- Lightly engage the quads to protect the backs of the knees.
- Relax the neck.
Common mistakes:
- Aggressively locking knees.
- Forcing straight legs while rounding the lower back painfully.
- Pulling on the feet with arms rather than using the hips/legs.
Modifications:
- Keep knees bent; prioritise a long spine.
- Use blocks or fingertips on the floor.
3) Awkward Pose (Utkatasana)
Utkatasana, Strong Awkward Pose, is a strong standing posture that strengthens and tones the leg muscles, also creating heat in the body in the early part of the Bikram Yoga sequence. By replicating a seated position, the pose puts pressure on your thighs, hips, ankles, and abdomen while teaching proper alignment and mental concentration. It is repeated in several stages, increasing in intensity and showcasing the body for the balancing poses that come later.
Purpose: Strength in the legs, flexibility in the ankle, and building of heat.
")
This asana is usually done in several stages.
Steps (The general idea):
- Feet a few inches apart; arms forward at shoulder width.
- Hinge at your hips as if you were sitting in a chair; keep your heels on the ground (as long as they’re able to stay there).
- Lift the chest, lengthen through the spine.
Key cues:
- Knees track toward second/third toes.
- Weight into heels or mid-foot.
- Squeeze ribs together, no flaring of the chest.
Common mistakes:
- Knees are collapsing inward.
- Heels are lifting unintentionally.
- Overarching the lower back.
Modifications:
- Reduce depth.
- Practice near a wall.
- For sensitive knees, limit the range and maintain a pain-free line.
4) Eagle Pose (Garudasana)
Garudasana is a concentration-intensive balancing pose that involves wrapping the arms and legs around each other to create a sense of compression in the body. This posture, which is part of the Bikram Yoga sequence, increases focus and relaxes the nervous system. Strengthening: legs, ankles. Opening: shoulders, upper back. Increases circulation to joints. The wrapping motion promotes circulation and the release of muscular tension that are typical problem areas.
Purpose: Balance, stability in the hips, opening of the shoulders and upper back.
How to do it:
- Bend knees slightly.
- Cross one leg over the other (the toe can remain down as a kickstand).
")
- Cross arms so elbows are overlapped, and then raise them to shoulder height.
- Come to a seated position with your hips down and back and chest lifted.
Key cues:
- Hug your thighs together.
- Lift elbows; soften shoulders down.
- Fix your gaze on one point.
Common mistakes:
- Leaning forward too much.
- Dropping elbows.
- Twisting the standing knee inward.
Modifications:
- Continue to point the wrapped toes to the floor.
- Cross arm hug: hug shoulders or tap hands to shoulders.
5) Standing Head to Knee (Dandayamana Janushirasana)
One-legged Balancing Pose is an intense mix of single-leg strength, flexibility, and mental concentration. This is a killer hamstring stretch and really strengthens that standing leg and core. The fact that balance and alignment are so important means it stimulates concentration, patience, and controlled breath during the practice.
Intention: Balance, hamstring, core work and attentiveness.

How to do it:
- Shift weight into one foot.
- Raise the opposite knee, gripping under the calf or around the foot.
- Reach the leg forward as best you can (it may remain slightly bent).
- Fold over the toe/shin and come down with support.
Key cues:
- Stability first, shape second.
- Avoid jamming the standing knee.
- Try to keep your hips as square as you can.
Common mistakes:
- Pulling aggressively and losing balance.
- Hunching shoulders to chase depth.
- Hyperextending the standing knee.
Modifications:
- Keep the lifted knee bent.
- Use a strap.
- Practice near a wall.
6) Standing Bow Pulling (Dandayamana Dhanurasana)
Standing Bow Pulling Pose, a powerful balancing posture that involves strength, flexibility and poise. Reaching one arm forward and kicking the lifted leg back, the body lands in a very strong backbend that stretches the chest and hip flexors while strengthening the spine and standing leg. This pose creates greater focus, alignment, and poise – which can be obtained by practising one of the visually stunning postures in the Bikram Yoga sequence.
Intention: Strengthening the back, opening up the front of our hips, Balance and Posture.

How to do it:
- Grab the inside of one foot/ankle with your hand on that same side.
- Reach opposite arm forward.
- Kick the raised foot back and up, hinging the torso to move toward parallel with the ground.
- Keep hips square.
Key cues:
- The kick generates the lift; don’t just pull with the arm.
- Keep your shoulders level.
- Contract the abdomen to brace the back.
Common mistakes:
- Opening the hip out dramatically.
- Falling chest rather than stretching ahead.
- Over-kicking into low-back pain.
Modifications:
- Use a strap.
- Kick less; keep torso higher.
7) Balancing Stick (Tuladandasana)
Balancing Stick is a powerful, all-over-the-body posture which demands concentration, stability and stamina. By reaching the body into one long line, you will engage your back, butt, and hamstrings as well as core and balance muscles. It creates endurance and mental toughness, particularly as the body starts to really feel the heat.
Focus: The posterior chain, full-body engagement, endurance.
")
How to do it:
- Arms overhead (or forward).
- Step one foot slightly forward.
- Hinge until your body is in a long line from fingertips to lifted heel.
Key cues:
- Make one “plank line.”
- Square hips down.
- Better to reach forward than lift too much.
Common mistakes:
- Too much lifting with the back leg, too little length in the torso.
- Collapsing shoulders/neck.
- Yippity skippity over the profile.
Modifications:
- Hands on hips.
- Maintain a higher angle with your torso as you work on strength.
8) Standing Separate Leg Intense Stretch (Dandayamana Bibhaktapada Paschimottanasana)
Standing separate leg intense stretch is a seated forward bend and deep stretch for the hamstrings, calves, and spine. Standing with the legs spread wide, you get help from gravity to lengthen out the back body and decompress the spine. This asana also promotes better blood flow to the upper body and keeps the mind in a calming state with deep focus and controlled breathing.

Objective: Hamstrings, calves, and spinal decompression.
How to do it:
- Step wide.
- Fold forward from the hips.
- Hold the lack of heels/ankles or hands on the floor.
- Lie on your back, progressively work down, lifting your head between your legs.
Key cues:
- Lift sitting bones, hinge hips.
- Engage quads to support hamstrings.
- Distribute weight through the feet.
Common mistakes:
- Rounding low back to “go deeper.”
- Painful knee locking.
- Falling away to the outsides of the feet.
Modifications:
- Bend knees.
- Hands on blocks.
9) Triangle Pose (Trikonasana – Bikram variation)
One of the strong standing poses in the Bikram series, Triangle Pose develops strength and stability in the legs as it deeply opens the hips and side body. This version is not at all like a normal triangle; it involves sinking very deeply into the front knee, and you get a deep stretch and strengthening effect through the legs and core. It also enhances the flexibility and coordination of the spine, allowing the chest open and the torso to rotate.
")
Purpose: Hips, legs, side body, and core.
How to do it:
- Step wide; turn one foot out.
- Bend the front knee deeply.
- Rest elbow/forearm on thigh (or go lower if you can do so safely).
- Reach top arm up; open chest.
Key cues:
- Front knee over front ankle (no keeling in).
- Ground through the back foot.
- Turn the ribcage open without moving the hips.
Common mistakes:
- Knee drifting inward.
- Collapsing chest.
- You’re letting the straight leg drift.
Modifications:
- Forearm to thigh.
- Lessen the bend in the front knee.
10) Standing Separate Leg Head to Knee (Dandayamana Bibhaktapada Janushirasana)
Standing Separate Leg Head to Knee Pose is a deep, direct forward bend that stretches the hamstrings and hips firmly, in addition to testing our balance and focus. Performed with the legs wide, this shape promotes length in the spine and mindful motion while undoing tightness in the lower body and developing mental acuity and breath-awareness.

Purpose: Deep hamstring/hip stretch with some concentration.
How to do it:
- Wide stance; set feet stable.
- Release back to your front leg.
- Gently fold towards the thigh/shin, don’t push it too hard.
- Gradually refine alignment and depth.
Key cues:
- Square hips as best you can.
- Lengthen spine before deepening.
- Breathe steadily; don’t strain.
Common mistakes:
- Twist to ‘touch’ the head down.
- Jamming the straight front leg down to create pain.
- Completely unloading on the front foot.
Modifications:
- Bend the front knee.
- Use blocks.
11) Tree Pose
Tree Pose is a traditional balancing pose that creates stability, body awareness, and focus. For Bikram Yoga, this pose builds the strength in your standing leg and ankle and opens the hips a little. With an erect spine and focused gaze, Tree Pose enhances posture, coordination, and mental poise.
Focus: Balancing, opening your hips, and postural control.
How to do it:
- Stand on one leg.
- Put the other foot on the inside part of your thigh, or inner calf( no //no joint).
- Hands at heart or overhead.
Key cues:
- Push down through the standing foot; rise through the inner arch.
- Square hips forward.
- Use slow breathing to steady.

Common mistakes:
- Foot pressing into the knee.
- Hyper-hiking or over-rotating.
- Collapsing through the standing ankle.
Modifications:
- Kickstand: toes on floor.
- Use a wall.
12) Toe Stand (Padangustasana – Bikram name)
Toe Stand is a challenging balancing posture that strengthens and stabilises the feet, ankles, and legs, while requiring strong focus. Starting from Tree Pose, lowering down into this shape tests both balance and strength as the whole body folds down into a down shape on the floor. It honed focus, strengthens joints, and builds confidence in balance.
Goal: Foot and ankle power, deep balance challenge.
How to do it:
- Start from the tree.
- Bend standing knee, touching fingertips to the floor.
- Lower hips to heel, and keep weight on the ball of the foot.
- Prayer hands; lift chest.

Key cues:
- Move slowly and steadily.
- Knee tracks forward.
- Keep breathing calmly.
Common mistakes:
- Dropping all the way down, and to watch the knee/ankle!
- Knee collapsing inward.
- Holding breath.
Modifications:
- Stay in the tree.
- Keep fingertips down, or use blocks.
13) Savasana (Dead Body Pose)
Savasana is a restorative position for full-body and body-mind recovery. In the Bikram Yoga sequence, you employ it mindfully to soothe the nervous system, reduce pulse, and assimilate effects from the standing series. This pose looks easy, but it is vital for reestablishing equilibrium and for the floor sequence that it precedes.
Purpose: Nervous system reset, recovery.
How to do it:
- Lie on your back with arms at rest, palms facing up.
- Let the floor support you.
- Breathe naturally.
")
Key cues:
- Soften jaw, shoulders, belly.
- If you feel dizzy, roll to the side before sitting up.
Modifications:
- Bend your knees, or roll up a washcloth and slide it behind your knees.
Floor Series: Detailed Breakdown (Poses 14 - 26)
14) Wind-Removing Pose (Pavana Muktasana)
Wind-Removing Pose is a great, grounding posture that can help to release tension in the lower back and hip area. This asana is great for modifying gas and massaging the abdominal area; along with that, it softens and aligns the spine, opening up circulation. It’s particularly good for dropping into the body after standing and before deeper floor work.
Purpose: Low-back comfort, hip flexors, gentle compression.
")
How to do it:
- Lie on your back.
- Draw one knee in toward the chest; extend the other leg long (or bend as you need to).
- Optional: lift head toward knee.
- Do on the other side, then both knees at once.
Key cues:
- Inhale as you bring your knee to you.
- Relax your shoulders and face.
Modifications:
- Keep your head down.
- Tuck the back of the thigh, not the shin.
15) Sit-Up (Bikram Sit-Up)
The Bikram Sit-Up is a moving posture that uses your core and breath to link movement. Rather than a quick or powerful movement, this sit-up showcases presence, core awareness, and smooth control of the body as it transitions from floor positions. It keeps the heat on and palms down during the floor series.
Purpose: Transition and core activation.
How to do it:
- From lying, reach arms overhead.
- Exhale and roll up with control.
- Breathe in and gradually lower back down.
")
Key cues:
- Smooth and slow; avoid jerking.
- Keep your neck long.
Modifications:
- Bend knees.
- Use hands lightly for support.
16) Cobra Pose (Bhujangasana)
Cobra Pose is a gentle, backbending pose that opens the chest and the front of the body by strengthening the spine. In the Bikram Yoga series, this posture helps to correct posture, improve flexibility of the spine and neutralise those forward bending postures you were working with earlier. It promotes outward opening through the chest and groundedness in the lower body.
Purpose: Back strength, chest opening.
")
How to do it:
- Lay on your belly, and place your palms under your shoulders.
- Back: Chest lift with the use of back muscles; elbows next to the body.
- Keep hips grounded.
Key cues:
- Lengthen forward and up instead of cranking back.
- Keep shoulders away from ears.
Modifications:
- Lower height.
- Use Sphinx (down on forearms) if necessary.
17) Locust Pose (Salabhasana)
Locust is a form of strength-building backbend that works the glutes, hamstrings, and muscles along the spine. Performing it on your belly will strengthen your posterior chain, as well as add in some much-needed carryover for spine stability and posture. It also helps reset your body after forward bends by activating the back body in a controlled and directed manner.
Purpose: Glutes, hamstring and back-body strength.
How to do it:
- Lie on your belly.
- Lift one leg; lower; switch.
- Advance to raising both legs if possible.
")
Key cues:
- Extend legs back; raise from the glutes.
- Keep pelvis grounded.
Modifications:
- Lift lower.
- Place a folded towel underneath your hips.
18) Full Locust (Poorna Salabhasana)
Salabhasana Full Locust Pose is a very strong strengthening posture which develops stamina in the muscles of your upper back, buttocks, and hamstrings. The back raise isolates the posterior chain and promotes concentration on breathing with complete focus. It’s a wonderful way to tone those muscles that work to support better posture and to warm the body up for the deeper backbends to come.
Purpose: Upper-back endurance, posterior chain.
")
How to do it:
- Reach your arms forward (as cued in class).
- Lift chest and legs.
- Breathe steadily.
Key cues:
- Broaden collarbones; keep throat relaxed.
- Keep legs long and active.
Modifications:
- Only lift the chest or only the legs.
- Lower arms if shoulders are tender.
19) Bow Pose (Dhanurasana)
Bow Pose is a robust backbend that strongly stretches the front body and strengthens the spine and biceps. Lifting the chest and thighs off the floor stretches the hip flexors, quadriceps, and shoulders, and builds strength and flexibility in the back body. And it even boosts energy and enhances posture.
Goal: Open the Deep front body and back strengthening.
How to do it:
- Bend knees and hold ankles.
- Kick feet into hands to lift chest and thighs.
- Keep a comfortable bend in the knees (usually closer to hip-width).
")
Key cues:
- Kick more than you pull.
- Keep breathing.
Modifications:
- Use a strap.
- Do one leg at a time.
20) Fixed Firm (Supta Vajrasana)
Fixed Firm Pose is a seated back-bending yoga posture that intensely stretches the quadriceps, ankles and knees and opens the front of the thighsand hips. This pose increases the joints’ range of motion and enhances flexibility in the legs. It’s one of the most challenging postures in the Bikram Yoga floor series. When practised mindfully, it can lead to both physical resilience and mental discipline.
Intention Quad, ankle, and knee mobility; deep front-thigh opening.
")
How to do it:
- Begin kneeling (often with hips stacked over heels).
- Slowly lower to the elbows, then back up, if possible.
- And then get out slowly: elbows, up.
Key cues:
- Start cautiously—intensity is good, pain is bad.
- Never force the knees.
Modifications:
- Sit on a block/bolster.
- Stop at elbows.
21) Half Tortoise (Ardha Kurmasana)
In the Half Tortoise Yoga pose, a soothing forward bend, we gently stretch the arms, shoulders and back. When you fold forward and bend your knees, draw the body in as well as out, bringing the arms forward with relaxation to promote lengthening through the spine, it helps quiet everything down. It is not just a chance to open the body, but also an opportunity to let go of some upper-body tension and ground amidst the intensity of the Bikram Yoga series.
")
Intention: Expansion in the shoulders, gentle forward fold to soothe and lengthen the spine.
How to do it:
- Kneel, sitting back on hips to heels.
- Reach arms overhead.
- Fold forward, head down, arms outstretched.
Key cues:
- Keep hips heavy toward heels.
- Stretch your fingers forward, reaching away from the side of your body.
Modifications:
- Separate knees slightly.
- Support the forehead with a block.
22) Camel Pose (Ustrasana)
Camel is a deep kneeling backbend that works to open the chest, upper back, shoulders, and stretches hip flexors while it improves spinal flexibility. In the Bikram Yoga series, this position contributes to good posture, helps with rounded shoulders, and encourages energy flow. Performed with poise and control, this heart-opening backbend develops flexibility in the front of the body and self-assurance in the spine.
Uses: Backbend, hip flexor opener, posture.
")
How to do it:
- Kneel, knees hip-width.
- Hands on hips, but first, let’s lift the chest up.
- Grip heels, if possible, one at a time.
- Push hips forward; lift sternum.
Key cues:
- Hips forward, chest up.
- Squeeze glutes gently for support to the lower back.
- If dropping your head back feels unsafe, keep your neck neutral.
Modifications:
- Hands stay on the low back.
- Bring heels together and tuck toes.
23) Rabbit Pose (Sasangasana)
From Rabbit, a deep forward bending pose that flexes the spine, serves as a strong counterpose to the backbends at the start of this series. By rounding the spine and stretching out gently into the shoulders and upper back, this pose decompresses while also aiding in spinal mobility and steadying the nervous system. It’s designed to draw you back to the heart and relax after an intense heart-opening practice.
Counterpose to backbends; flexes the spine, stretches shoulders.
")
How to do it:
- Kneel and sit on heels.
- Hold heels; tuck chin.
- Make sure to get the crown of your head on the floor close to your knees.
- Lift hips, rounding spine upward.
Key cues:
- Chin remains down to protect the neck.
- This isn’t a move to be whipped through the head.
Modifications:
- Keep hips lower.
- Add padding under the head.
24) Head to Knee Pose (Janushirasana)
Head to Knee Pose is a seated bend that stretches the back of the legs and creates a sense of calmness and focus in the mind. Fold over one extended leg and embrace spinal length as tension in the lower body gradually releases. It also slows the breath and nervous system, a grounding posture in the floor series.
Goal: Hamstrings, targeted in the forward fold.
")
How to do it:
- Fold the other leg straight, foot to inner thigh, so you are sitting with one foot on the ground.
- Inhale, lengthen; exhale, fold over the straight leg.
- Holdthe foot/ankle/shin without yanking.
Key cues:
- Lead with the chest, not just the head.
- Keep shoulders soft.
Modifications:
- Bend the knee slightly.
- Use a strap.
25) Intense Stretching Pose (Paschimottanasana)
A big-legged forward fold, Intense Stretching Pose, stretches both sides of the legs and spine. When folded with legs extended, this pose elongates the spine and releases stored tension in the lower body. It also encourages stillness, focus, and regular breathing.
Goal: Two-legged hamstring stretching, back-body lengthening.
")
How to do it:
- Sit with both legs straight.
- Inhale lengthen; exhale fold.
- Grab feet/ankles or hold a strap.
Key cues:
- Keep your back long as you fold over.
- Micro-bend knees if needed.
Modifications:
- Strap, bend knees, or sit on a towel folded over.
26) Spine Twisting Pose (Ardha Matsyendrasana)
About The Pose Spine Twisting Pose is a seated twist that helps in gradually regaining the mobility of the spine after forward bend poses. By extending the spine before twisting, this posture will help in relieving any tension in our back, and also help improve posture and even out the body. It also aids in digestion and leaves one with a sense of calm, effortless completeness at the end of the Bikram Yoga sequence.
Goal: Move the back, counterpose to forward folds.
")
How to do it:
- And sit tall, bend one knee and cross it over.
- Inhale to lengthen upward.
- Exhale to twist softly from the ribs and upper back.
Key cues:
- Grow tall first, then rotate.
- Avoid yanking the neck.
Modifications:
- Keep the bottom leg straight.
- Wrap instead around the knee.
Breathing Exercise A: Standing Deep Breathing (Pranayama)
Standing Deep Breathing is the first breathing exercise of the Bikram Yoga Series. Done standing tall, it’s a controlled breathing exercise that warms the body from within, increases lung capacity, and focuses the mind on the breath. It is the base of the entire class, where it puts your mind at rest and opens up your body to move in a heated room.
How to do it:
- Stand and breathe slow, controlled in and out breaths.
Purpose:
- Warm the body
- Steady the mind
- Prepare for movement
Breathing Exercise B: Blowing in Firm (Kapalbhati in Firm Seat)
Blowing in Firm is the final breathing pattern of Bikram Yoga, and it is what you want to do to awaken your body and clear your mind. It involves forcefully exhaling rhythmically to contract the abdominals and promote circulation. Done at the end of a class, it’s very effective to release fatigue, enhance focus and create a powerful, rejuvenating finish to the practice.
How to do it:
- Staccato forceful exhales, soft inhale.
Important note:
- If you’re pregnant or have health concerns, however, skip forceful breathing.
Frequently Asked Questions
Is Bikram Yoga the same as “hot yoga”?
Not always. “Hot yoga” is a many-splendored thing. Bikram/Hot 26 is a prescribed set sequence that’s classically taught in a hot room.
How long do you hold poses?
It depends on the pose and the teacher, but poses are practised twice in most classes, with holds ranging from short to long.
Can beginners do Bikram Yoga Poses?
Beginners can, of course, but start very conservatively, take breaks, and focus on hydration and safety – especially in the heat.