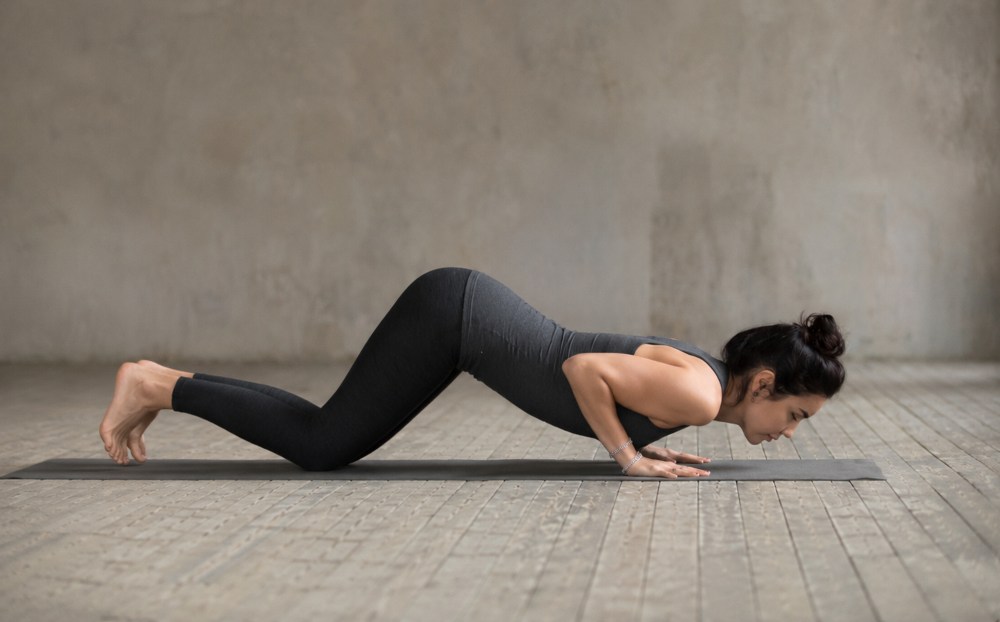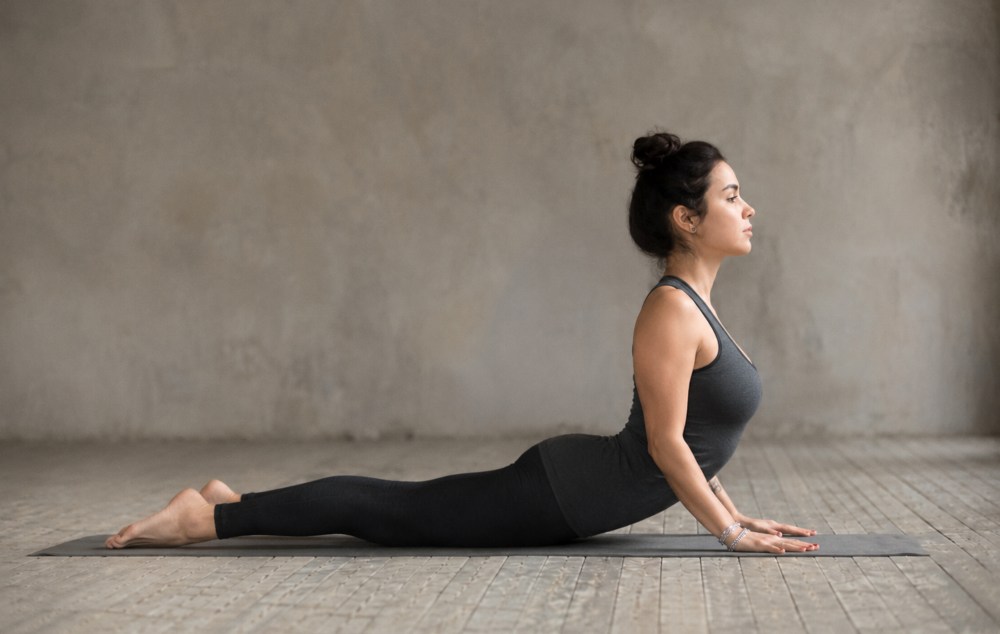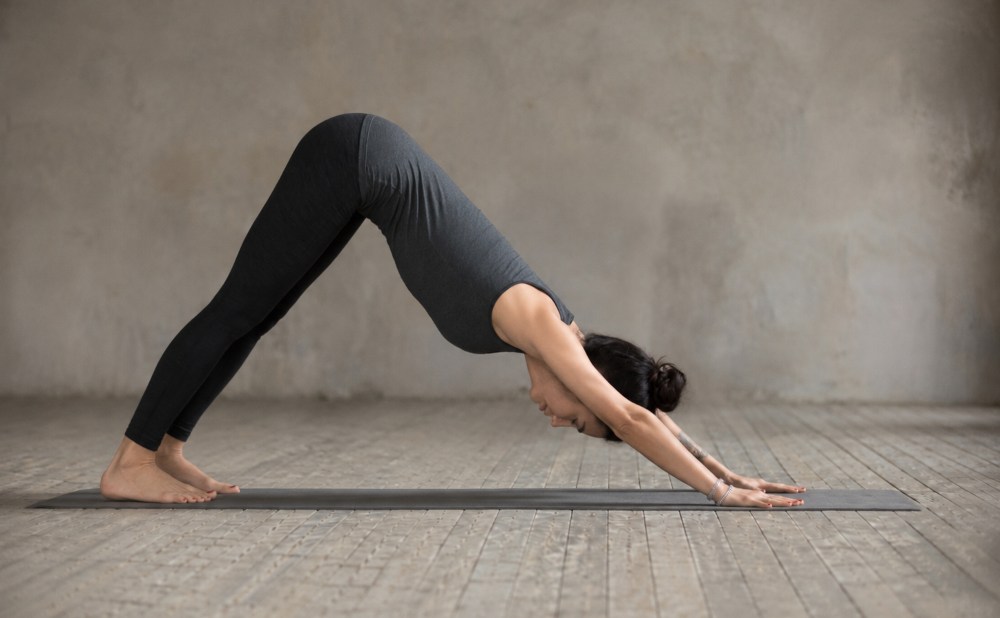
Sarvangasana and Inversions in Teacher Training: Preparation, Safety, and Progression

sarvangasana and inversions in teacher training

Sarvangasana, commonly called Shoulderstand, can teach valuable lessons about preparation, pressure, breathing, observation, and individual choice. It can also place substantial demands on the neck, shoulders, upper back, cardiovascular system, and sense of balance. That combination makes it a useful teacher-training subject, but not a posture that every trainee must perform.

The safest educational goal is not to make everybody look vertical. It is to help trainees understand what an inversion changes, recognise when load is poorly distributed, offer meaningful alternatives, and know when not to teach the pose. Progress should be based on readiness and response, not on course week, flexibility, seniority, or the belief that a “complete” yoga practitioner must master Shoulderstand.

This guide explains how to approach Sarvangasana and related inversions responsibly. It separates traditional teaching from modern evidence, describes a staged progression, identifies important precautions, and gives teacher trainers practical criteria for observation, assessment, and referral.

TLDR

  • Sarvangasana is a weight-bearing inversion in which the shoulders and upper arms should carry much of the load while the cervical spine remains protected from excessive pressure and movement.
  • Full Shoulderstand is not an essential achievement for every teacher trainee. A person can learn to teach inversions safely without demonstrating the final pose.
  • Preparation should develop shoulder organisation, upper-back support, trunk control, breathing under manageable effort, and calm entry and exit skills.
  • Begin with lower-risk relationships to gravity, such as Legs-Up-the-Wall Pose, supported bridge variations and partial lifts, before considering a full vertical shape.
  • Blankets or other supports may improve the shoulder-to-head height relationship for some people, but props do not make the pose automatically safe.
  • Neck pain, tingling, numbness, weakness, radiating symptoms, dizziness, visual disturbance, severe headache, chest pain or unusual breathlessness are reasons to stop, exit carefully and seek appropriate assessment.
  • People with glaucoma or retinal concerns, recent eye surgery, uncontrolled blood pressure, significant cardiovascular or cerebrovascular disease, acute neck problems, severe osteoporosis, recent surgery or other relevant conditions need individual guidance before inverted weight-bearing practice.
  • Pregnancy requires a separate, individual decision. Teacher training is not the right setting for a pregnant beginner to learn a new high-load inversion.
  • Research on yoga programmes cannot be used to claim that Sarvangasana alone treats thyroid disease, anxiety, insomnia or other medical conditions.
  • A good teacher-training assessment measures decision-making, communication, consent, spotting, modification and risk recognition, not only physical performance.

What Is Sarvangasana?

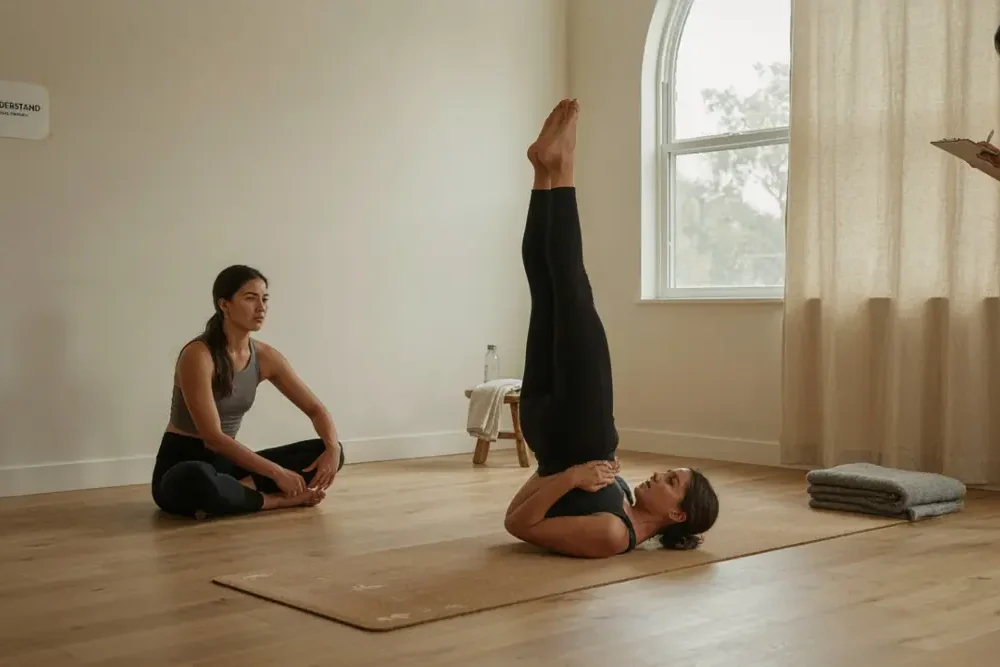
Sarvangasana is usually translated as “all-limbs pose,” although English-language classes commonly call it Shoulderstand. In the modern form, the practitioner lies down, lifts the pelvis and legs, supports the back with the hands, and attempts to organise the torso and legs above the shoulder base.

The name can hide an important mechanical fact: the pose is not supported by the shoulders alone. The upper arms, shoulder girdle, upper back, and contact with the floor or blankets all contribute. The head remains on the floor, but it should not become the primary base. The neck is in substantial flexion, which means careless loading, turning the head, or forcing the torso toward vertical can create avoidable risk.

Different lineages teach different versions. Some use several folded blankets under the shoulders, some use a wall, some teach a less vertical angle, and some omit the posture for particular students. Teacher trainees should understand the intention and trade-offs of a method rather than treating one visual form as universal.
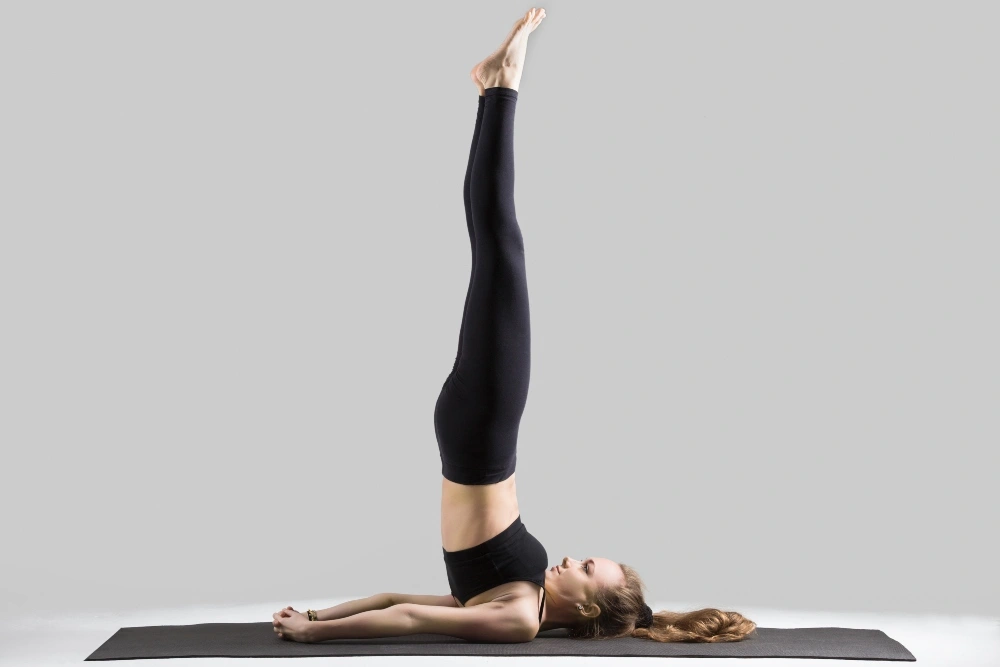
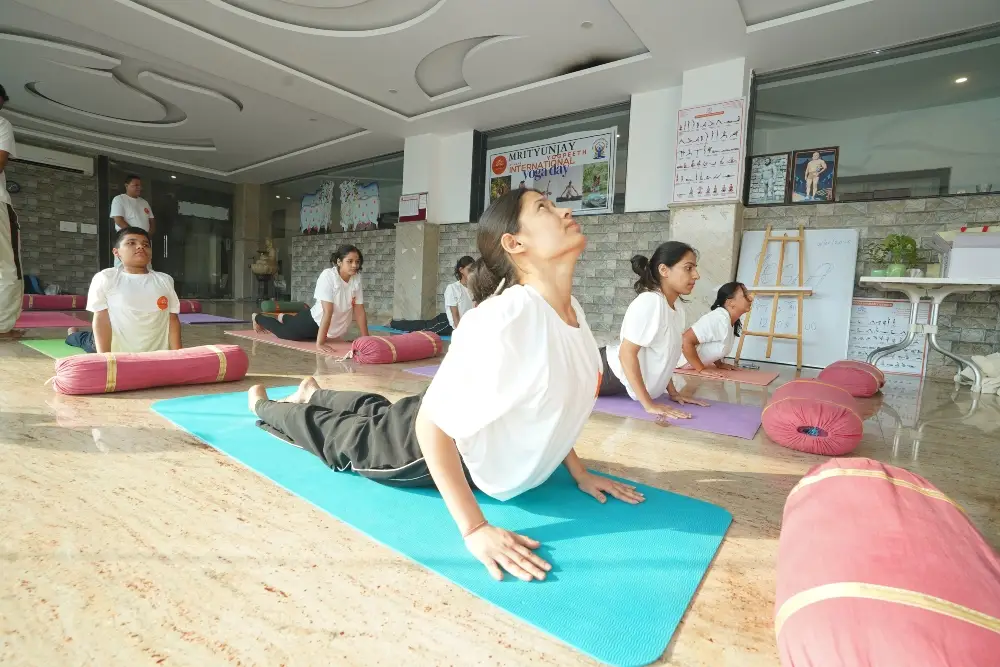
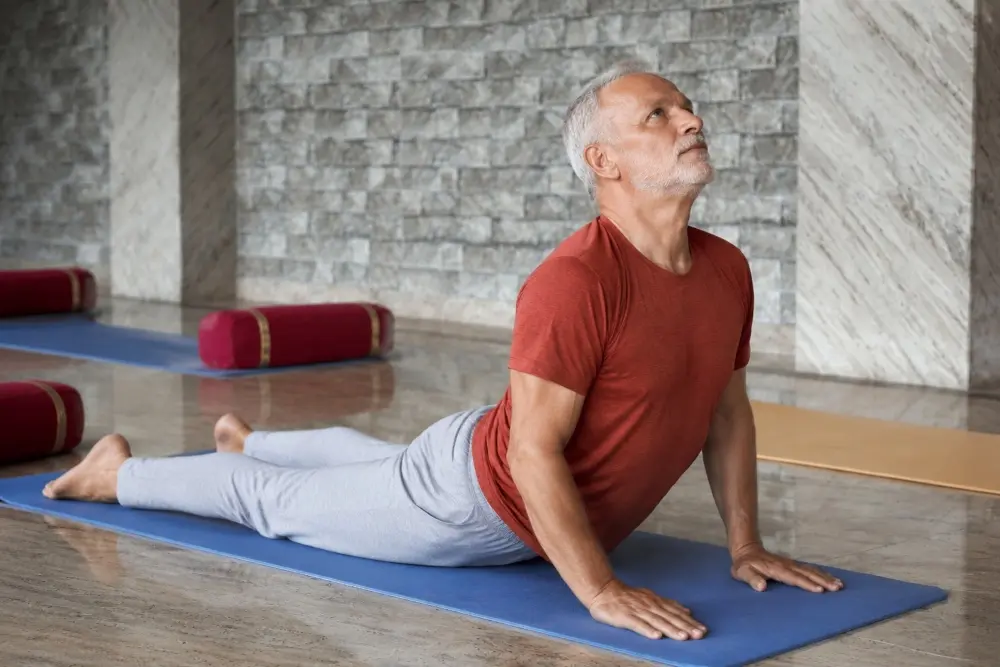
student performing sarvangasana pose at mrityunjay yogpeeth

Is Shoulderstand a Traditional Hatha Yoga Pose?

Sarvangasana is strongly associated with modern Hatha and postural-yoga teaching, but teachers should be precise about historical claims. Early Hatha texts do discuss inverted practices, including viparita karani, yet their methods, purposes, and terminology do not always match the contemporary Shoulderstand taught in studios.

It is therefore more accurate to say that Sarvangasana belongs to influential modern Hatha lineages than to claim that every detail of today’s pose appears unchanged in ancient manuals. Traditional descriptions may associate inversion with conserving vital essence, awakening energy, improving digestion, or reversing decline. These ideas are meaningful within their philosophical and historical systems, but they are not the same as modern clinical evidence.

A respectful teacher can present three layers clearly:

  • Traditional teaching: what a lineage or text says the posture represents or supports.
  • Movement experience: what a practitioner may notice, such as effort in the upper body, a changed relationship to gravity, or a settling effect after a supported variation.
  • Scientific evidence: what research has actually tested, with attention to whether the study examined this posture alone or a complete yoga programme.

Keeping these layers separate protects both tradition and students from exaggerated health promises.

Why Is Sarvangasana Taught in Teacher Training?

Shoulderstand can expose teaching skills that are less visible in simple standing poses. A trainee has to manage fear, altered orientation, limited visual feedback, prop placement, entry and exit, individual anatomy, and the possibility that a student should choose a different pose.

It can help trainees learn to:

  • classify inversions by load and complexity;
  • observe whether the neck appears compressed or unstable;
  • distinguish effort from warning symptoms;
  • give short instructions when a student is upside down;
  • teach an exit before teaching an entry;
  • offer an alternative without presenting it as a lesser pose;
  • ask permission before touching or spotting;
  • keep students from turning their heads under load;
  • respond calmly if balance or breathing deteriorates;
  • recognise the limits of a group-class screening process.

These competencies matter even when a trainee never performs or teaches full Sarvangasana.
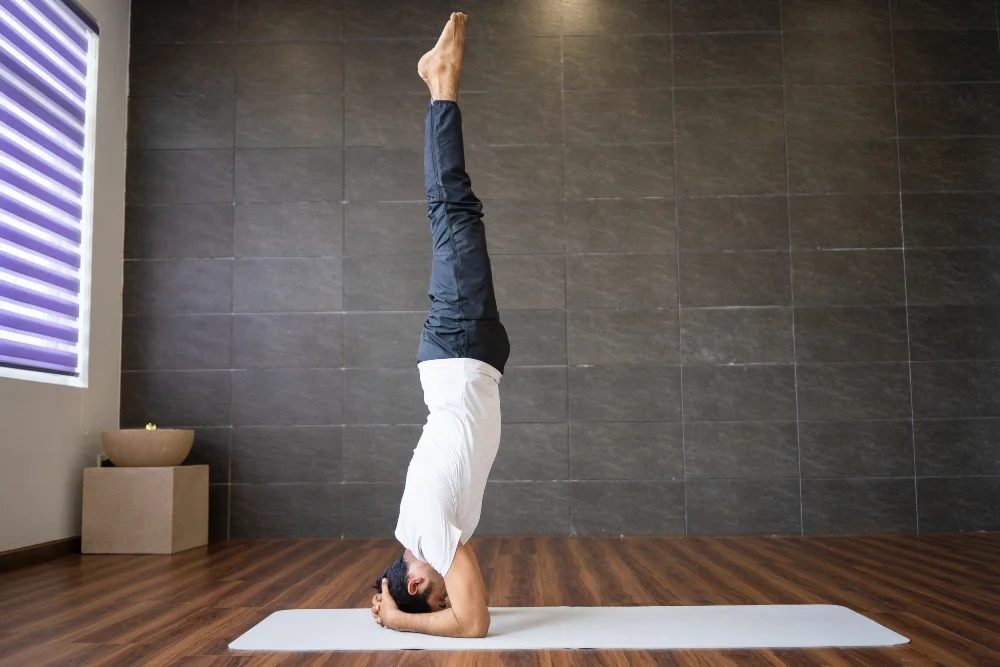
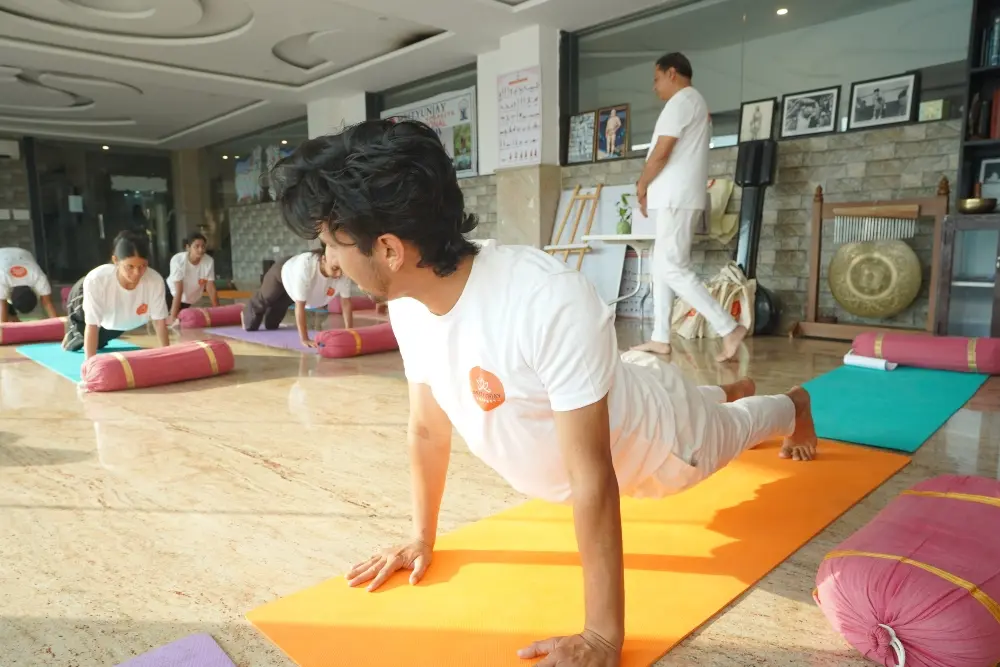
yoga student practising headstand yoga pose

What Counts as an Inversion?

An inversion is broadly a position in which the head is below the heart or the lower body is elevated relative to the torso. That definition includes poses with very different risks.

Supported or Restorative

  • Examples: Legs-Up-the-Wall Pose, calves on a chair
  • Main consideration: Low external load, but comfort, breathing, and individual medical context still matter.

Partial Inversion

  • Examples: Downward-Facing Dog, wide-legged forward fold, supported bridge
  • Main consideration: The head may be positioned below the heart without placing full body weight on the neck or arms.

Shoulder-Supported

  • Examples: Partial Shoulderstand, supported Sarvangasana
  • Main consideration: Neck flexion, shoulder support, breathing, and a controlled exit require close attention.

Arm-Supported

  • Examples: Forearm balance, handstand
  • Main consideration: Upper-body strength, balance, falling strategy, and wrist or shoulder tolerance become central.

Head-Supported

  • Examples: Headstand variations
  • Main consideration: Direct or indirect loading of the head and cervical spine requires a distinct progression and should not be treated as a substitute for Shoulderstand preparation.

The category matters more than the label “inversion.” A person who is comfortable in Legs-Up-the-Wall Pose is not automatically prepared for head-supported or shoulder-supported weight bearing.

What Makes Sarvangasana Technically Demanding?

The neck is flexed while the body is loaded

In the final shape, the chest moves toward the chin, and the cervical spine is flexed. The practitioner cannot see the base clearly and may not recognise that weight has shifted onto the back of the neck. If the shoulders do not provide adequate elevation or the torso is forced upright, the available movement may be taken from the neck.

The shoulder base must remain organised

The upper arms need to press down while the shoulders and upper back provide a broad base. If the elbows slide too wide, the hands lose useful support, and the body may collapse toward the head. Aggressively pulling the elbows together is not a universal solution because shoulder structure and mobility vary.

Breathing may become restricted

Deep neck flexion, chest compression, abdominal effort, and anxiety can make breathing feel constrained. A trainee who holds the breath, strains, or cannot follow a simple instruction is not ready to increase the challenge or duration.

Entry and exit carry their own risk

Many problems occur during hurried transitions rather than during a stable hold. Momentum can take the legs beyond control. Fatigue can turn the exit into a fall. Teachers should therefore treat entry, staying, and exit as three separate skills.

What Benefits Can Be Claimed Responsibly?

Yoga programmes that combine postures, breathing, relaxation and education have been studied for stress, sleep, pain, balance and general wellbeing. Those findings may support yoga as a broader practice, but they do not prove that one shoulderstand produces the same outcomes.

Reasonable, non-medical learning outcomes from a well-selected Sarvangasana progression may include:

  • greater awareness of shoulder and upper-back support;
  • improved ability to coordinate trunk and leg position;
  • practice remaining calm in an unfamiliar orientation;
  • better understanding of graded load and movement choices;
  • confidence entering and leaving an inversion under control.

Claims that Shoulderstand “balances hormones,” “cures thyroid disease,” “detoxifies the body,” “drains the lymph,” “resets the nervous system,” or treats depression, insomnia, or digestive disease should not be presented as facts. A temporary feeling of calm after a pose is valid as personal experience, but it is not evidence of a medical mechanism or cure.

What Are the Main Safety Concerns?
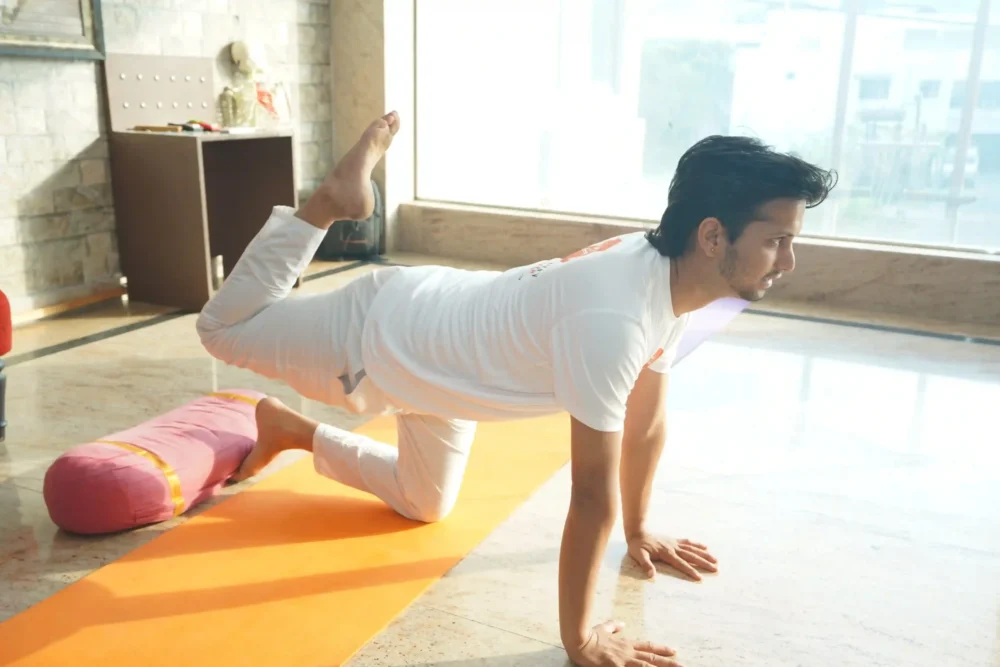
yoga practitioner at mrityunjay yogpeeth

Cervical pressure and excessive neck flexion

The most obvious concern is poorly distributed load around the cervical region. A visually straight pose is not worth forcing if the practitioner feels pressure, pain, pinching, or loss of control. Head turning under load adds rotation to an already flexed neck and should be avoided.

Changes in eye pressure

Research has shown that head-down yoga positions can temporarily raise intraocular pressure. The amount and relevance vary by position and individual, but this finding matters for people with glaucoma, ocular hypertension, retinal problems, or recent eye procedures. They should consult their eye-care professional rather than relying on a general yoga rule.

Blood-pressure and cardiovascular responses

Inversion changes the relationship between gravity, circulation, and effort. Breath-holding and straining may add to the demand. Anyone with uncontrolled hypertension, significant heart disease, a history of stroke or another relevant vascular condition needs individual medical guidance before high-load inversion practice.

Falling, dizziness and disorientation

Altered visual orientation can provoke fear or dizziness. A student may also lose balance onto nearby people, walls or objects. The practice space must allow a controlled exit, and the teacher must not create a false sense that a wall eliminates all risk.

Overconfidence created by props or assistance

Blankets, chairs, and walls are teaching tools, not safety guarantees. A prop can be badly positioned, move on a slippery surface, or make the exit more complicated. Hands-on help can also create dependency or place both teacher and student in an unstable load-sharing situation.

Who Should Avoid Sarvangasana or Seek Individual Clearance?

No checklist can replace an individual assessment. The following situations justify omitting full Shoulderstand or obtaining guidance from an appropriately qualified clinician who understands the person’s condition and proposed activity:

  • current neck pain, recent whiplash, cervical disc symptoms or known cervical instability;
  • tingling, numbness, weakness or pain radiating into an arm or hand;
  • severe or unexplained headache, fainting, vertigo or neurological symptoms;
  • glaucoma, ocular hypertension, retinal disease, recent eye surgery or another pressure-sensitive eye condition;
  • uncontrolled high blood pressure, significant cardiovascular disease or cerebrovascular history;
  • recent surgery or a healing fracture;
  • severe osteoporosis or another condition that may increase fracture risk;
  • an acute shoulder injury that prevents a stable, comfortable base;
  • a condition that affects balance, spatial orientation or safe independent exit;
  • pregnancy when the person is new to the pose, has complications, has been advised to avoid it or cannot exit reliably;
  • any instruction from a treating healthcare professional to avoid inversions or loaded neck flexion.

A teacher should not diagnose these conditions. The teacher’s job is to hear the information provided, avoid exceeding scope, offer a safe alternative, and refer when needed.

Which Warning Signs Mean Stop Immediately?

Exit carefully if the practitioner experiences:

  • sharp, burning or escalating neck, head, shoulder or back pain;
  • tingling, numbness, weakness or an electric sensation;
  • visual disturbance, eye pain or sudden severe pressure;
  • severe headache, confusion, faintness or loss of coordination;
  • chest pain, palpitations or unusual breathlessness;
  • inability to breathe smoothly or respond clearly;
  • panic that does not settle with an immediate exit;
  • loss of a stable base or an uncontrolled shift toward the head.

Urgent symptoms require appropriate medical evaluation. “Breathe through it” is not a suitable response to neurological, cardiovascular, or visual warning signs.
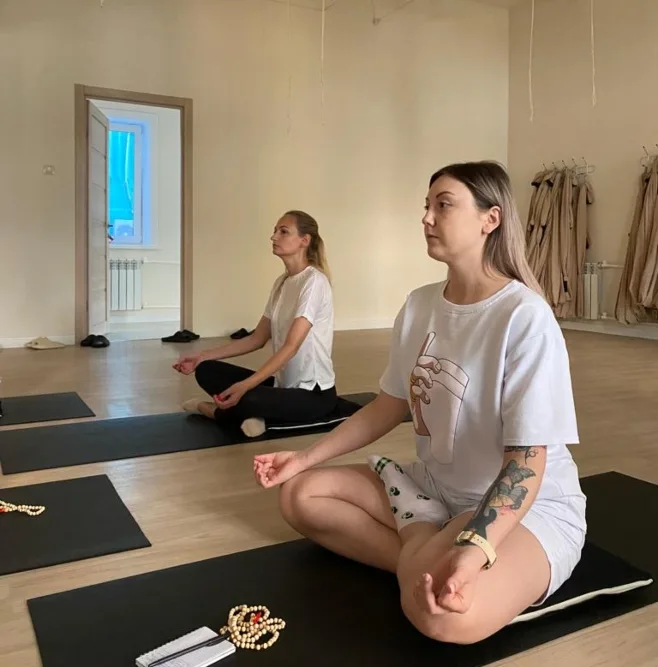
students practising yoga at mrityunjay yogpeeth

What Should a Trainee Be Able to Do Before Full Shoulderstand?

Readiness is not a single flexibility test. Useful prerequisites include the ability to:

  • understand and follow the planned exit;
  • lie supine and move the head and neck comfortably in daily ranges;
  • maintain a broad upper-back and upper-arm base without sharp discomfort;
  • perform a controlled bridge variation without collapsing through the neck;
  • lift and lower the pelvis slowly rather than using uncontrolled momentum;
  • keep breathing during moderate trunk effort;
  • communicate symptoms honestly without pressure to succeed;
  • accept a partial version or alternative as a complete practice choice.

These are observations, not guarantees. A person can meet them and still be unsuitable for full Sarvangasana because of health history, structure, symptoms, or preference.

How Should You Prepare the Body?

Preparation should create options rather than exhaust the muscles needed for support.

1. Establish neutral rest and breathing

Begin supine with the head supported if needed. Observe whether breathing is easy and whether the neck feels neutral. If symptoms are already present, do not use a demanding inversion to “fix” them.

2. Mobilise the upper back and shoulders gently

Use comfortable arm movements, supported chest opening, and small thoracic movements. Avoid forcing shoulder range simply to make the elbows look narrow.

3. Develop a controlled bridge

In Bridge Pose, practise pressing the upper arms down, lifting the pelvis without throwing the head back, and lowering one segment at a time. The head stays still.

4. Train trunk control

Simple supine leg movements, low-load abdominal work, and bridge variations can teach the practitioner to move the pelvis without swinging the legs.

5. Introduce a gentler inversion relationship

Legs-Up-the-Wall Pose or calves on a chair allows the trainee to notice breath, pressure, and emotional response without bearing body weight through the upper body.

6. Rehearse the exit

Before lifting high, practise lowering the hips with control and rolling out only when the neck is unloaded. A trainee who does not know how to leave should not enter.

How Should Blankets and Props Be Set Up?

Many teaching methods place two or more firm, evenly folded blankets under the shoulders while the head rests on the floor. The intention is to elevate the shoulders relative to the head and reduce the degree of neck flexion required. The folded edges should be aligned, stable, and wide enough to support both shoulders and upper arms.

Key setup checks include:

  • the head is on the floor, not half on a blanket edge;
  • both shoulders are supported at the same height;
  • the surface is firm and non-slip;
  • hair, jewellery or clothing will not interfere with the base;
  • the wall, if used, is close enough for the planned variation but does not trap the practitioner;
  • The teacher explained how to exit without turning my head.

Blanket height cannot be prescribed universally. Too little support may not change the neck angle meaningfully; too much or unstable support may impair balance. If the setup cannot be made clear and stable, choose another pose.
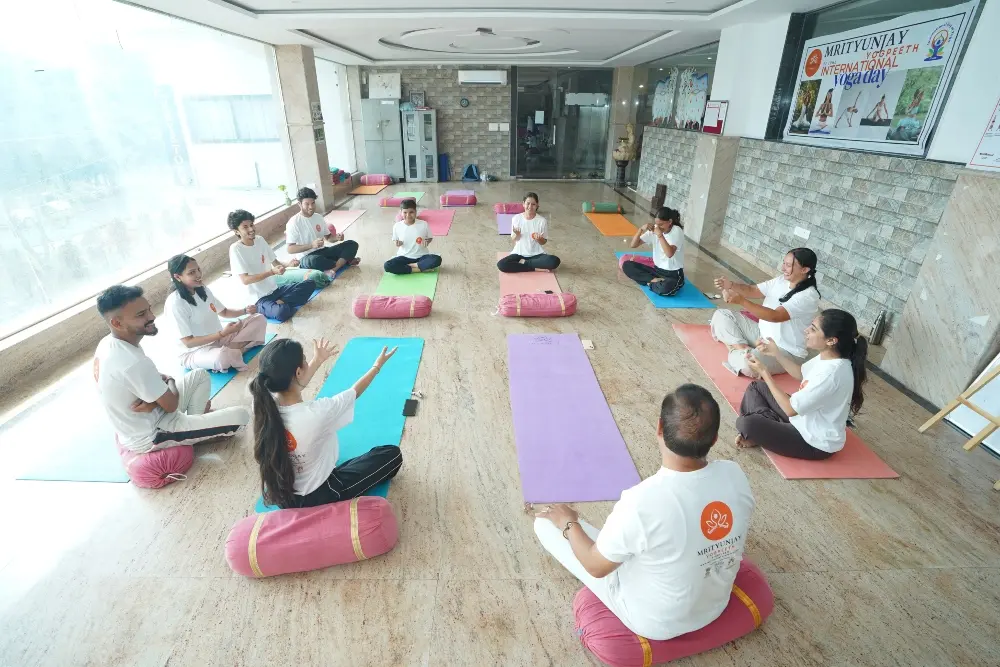
yoga session at mrityunjay yogpeeth

What Is a Safe Progression Toward Sarvangasana?

The following stages are teaching options, not a promise that everyone should advance through all of them.

Stage 1: Legs supported above the pelvis

Use Legs-Up-the-Wall Pose or place the calves on a chair. The practitioner learns how inversion-like orientation affects breathing, comfort, and emotional state. There is no reason to progress if this option already meets the purpose of the practice.

Stage 2: Supported Bridge Pose

Lift the pelvis and place an appropriate yoga block under the sacrum, not the low back. The shoulders remain broad, and the head stays still. Feet may remain down, or one leg may lift only if the base and breathing stay steady.

Stage 3: Active Bridge Pose

Practise lifting and lowering without a block. The trainee learns upper-arm pressure, pelvic control, and fatigue recognition. This is preparation, not proof of readiness.

Stage 4: Partial pelvic lift with hand support

From supine, bring the knees toward the torso and lift the pelvis only as high as can be controlled. Hands support the back. Keep the knees bent and the torso diagonal. This reduces the lever length and allows an early exit.

Stage 5: Wall-assisted partial Shoulderstand

Use the wall to reduce balance demand while maintaining a diagonal torso or bent knees. Do not kick into position. The wall should support a planned action, not encourage the student to force the pelvis over the shoulders.

Stage 6: Supported Sarvangasana

Only when the base, symptoms, breath, and exit are satisfactory should the student consider extending the legs. Verticality is optional. A slightly diagonal, stable pose may be more appropriate than pushing the chest toward the chin.

Stage 7: Independent practice or a conscious alternative

Independence means the practitioner can set up, enter, monitor, and exit without rescue. It also includes the confidence to stop at an earlier stage. Choosing not to perform full Sarvangasana is a valid endpoint.

How Do You Enter and Exit Without Using Momentum?

A controlled entry

  1. Set the blankets and clear the surrounding area.
  2. Lie with the shoulders supported and the head centred on the floor.
  3. Explain that the head remains still from this point until the neck is fully unloaded.
  4. Bend the knees and bring the feet toward the sitting bones.
  5. Exhale and lift the pelvis gradually, using the hands to support the back.
  6. Keep the knees bent while organising the upper arms and shoulder base.
  7. Pause. Check breath, comfort, vision, and control.
  8. Extend the legs only if the previous position remains stable and symptom-free.

A controlled exit

  1. Bend the knees toward the torso to shorten the lever.
  2. Keep the head still and maintain hand support.
  3. Lower the spine slowly, allowing the hands to move as the torso descends.
  4. Place the pelvis down without dropping or swinging the legs.
  5. Rest with the head neutral until breathing settles.
  6. Only after the neck is unloaded should the practitioner roll to a side or move the head.

If control is deteriorating, exit earlier rather than trying to repair the final pose while fatigued.
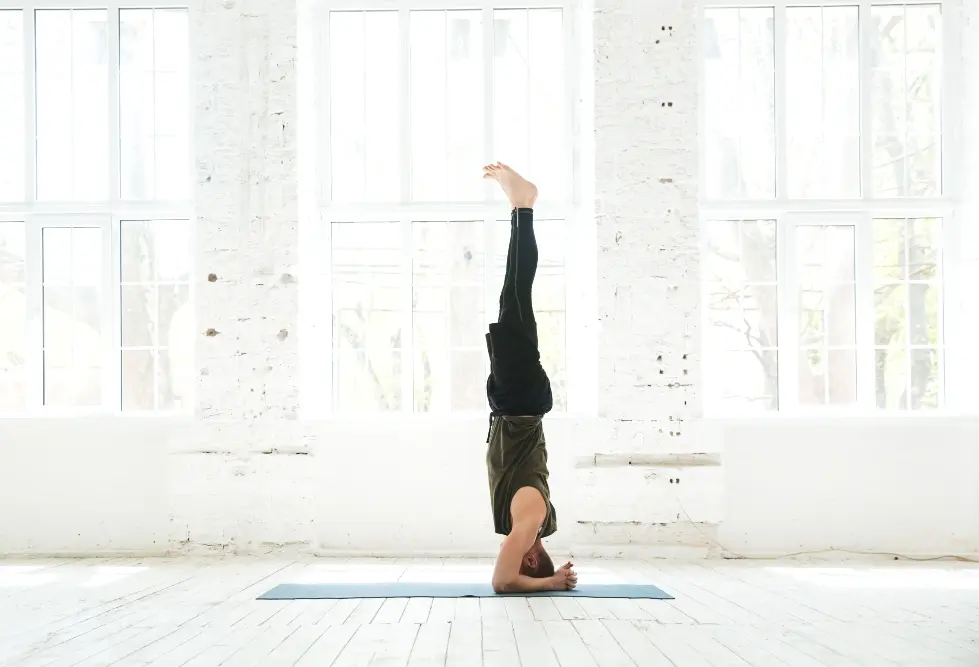
man practising sarvangasana at mrityunjay yogpeeth

Which Alignment Cues Are Most Useful?

Effective cues describe actions and sensations without demanding one appearance from every body.

  • “Keep the back of your head quiet and centred.”
  • “Press the upper arms into the support and widen across the upper back.”
  • “Let your hands support the back without pushing the torso beyond a comfortable angle.”
  • “Keep the jaw, eyes and throat as easy as the position allows.”
  • “Use a steady breath. If you need to hold it, lower the intensity.”
  • “Bend your knees before you lose control.”
  • “Come down immediately if you feel neck pressure, tingling, dizziness, or visual change.”

Avoid cues such as “put all the weight on your shoulders,” “squeeze the elbows together at any cost,” or “stay for ten breaths no matter what.” They replace observation with a rigid target.

How Long Should You Hold Your Shoulderstand?

There is no universal minimum. A first exposure may be one calm breath in a partial position followed by a controlled exit. Duration should increase only when setup, breathing, symptoms and exit remain reliable.

A practical progression is to add a small amount of time across separate sessions, not within a single fatigued attempt. End the hold before arm support weakens, elbows slide, breathing becomes strained, or the trainee feels pressure building in the neck or head.

Long traditional holds should not be copied merely because an experienced practitioner uses them. Experience, health, technique, environment, and purpose all affect an appropriate duration.

What Are the Most Common Teaching Mistakes?

Treating vertical legs as the goal

  • Why it matters: Encourages force and can hide poor load distribution.
  • Better response: Prioritise breath, a stable base, and a controlled exit.

Letting students turn their heads

  • Why it matters: Adds rotation while the neck is loaded and flexed.
  • Better response: Establish a clear no-head-turning rule before entry.

Using momentum to lift

  • Why it matters: Reduces control and can cause the body to overshoot the base.
  • Better response: Begin with bent knees and use a smaller, controlled lift.

Moving elbows inward aggressively

  • Why it matters: May force a range of shoulder motion that is not currently available.
  • Better response: Seek a stable and comfortable arm position without forcing the elbows.

Holding everyone for the same count

  • Why it matters: Ignores fatigue and individual responses.
  • Better response: Allow each student to exit when technique, breathing, or control begins to deteriorate.

Assuming props make the pose safe

  • Why it matters: Props can slip, be positioned incorrectly, or be misused.
  • Better response: Teach the setup, purpose, limitations, and exit strategy for every prop.

Physically lifting a student into place

  • Why it matters: Removes student agency and may transfer unpredictable loads.
  • Better response: Use consent-based guidance and lower-risk progressions.

Teaching entry before exit

  • Why it matters: Students may not know how to safely return from the position.
  • Better response: Rehearse and understand the exit before practising the full entry.

Making medical promises

  • Why it matters: Can misrepresent available evidence and exceed appropriate teaching scope.
  • Better response: Clearly distinguish traditional yoga claims from evidence-based information.

Praising risk-taking

  • Why it matters: Can discourage students from reporting discomfort or symptoms.
  • Better response: Reinforce good decision-making, including choosing a modification or alternative when appropriate.

How Should Hands-On Assistance Be Used?

Touch is optional, not a requirement of good teaching. Obtain specific consent before the pose, because a student cannot easily evaluate or refuse an unexpected adjustment while inverted. Explain where contact may occur, what it is intended to do, and how the student can ask you to stop.

A teacher should not pull a student into vertical alignment, force the elbows inward or press weight toward the neck. If the practitioner cannot maintain the pose without substantial physical support, the progression is too advanced for independent practice.

Spotting skills require training. The teacher needs a stable stance, a clear escape path, and an understanding that catching an adult body can injure both people. Sometimes the safest assistance is a calm verbal cue to bend the knees and come down.
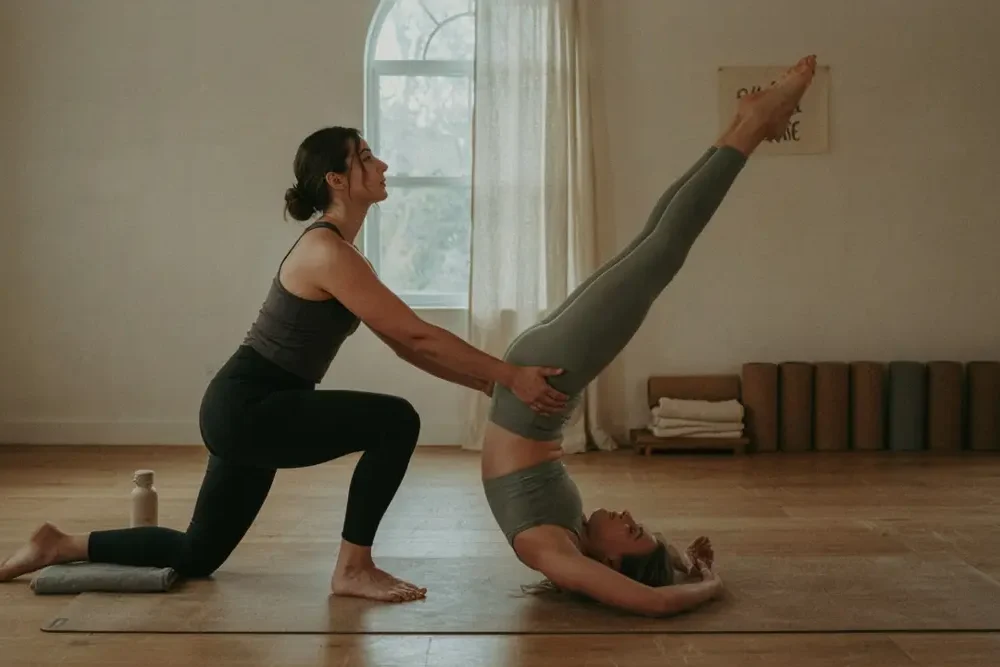
yoga teacher helping student to perform sarvangasana at mrityunjay yogpeeth

How Should Inversions Be Sequenced in a Class?

Place Shoulderstand after the body and attention are prepared but before fatigue compromises support. Avoid introducing it at the end of an exhausting strength sequence or in a rushed final few minutes.

A sensible educational sequence might include:

  1. neutral rest and symptom check;
  2. gentle shoulder and thoracic preparation;
  3. bridge variations and trunk-control work;
  4. a lower-risk inversion option;
  5. the individually selected Shoulderstand stage;
  6. a slow, controlled exit;
  7. neutral supine rest;
  8. comfortable follow-up movement after the neck is unloaded.

Traditional sequences may pair Sarvangasana with Matsyasana, or Fish Pose, as a counterpose. A forceful counterpose is not medically required. Do not move directly from maximal neck flexion into an aggressive neck extension. Let the head and neck return to neutral, observe symptoms and choose a comfortable follow-up.

How Should Sarvangasana Be Taught in a 200-Hour Programme?

A foundational teacher training should emphasise safe literacy rather than performance mastery. Learning outcomes may include:

  • defining different inversion categories;
  • explaining the main demands of Shoulderstand in plain language;
  • conducting an appropriate, non-diagnostic readiness conversation;
  • setting up a supported option clearly;
  • teaching at least two alternatives;
  • recognising red flags and ending practice promptly;
  • giving consent-based guidance;
  • avoiding unsupported medical claims;
  • documenting incidents and referring beyond scope.

A course can teach these skills even if full Sarvangasana is not appropriate for some trainees. Requiring every student to demonstrate the final pose may discriminate against people with relevant conditions and confuses teaching competence with one physical capacity.

What Changes in Advanced Teacher Training?

At an advanced level, trainees can explore more complex observation and decision-making. This may include adapting blanket height, comparing lineage methods, teaching mixed-level rooms, planning a progressive module, managing fear, understanding likely compensation patterns, and practising emergency communication.

Advanced hours should deepen judgment, not simply lengthen holds or add more difficult inversions. A 300-hour or 500-hour credential does not make a teacher a clinician. Medical diagnosis, rehabilitation, and treatment remain outside the ordinary scope of yoga teaching unless the person holds separate, relevant professional qualifications.

How Should Trainees Be Assessed?

A fair assessment should use several domains.

Knowledge

  • Explains inversion categories, primary risks, evidence limitations, and appropriate referral boundaries.

Preparation

  • Selects appropriate warm-up exercises without unnecessarily fatiguing the muscles and structures needed for support.

Communication

  • Provides brief, clear, and timely instructions and teaches the exit before the full pose.

Observation

  • Identifies signs such as strained breathing, slipping elbows, neck pressure, and loss of control.

Choice

  • Offers appropriate alternatives of comparable purpose and does not pressure students to progress.

Consent

  • Requests specific permission before using touch, physical guidance, or spotting.

Response

  • Ends the pose appropriately when necessary and follows an established incident procedure when required.

Reflection

  • Can clearly explain why a particular variation, modification, or alternative was selected for an individual student.

Physical demonstration may be included when suitable, but it should not outweigh risk recognition and teaching judgment.

How Can You Make Inversion Teaching More Inclusive?
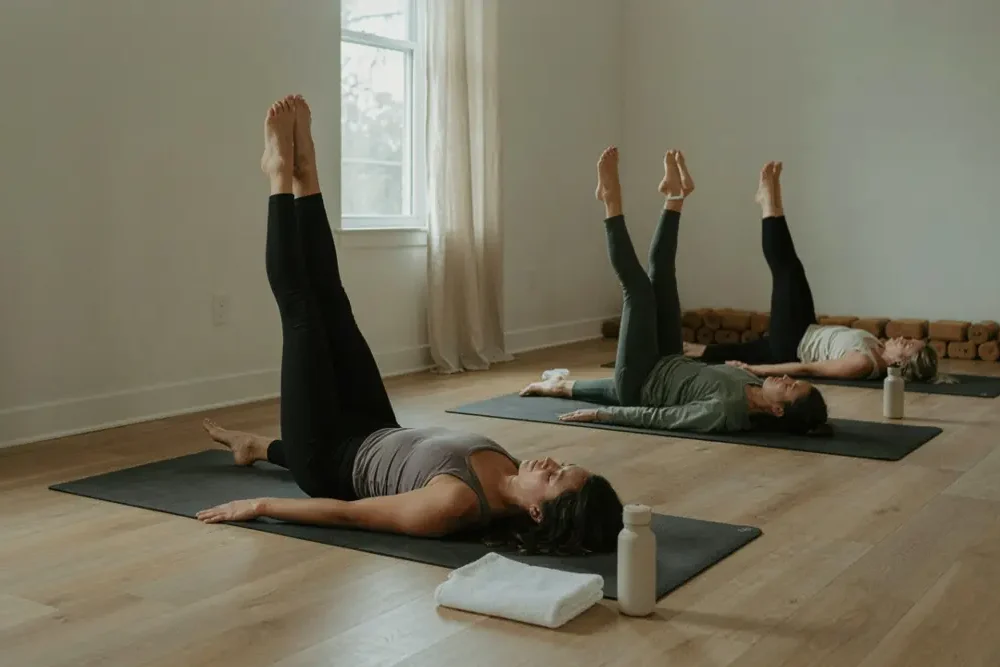
yoga students practising sarvangasana pose

Inclusive teaching begins by removing the assumption that full inversion is the superior experience. A student may decline because of medical history, menstruation, pregnancy, trauma, religious or cultural concerns, body proportions, vertigo, fear or simple preference. They do not owe the class an explanation.

Offer choices before anyone moves onto props. Useful alternatives include:

  • calves supported on a chair;
  • Legs-Up-the-Wall Pose;
  • supported bridge with feet grounded;
  • a gentle downward-facing shape with the head supported;
  • constructive rest with slow breathing;
  • observation and verbal analysis for a trainee who is learning to teach but not practise the pose.

Describe the learning purpose shared by the options, such as calm breathing under a changed relationship to gravity, rather than calling one the “full pose” and the others “beginner versions.”

What About Pregnancy?

Yoga in pregnancy is not governed by one rule for every person or trimester. Experience before pregnancy, current symptoms, obstetric history, balance, blood pressure, and the advice of the maternity-care team all matter.

A pregnant person who has never practised Sarvangasana should not use a general teacher-training session to learn it. Even an experienced practitioner may need to change or stop the pose as balance, comfort and physiology change. Complications, dizziness, bleeding, pain, contractions, fluid leakage, chest symptoms or medical restrictions require prompt professional guidance.

Teacher trainers should provide a non-inverted option automatically and should not treat previous ability as permission for the current day.

What About Menstruation?

Some yoga lineages advise avoiding inversions during menstruation; others leave the choice to the practitioner. There is not a strong clinical basis for presenting a universal inversion ban as medical fact.

The respectful approach is to explain the lineage’s teaching accurately, distinguish it from evidence-based medical advice, and preserve individual choice. Symptoms such as heavy bleeding, pain, dizziness, migraine, or fatigue may make a restorative option more appropriate, but menstruation alone should not be treated as a disease or a reason for public questioning.

How Do Other Inversions Fit Into the Progression?

Headstand, forearm balance, and handstand are not automatic “next steps” after Shoulderstand. Each has a different base, loading pattern, balance demand, and falling strategy.

  • Headstand requires specific cervical-load management and should not be assumed safe because the student can hold Shoulderstand.
  • Forearm balance shifts more demand to the shoulders, upper back and balance system.
  • Handstand places high demand on wrists, shoulders, trunk control, and fall management, usually with less direct neck loading when taught well.
  • Plough Pose increases spinal and hip-flexion demands and may deepen neck loading after Shoulderstand; it is not a mandatory exit.

Teacher training should create a separate readiness pathway for each posture rather than arranging them in a prestige ladder.
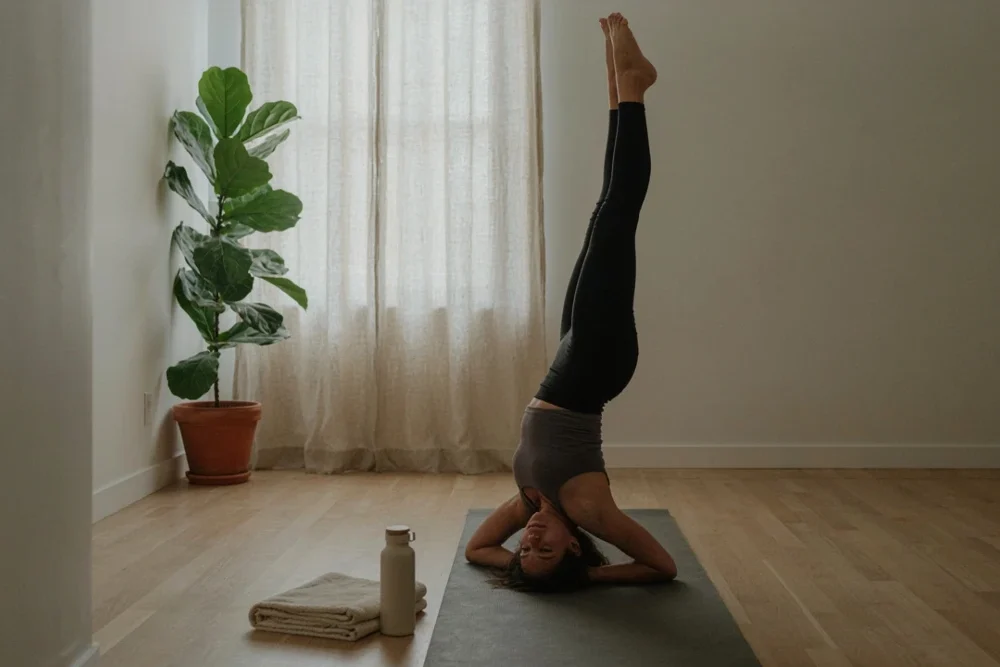
shoulderstand practice at mrityunjay yogpeeth

A Six-Week Competency-Based Progression

This example assumes an appropriate student who remains symptom-free. Repeat, slow down, or stop at any stage.

Week 1: Orientation and screening

Learn inversion categories, relevant precautions, warning signs and the no-head-turning rule. Practice Legs-Up-the-Wall Pose and controlled bridge.

Week 2: Base and exit skills

Develop upper-arm pressure, broad upper-back support and slow lowering. Rehearse the exit from a small pelvic lift.

Week 3: Partial hand-supported lift

Use bent knees and a diagonal torso. Hold briefly, check breathing, and exit before fatigue.

Week 4: Supported or wall-assisted variation

Refine prop setup and reduce reliance on momentum. Practise giving and receiving concise verbal cues.

Week 5: Individual progression

Some trainees may extend their legs or move farther from the wall. Others repeat a partial form or select an alternative. Both paths are valid.

Week 6: Teaching integration

Teach a short progression to a partner, including screening language, two options, exit instructions, consent, and a post-pose check. Assessment focuses on judgment, not verticality.

Practical Teacher-Training Scenarios

A trainee feels pressure at the back of the neck

Ask them to bend the knees and exit with the head still. Do not add blankets and immediately repeat the full pose without reassessment. Review the base, method, symptoms, and whether an alternative is more appropriate. Persistent or significant symptoms warrant professional evaluation.

A student becomes dizzy after coming down

Keep them resting in a comfortable position, monitor communication, and follow the course’s incident procedure. Do not ask them to repeat the inversion. Severe, persistent, or associated symptoms require appropriate medical help.

An experienced trainee discloses glaucoma

Do not decide that experience cancels the condition. Recommend an alternative and ask the trainee to obtain individual advice from their eye-care professional about head-down positions and allowable intensity.

A trainee can teach clearly but cannot perform full Sarvangasana

Assess teaching competence separately from physical performance. They can demonstrate preparation with another person, use a model, teach alternatives and explain decision-making. Document any essential course outcomes transparently.

A student asks whether Shoulderstand will cure thyroid disease

State that there is no good evidence that this posture cures thyroid disease. Encourage medical care and present yoga, if appropriate, as a complementary wellbeing practice rather than a replacement for diagnosis or treatment.
sarvangasana practice session at mrityunjay yogpeeth

Frequently Asked Questions

Is Sarvangasana compulsory in yoga teacher training?

No universal standard requires every trainee to perform full Sarvangasana. A school may include it in its curriculum, but a responsible assessment should accommodate relevant health conditions and measure teaching judgment, alternatives, and safety skills.

Is Shoulderstand safe for beginners?

Full Shoulderstand is not an appropriate first inversion for every beginner. Beginners generally benefit from lower-load options, preparation and close observation. Suitability depends on health, comfort, control, and the teaching environment.

Should I use blankets under my shoulders?

Many methods use firm folded blankets to elevate the shoulders relative to the head. They may reduce the neck-flexion demand for some people, but setup must be taught correctly and does not guarantee safety.

Can I learn Sarvangasana against a wall?

A wall can reduce balance demand and support partial variations. It can also encourage pushing or create a difficult exit if used carelessly. Learn the setup and exit from a qualified teacher rather than kicking into position.

Why should I not turn my head in Shoulderstand?

The neck is already flexed and loaded. Turning adds rotation under load. Set the space and listen to instructions before lifting, so you don’t need to look around.

How long should a beginner hold Shoulderstand?

There is no required duration. A brief, controlled partial lift may be enough. Exit before breath strain, neck pressure, slipping support or fatigue appears.

Is Sarvangasana good for the thyroid?

Traditional and popular yoga sources often make this claim, but research does not establish that Shoulderstand treats or cures thyroid disease. People with thyroid conditions should continue appropriate medical care.

Can people with high blood pressure practise inversions?

It depends on the individual, how well the condition is controlled, and the type of inversion. Someone with uncontrolled hypertension or relevant cardiovascular history should obtain medical guidance before high-load inversion practice.

Can people with glaucoma practise Shoulderstand?

Head-down positions can temporarily raise intraocular pressure. A person with glaucoma, ocular hypertension, retinal concerns or recent eye surgery should ask their eye-care professional which positions, if any, are appropriate.

Can I practise Sarvangasana during pregnancy?

Pregnancy requires an individual decision. It is not a suitable time for a beginner to learn a new high-load inversion in a general class. Experienced practitioners should still consult their maternity-care team and adapt as circumstances change.

Is it medically necessary to avoid inversions during menstruation?

There is no strong evidence for a universal medical ban. Some traditions advise avoidance, and individual symptoms or preference may support choosing another pose. Teachers should explain tradition without presenting it as settled medical fact.

Is Headstand the next pose after Shoulderstand?

Not necessarily. The headstand has a different loading pattern and requires its own preparation and safety assessment. Yoga postures should not be treated as a fixed prestige ladder.

Can a yoga teacher diagnose whether my neck is safe?

No. A yoga teacher can observe movement, ask about symptoms and choose not to teach a pose, but medical diagnosis belongs to appropriately qualified healthcare professionals.

What is the safest alternative to full Shoulderstand?

There is no single best option for everyone. Legs-Up-the-Wall Pose, calves on a chair or supported bridge often provide a gentler relationship to inversion. The choice should match the person’s health, comfort and purpose.

Conclusion

Sarvangasana can be a rich teacher-training laboratory, but only when the educational goal is good judgment rather than a perfect silhouette. The pose asks teachers to understand load, altered orientation, breath, individual anatomy, consent, and the difference between productive effort and a warning sign.

The most responsible progression begins with screening and lower-risk options, develops a stable shoulder and upper-arm base, teaches the exit before the entry, and advances only when the practitioner remains comfortable, communicative and in control. Props, walls and hands-on help are useful only when their purpose and limitations are understood.

Most importantly, teacher training should normalise the decision not to perform full Shoulderstand. A competent teacher can explain the pose, demonstrate preparation, offer inclusive alternatives, recognise risk, and refer beyond scope without making their own body the standard for everyone else.

Your Next Step

Before teaching Sarvangasana, write a one-page inversion protocol for your course or class. Include:

  • the learning purpose;
  • relevant screening questions;
  • the warning signs that require an immediate exit;
  • at least two non-weight-bearing alternatives;
  • the exact setup and exit instructions;
  • your touch and spotting consent process;
  • the incident-response and referral pathway;
  • the criteria for progression that do not depend on appearance.

Then practise teaching the exit and alternatives before teaching the full pose. If the plan works only when every student has the same body, history and confidence, it is not yet a safe teaching plan.
Dr. Anirudh Gurupratap Singh

Founder & Head Teacher – Mrityunjay Yogpeeth Dr. Anirudh Gurupratap Singh is the founder, and the vision behind Mrityunjay Yogpeeth is to pass on the wisdom of yoga from great yoga masters to students of yoga. Dr. Singh is a beloved teacher, healer and guide whose life has been dedicated to the spiritual and physical uplifting of people through authentic yoga practice and Vedic tradition.

Paschimottanasana for Flexibility and Nervous System Calm: A Practical Guide

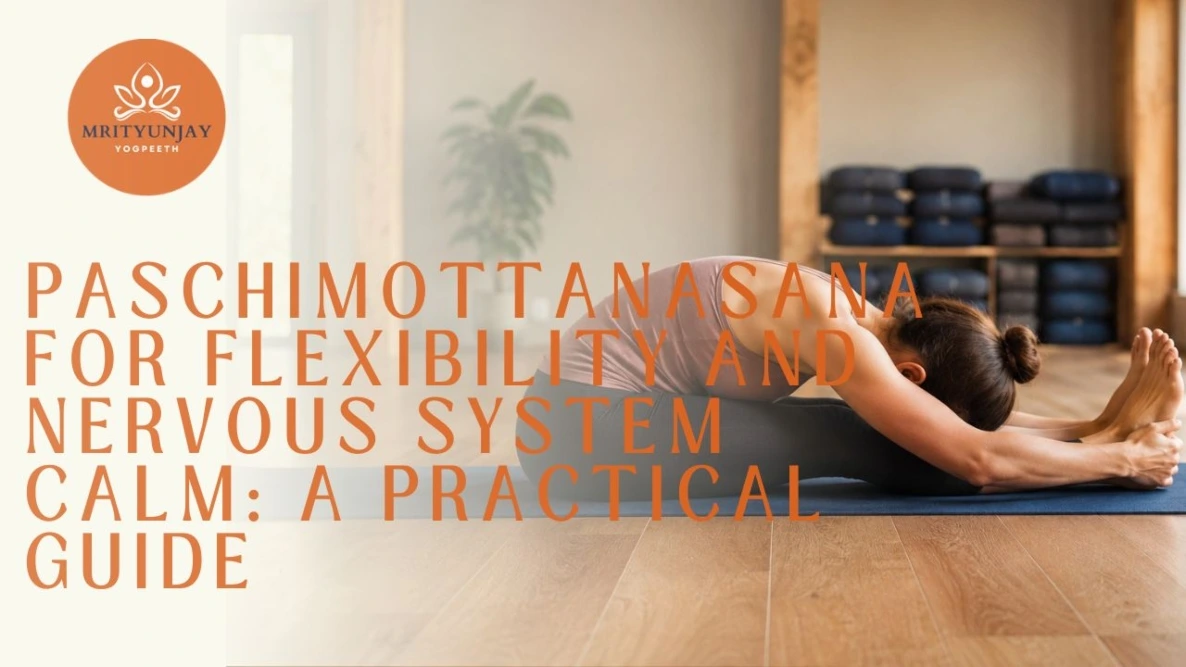
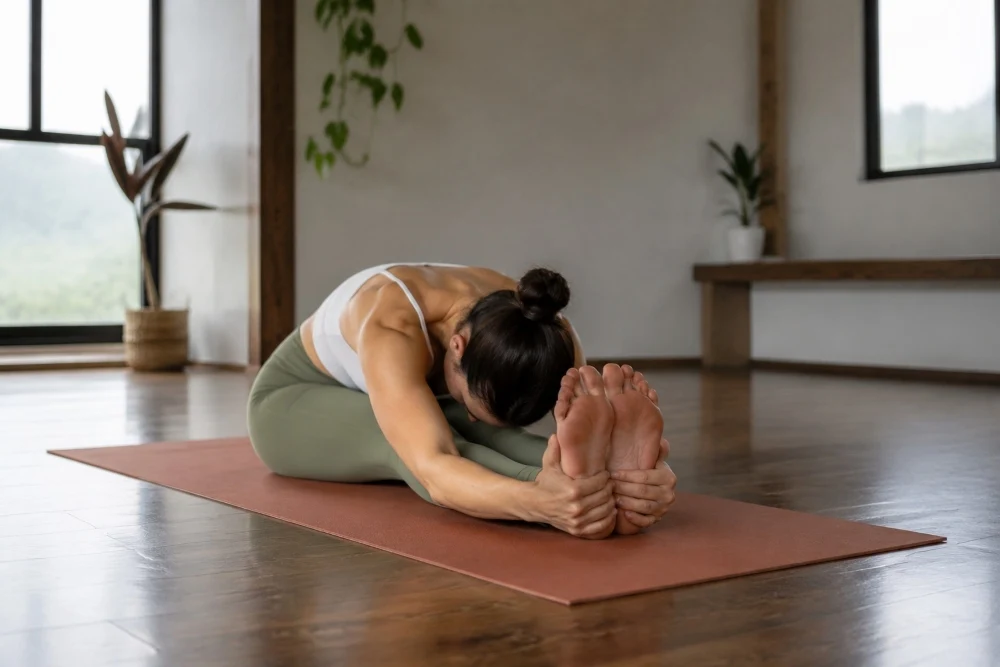
Paschimottanasana – often called Seated Forward Bend – is a foundational seated forward fold. Practised with bent knees, appropriate support, and unforced breathing, it can train tolerance to a posterior-chain stretch and create conditions that many people experience as settling. It should feel spacious and sustainable, not like a contest to touch the toes.

TL;DR

  • Paschimottanasana is a seated forward bend performed from Dandasana, with the torso moving over the legs.
  • Its most defensible physical benefit is exposure to a sustained stretch across the back of the body – especially the hamstrings with possible gains in range of motion when practised consistently.
  • You do not need straight knees, a flat torso on the thighs or hands around the feet. Those are shapes, not measures of success.
  • For most beginners, the safest useful option is to sit on a folded blanket, bend the knees and hold a strap around the feet or rest the torso on a bolster.
  • Start the fold from the hip joints. Let the spine respond naturally, but do not yank the torso deeper or force a rounded lower back.
  • An active version is better suited to mobility work; a supported, quieter version is usually better when the intention is rest.
  • A gentle, slow breath may contribute more to a calm experience than the depth of the pose. Never strain, hold the breath, or chase a prescribed breath count.
  • Research supports flexibility improvements from repeated static stretching and suggests that yoga and slow-breathing practices can influence stress and autonomic measures. Direct research on Paschimottanasana alone is too limited to claim that the pose activates the vagus nerve, lowers cortisol, or treats anxiety.
  • Avoid or obtain individual guidance during an acute back or hamstring injury, new radiating pain, recent abdominal or spinal surgery, or a condition for which forward flexion or abdominal compression is restricted.
  • Pregnancy does not automatically rule out yoga, but this narrow forward fold usually needs substantial modification to avoid abdominal compression. Use prenatal guidance and medical clearance where appropriate.
  • Stop for sharp, electric or escalating pain; numbness or tingling; dizziness; visual disturbance; chest or abdominal pressure; or difficulty breathing.

What is Paschimottanasana?

Paschimottanasana is a seated, symmetrical forward-bending posture. The name is commonly parsed from Sanskrit terms referring to the west or back of the body, an intense stretch, and a posture. English teaching names include Seated Forward Bend, Seated Forward Fold, and Intense Stretch of the West.

The traditional name carries history; it does not prescribe one universal modern alignment. Different Hatha, Iyengar, Ashtanga, therapeutic, and contemporary schools may vary in how actively the legs work, when the spine rounds, how the feet are held, and how long the posture is maintained.

This guide uses a functional aim: create a tolerable, controllable forward fold without pain, breath restriction, or coercion.

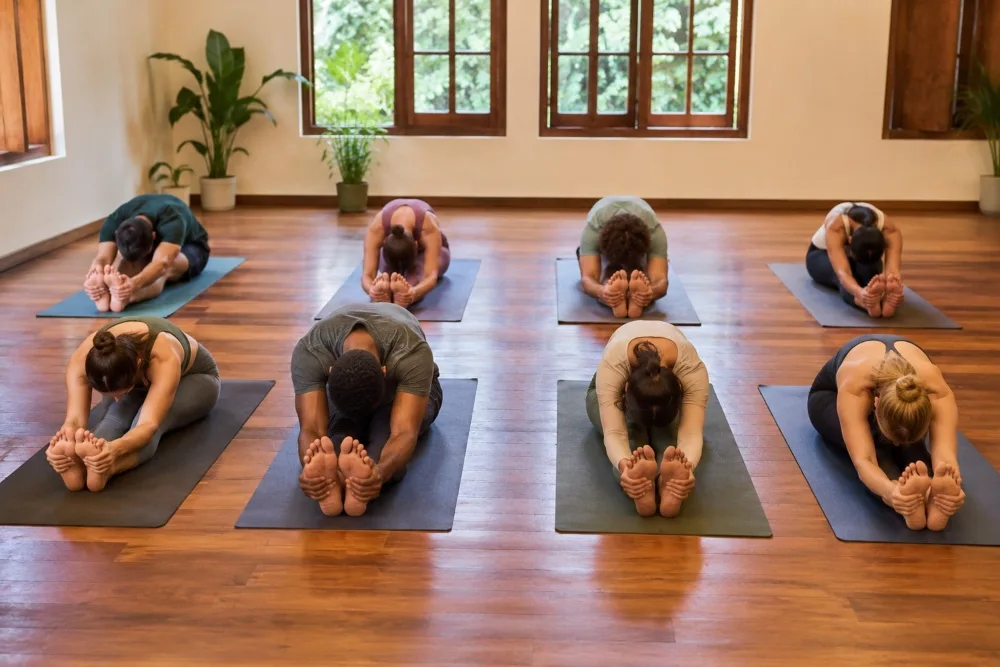
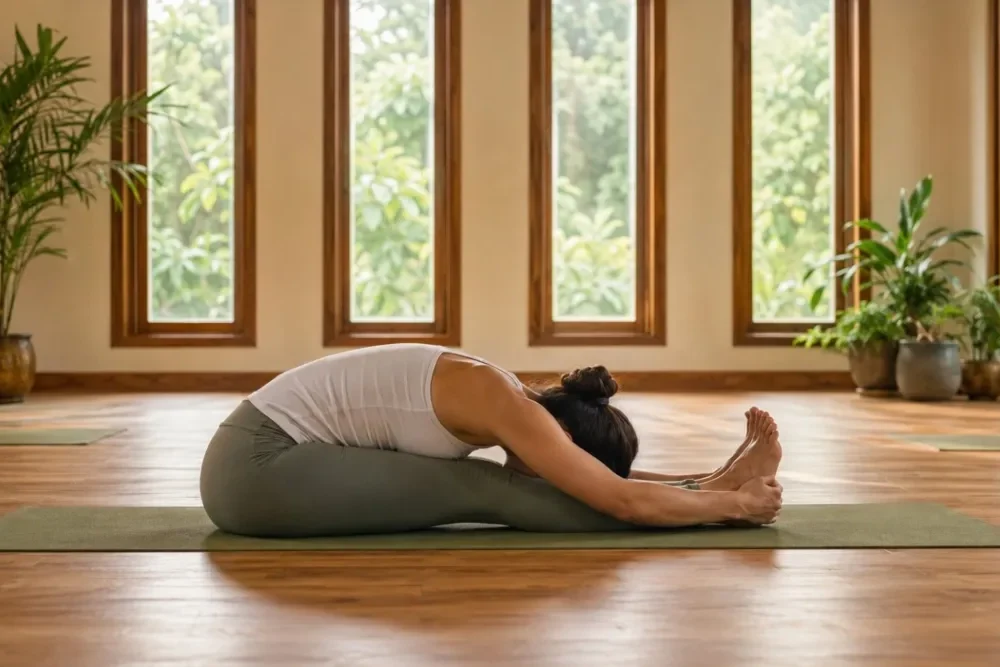
paschimottanasana yoga pose for better flexibility

The short answer: does it improve flexibility and calm the nervous system?

Flexibility: plausible and trainable

Paschimottanasana places the hips into flexion while the knees are extended to the degree chosen by the practitioner. That commonly creates a stretch sensation through the hamstrings and sometimes the calves, gluteal region, or spinal tissues.

The broader stretching evidence is strong enough to say that static stretching can improve range of motion. A 2025 systematic review and meta-analysis of 189 studies and 6,654 adults found both immediate and longer-term flexibility gains from static stretching. It also found no additional average benefit beyond about four cumulative minutes in one session or ten minutes per week for chronic gains. That is a population-level finding, not a requirement to hold this pose for four minutes. Ingram et al., *Sports Medicine*

Yoga programs may also improve flexibility, although studies usually combine several postures, breathing and other practices. A systematic review in older adults found a modest improvement in flexibility, while noting heterogeneity and limited evidence for several psychological outcomes. Systematic review and meta-analysis

The honest conclusion is that Paschimottanasana can be one useful part of a flexibility programme. The research does not establish it as uniquely effective or necessary.

Nervous-system calm: possible experience, not a guaranteed switch

A supported forward fold can reduce movement, narrow visual stimulation, and give attention a simple anchor. A slow, comfortable breath may reduce the sense of effort. Together, those conditions can feel quieting.

Research on broader yoga, meditation, and breathing practices is encouraging. A systematic review of single sessions found that many included studies reported reduced physiological or psychological stress reactivity, although interventions and methods varied. Pascoe et al., *Stress and Health*

A separate systematic review linked voluntary slow breathing with changes in heart-rate variability, respiratory sinus arrhythmia, brain activity and reported relaxation. The authors also described limitations in a small and varied evidence base. Zaccaro et al., *Frontiers in Human Neuroscience*

Those findings do not prove that Paschimottanasana itself stimulates the vagus nerve, “switches on” the parasympathetic nervous system or treats anxiety. The outcome may depend on the entire practice: position, support, breath, attention, expectation, environment and individual response.

If the pose makes you brace, hold the breath, or feel trapped, it is not calming for you in that form. Change the form or choose another posture.

What does the pose stretch?

The felt stretch differs from person to person because body proportions, joint structure, previous activity, neural sensitivity, and technique all matter.

Area Why you may feel it Useful adjustment
Hamstrings Hip flexion lengthens muscles crossing the back of the hip and knee, especially as the knees straighten Bend the knees; keep the sensation broad rather than sharp near the sitting bone
Calves Ankle dorsiflexion and straight knees can increase tension through the back of the lower leg Soften the knees and keep the ankles neutral instead of forcefully pulling the toes back
Gluteal region Pelvic position and hip flexion can create tension across the back of the hip Sit higher and reduce depth; avoid forcing the pelvis under
Back The spine may flex as the torso comes forward Initiate at the hips; support the torso; avoid pulling hard with the arms
Behind the knee Hamstrings, calf, or neural structures may contribute Reduce intensity immediately; bend the knees and do not press them down

A stretch is not automatically better because it is stronger. Use a sensation that is clear but non-threatening – often around 3 to 5 on a personal 10-point intensity scale. There should be no sharpness, burning, electric sensation, or loss of normal breathing.

How to do Paschimottanasana safely

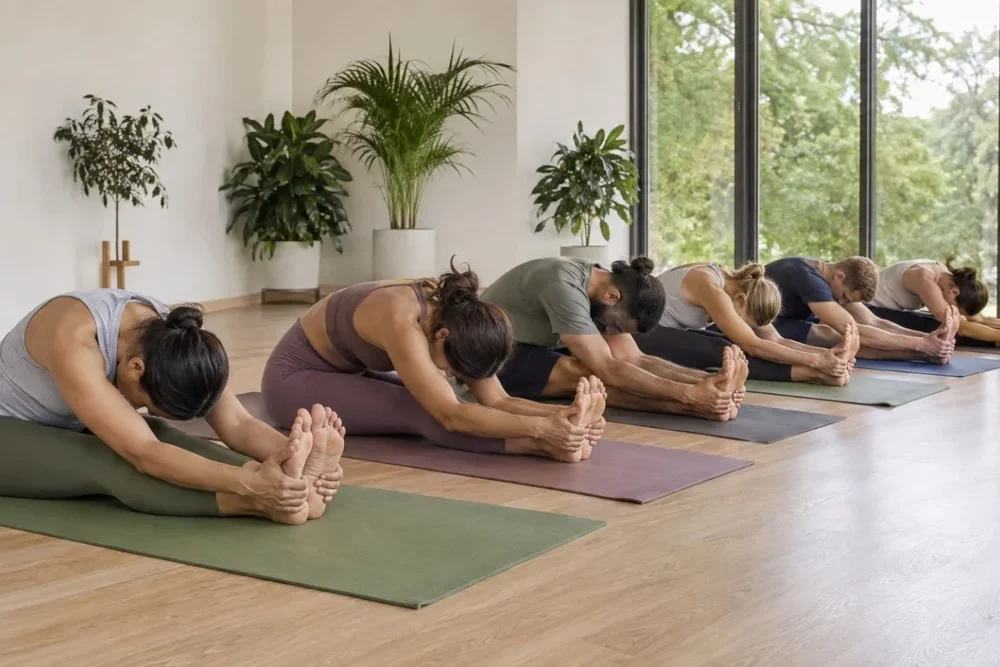
students practising paschimottanasana during yoga session at mrityunjay yogpeeth

What you need

Have a folded blanket or firm cushion, a yoga strap or belt, and optionally a bolster, pillows, or a chair. Props are not remedial. They let you select the load and purpose of the pose.

Step-by-step instructions

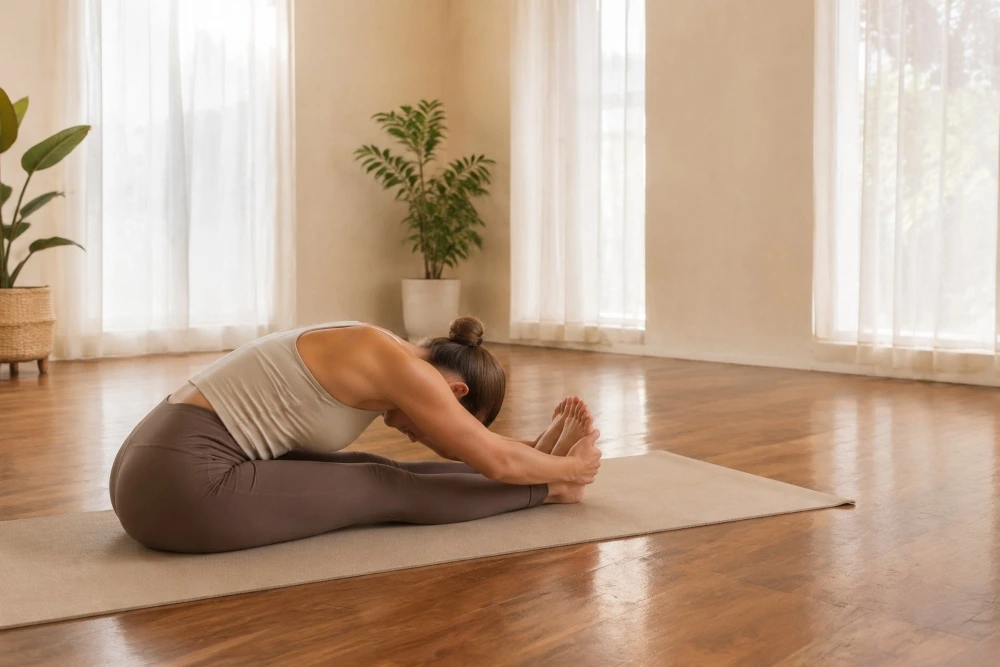
  • Begin in Dandasana. Sit with both legs forward. Place the hands beside the hips and find an upright position that does not require strain.
  • Elevate the pelvis if needed. If the pelvis rolls backward or the lower back collapses immediately, sit near the front edge of one or more folded blankets. The height should make upright sitting easier.
  • Bend the knees. Use as much bend as needed. Place a rolled blanket beneath the knees if holding them softly bent takes effort.
  • Set the feet without rigidity. Point the knees and toes roughly upward. Keep the ankles comfortably active or neutral; avoid aggressive flexing.
  • Lengthen before moving. On an easy inhalation, allow the spine to grow tall and the front of the torso to lengthen.
  • Fold from the hips. On an exhalation, tip the pelvis and torso forward as one unit. Stop before the breath becomes restricted or the pelvis rolls heavily backward.
  • Place the hands. Hold the shins, rest the hands on the floor, or loop a strap around the feet. Keep the elbows soft. Do not use the arms as a winch.
  • Choose the version. For an active mobility version, keep the torso long and the legs gently engaged. For a quieter version, place a bolster, stacked pillows, or a chair under the chest and head.
  • Breathe normally. Let inhalations create room and exhalations soften unnecessary effort. A slightly longer exhalation is optional only if it stays easy.
  • Exit gradually. Release any strong pull, place the hands beside the hips, and roll or hinge up slowly. Pause upright before standing.

How long should you hold it?

For a first practice, try 20 to 30 seconds for one or two rounds. Over time, an active version may be held for 30 to 60 seconds. A well-supported restorative version may be comfortable for one to three minutes.

Duration is subordinate to quality. Come out sooner if the stretch intensifies continuously, the breath shortens, the jaw tightens, or you feel you must endure the pose.

Active and supported versions serve different goals

Goal Setup Effort Suggested starting dose
Learn the hip hinge Sit on a blanket, knees bent, hands on thighs or blocks Light abdominal and spinal support 3–5 slow repetitions
Improve stretch tolerance Strap around feet, mild knee bend, torso long Gentle leg and trunk activity 20–45 seconds × 2
Quiet practice Torso and head fully supported on bolster, pillows or chair Minimal; no pulling 1–3 minutes if comfortable
Sensitive lower back Sit higher, bend knees more, remain relatively upright Low and controlled 15–30 seconds; consider individual guidance
Very tight hamstrings Blanket under pelvis, roll under knees, strap long Mild 20–30 seconds × 2

The supported form is not simply a deeper version. Its purpose is to make effort optional. If the head hangs or the abdomen is compressed, add height or come more upright.

How to use props

Folded blanket under the pelvis

Sit on the front third of the support so the pelvis can tip forward. Too little height may not change the fold; excessive height can feel unstable. Use enough to sit tall without gripping the hip flexors.

Strap around the feet.

Hold one end in each hand with elbows soft. The strap extends reach; it should not pull the torso down. If your shoulders lift or the back rounds abruptly, lengthen the strap.

Never wrap the strap around the hands. You should be able to release it instantly.

Bolster or pillows under the torso.

Build the support high enough that the abdomen, ribs, and head can rest. If the forehead is supported but the chest hangs, add another pillow. Turn the head only if the neck remains comfortable, and change sides midway; forehead support is often more neutral.

Chair version

Place a chair seat in front of the legs and rest the forearms or forehead on folded blankets on the seat. This is useful when the floor bolster is too low or getting down is impractical. Make sure the chair cannot slide.

Bent-knee version

This is often the most intelligent starting point. Bending the knees reduces demand on the hamstrings and may allow more movement at the hips. Over weeks, straighten only as far as the fold remains steady and pain-free.

A 10-minute practical sequence

paschimottanasana yoga pose for flexibility and stress relief

Use this after a few minutes of general movement or on its own at a gentle pace.

1. Constructive rest or easy sitting — 1 minute

Notice contact with the floor and let the breath settle. Do not manipulate it yet.

2. Cat–Cow or seated pelvic tilts — 1 minute

Move the pelvis and spine through a comfortable range. The aim is awareness, not maximum motion.

3. Low lunge — 1 minute each side

Use padding under the rear knee. Keep the range modest and the breath easy.

4. Half split or supported hamstring glide — 1 minute each side

From a kneeling lunge, shift the hips back while the front knee partially straightens. Move in and out rather than holding at maximum range.

5. Dandasana setup — 1 minute

Choose blanket height, knee bend and strap length. Practise two or three small hip hinges.

6. Paschimottanasana — 2 minutes total

Hold for 30 to 45 seconds, come upright, rest, then repeat. Alternatively, use one fully supported 60- to 90-second hold.

7. Neutral finish — 1 minute

Return upright, place the hands behind you and bend the knees, or lie down. Notice the effect without judging whether it was “deep enough.”

A four-week progression for beginners

Week Practice Focus Progress only when…
1 2–3 sessions; 2 × 20–30 seconds Find prop height and pain-free range Breath stays normal, and sensation settles rather than escalates
2 3 sessions; 2 × 30–40 seconds Repeat the same reliable setup No next-day focal pain at the hamstring attachment or lower back
3 3 sessions; 2 × 40–60 seconds Slightly reduce knee bend or strap length—not both Pelvis still tips forward and shoulders remain relaxed
4 3 sessions; up to 2–3 total minutes Choose active or supported goal You can exit smoothly and feel no need to force the shape

This is an example, not a rehabilitation prescription. Some bodies need slower progression; others will use less volume because the pose appears within a larger sequence. Consistency matters more than daily maximum effort.

How to breathe for a calming practice

Use the breath as feedback first and a technique second.

  • Start with natural nasal breathing if the nose is clear and that feels comfortable.
  • Let the inhale be unforced and the exhale quiet.
  • If it feels pleasant, make the exhale slightly longer—for example, inhale for about four counts and exhale for five or six.
  • Drop the count immediately if it creates air hunger, dizziness, or anxiety.
  • Do not add breath retention to a beginner relaxation practice.
  • If nasal breathing is obstructed, breathe in the way that allows ease; the pose does not depend on perfect technique.

Slow breathing research supports possible autonomic and psychological effects, but a rigidly slow rate is not appropriate for everyone. “Calming” breathing should feel calm while you do it.

yoga class at mrityunjay yogpeeth in rishikesh

Common mistakes and how to fix them

Mistake 1: measuring success by the toes

What happens: Reaching becomes the objective, so the shoulders round and the arms pull.

Fix: Hold a strap, shins, or the floor. Measure success by steady breath, tolerable sensation, and control.

Mistake 2: locking or pressing down the knees

What happens: The back of the knees feels sharp, or the pelvis cannot move.

Fix: Keep a small bend and support it with a rolled blanket. Straighten gradually without forcing.

Mistake 3: pulling with the arms

What happens: The stretch becomes aggressive and the neck and lower back brace.

Fix: Soften the elbows. Imagine the hands are anchors, not levers.

Mistake 4: insisting on a perfectly straight spine

What happens: The practitioner strains to stay upright or assumes any spinal flexion is wrong.

Fix: Begin with a hip hinge and avoid abrupt loaded rounding. A healthy spine can flex; the appropriate amount depends on the person, goal, and condition.

Mistake 5: Collapsing to look “relaxed”

What happens: The head hangs, breathing is compressed, and the pose becomes work.

Fix: Bring support up to the torso and head. Restorative means supported.

Mistake 6: Forcing dorsiflexion

What happens: Pulling the toes strongly toward the face increases calf or neural tension.

Fix: Keep the ankles neutral or only gently active.

Mistake 7: staying because the timer says so

What happens: A manageable stretch becomes pain or numbness.

Fix: Treat the timer as a ceiling, not a target. Exit when quality declines.

When to avoid, modify or seek advice

Yoga is generally considered safe for healthy people when practised appropriately, but strains and sprains can occur. The US National Center for Complementary and Integrative Health recommends qualified instruction, especially for beginners, and advises people who are pregnant, older or living with health conditions to discuss appropriate modifications. NCCIH yoga safety guidance

This section is a screening guide, not a diagnosis.

Pause and obtain individual guidance.

  • Acute hamstring or calf injury: stretching an injured tissue can delay recovery or aggravate symptoms.
  • New or severe back pain: especially pain that radiates, produces weakness, numbness or tingling, or changes with spinal flexion.
  • Recent abdominal, hip or spinal surgery: return only under the timelines and restrictions given by the surgical or rehabilitation team.
  • Known disc, nerve or spinal condition: a clinician or appropriately trained therapist can help determine whether flexion, knee extension or duration needs changing.
  • Osteoporosis or previous vertebral fracture: controlled bending may be possible, but end-range, loaded or repeated spinal flexion may need modification. The Royal Osteoporosis Society recommends a controlled hip hinge and avoiding over-flexion at the limit. Royal Osteoporosis Society guidance
  • Glaucoma, uncontrolled blood pressure, cardiovascular disease or recurrent dizziness: ask the treating clinician whether prolonged head-down positions or breath practices require modification. Remain more upright and never hold the breath.
  • Recent abdominal inflammation, hernia or significant gastrointestinal symptoms: avoid compression and seek condition-specific advice.

Pregnancy

Exercise and modified yoga can be appropriate in an uncomplicated pregnancy, but routines often need adjustment. The American College of Obstetricians and Gynecologists advises discussing exercise with the obstetric care professional and identifies modified yoga—not hot yoga—as an option. ACOG exercise guidance

For Paschimottanasana, avoid compressing the abdomen. A wide-leg, upright, chair-supported fold may be more appropriate, but prenatal guidance should be individual. Do not use this article as prenatal clearance.

Stop immediately if you experience

  • sharp, tearing, burning or electric pain;
  • numbness, tingling or new weakness;
  • dizziness, faintness, visual disturbance or nausea;
  • chest pressure, palpitations or unusual breathlessness;
  • painful abdominal or pelvic pressure;
  • a headache that appears or worsens in the fold; or
  • symptoms that continue or worsen after leaving the pose.

Seek urgent medical care for severe symptoms, new neurological deficits, chest pain, fainting or other warning signs appropriate to your situation.

What the science can—and cannot—say

paschimottanasana yoga class for flexibility in rishikesh

Claim: “Paschimottanasana improves flexibility”

Evidence-informed verdict: Reasonable, with conditions. Static stretching improves range of motion on average, and yoga programmes can improve flexibility. The exact contribution of this pose, ideal dose and long-term effect for a particular person are not established.

Claim: “Paschimottanasana activates the parasympathetic nervous system”

Evidence-informed verdict: Too specific as a fact. Broader yoga and slow-breathing studies report changes in autonomic measures, but a posture-specific causal claim is not established.

Claim: “The pose stimulates the vagus nerve”

Evidence-informed verdict: Commonly repeated but not adequately demonstrated for this pose. It is more accurate to say that a comfortable supported posture combined with slow breathing may help some people feel settled.

Claim: “It lowers cortisol”

Evidence-informed verdict: Do not promise this from a single pose. Some yoga interventions study cortisol or stress outcomes, but results from multimodal programmes cannot be assigned to Paschimottanasana alone.

Claim: “It treats anxiety, insomnia, depression or hypertension”

Evidence-informed verdict: Not an appropriate claim. Yoga may support wellbeing or symptom management for some people, but this pose is not a replacement for diagnosis or evidence-based treatment.

Claim: “It detoxifies the body and massages the organs”

Evidence-informed verdict: These traditional or promotional descriptions are not precise biomedical outcomes. The posture compresses the abdomen in some forms, but that does not prove detoxification or treatment of digestive disease.

How to know whether the practice is working

Use measures that are repeatable and relevant—not photographs of maximum depth.

For flexibility

Once per week, repeat the same setup after a similar warm-up and record:

  • blanket height;
  • knee bend;
  • strap length or hand position;
  • stretch intensity from 0 to 10;
  • time held with normal breathing; and
  • any symptoms during the following 24 hours.

Progress might mean the same shape feels easier, not merely that the hands move farther.

For calm

Before and two minutes after practice, rate perceived activation from 0 (very settled) to 10 (highly activated). Note breath comfort and whether you feel clearer, sleepy, neutral or more agitated.

This is self-observation, not an autonomic diagnosis. If forward folds reliably increase distress, use a different resting position such as constructive rest, side-lying support or supported Savasana.

Teaching Paschimottanasana responsibly

A teacher should make the aim and options visible before the class enters the pose.

  • Demonstrate a bent-knee, strap-assisted version first.
  • Offer prop choices before students are folded forward and unable to see.
  • Use invitational language: “You might keep the knees bent” is often more useful than “Straighten your legs.”
  • Cue sensation quality and breathing, not a visual endpoint.
  • Avoid pushing a student’s back or pulling their arms deeper.
  • Ask consent before touch, and remember that consent does not make a risky adjustment safe.
  • Keep medical claims outside the teacher’s scope unless the teacher is also appropriately licensed and working within that professional role.
  • Provide an easy exit and a neutral alternative.

A useful class cue is: “Come forward only as far as you can stay curious, breathe and leave smoothly.”

yoga teacher teaching paschimottanasana at mrityunjay yogpeeth

Frequently asked questions

Is Paschimottanasana good for beginners?

Yes, when the shape is adapted. Beginners commonly benefit from sitting on a blanket, bending the knees, and using a strap or chair. The full visual expression is not a prerequisite.

Should my back be straight or rounded?

Start the movement at the hips and maintain enough trunk support to avoid collapsing. Some spinal flexion may occur and is not inherently wrong for a healthy person. If you have osteoporosis, disc symptoms, or flexion-sensitive back pain, use condition-specific guidance and a smaller, more hip-led range.

Do my knees have to stay straight?

No. Bent knees often improve pelvic movement and reduce strain. Straight knees are an option, not a rule.

Where should I feel the stretch?

A broad sensation along the back of the thighs is common. Calf, gluteal, or back sensations may also occur. Sharp pain, a focal pull at the sitting bone, burning, tingling, or electric sensations are reasons to reduce or stop.

How long should a beginner hold the pose?

Start with 20 to 30 seconds and repeat once if it remains comfortable. Longer is not automatically better. A fully supported version can sometimes be held longer, but only while breathing and sensation remain easy.

How often should I practise?

Two or three consistent sessions per week are a practical start. The total programme matters; there is no need to force a long daily hold.

Is Paschimottanasana restorative?

It can be used restoratively only when the body and head are adequately supported, and the shape feels safe. An unsupported forward fold that requires effort is not restorative merely because it is held for several minutes.

Can it help me sleep?

A quiet evening practice may help some people wind down, but the pose is not a treatment for insomnia. Persistent sleep problems deserve appropriate assessment.

Does it release the vagus nerve?

“Release the vagus nerve” is not a precise or established effect of the pose. Slow, comfortable breathing and reduced effort may contribute to a calmer state, but individual responses differ.

Can I do it with sciatica?

Sciatica describes symptoms, not one uniform cause. Forward folding may relieve, reproduce, or worsen symptoms depending on the person. Do not stretch through radiating pain, numbness or tingling; obtain individual clinical guidance.

Can I practise during pregnancy?

Modified prenatal yoga may be suitable in a healthy pregnancy, but a narrow fold over straight legs can compress the abdomen. Seek prenatal guidance and use a wide, upright, supported alternative if cleared.

Is morning or evening better?

Either can work. Many people feel stiffer in the morning and need more warm-up. Evening may suit a supported, quiet version. Choose the time you can practise consistently without rushing.

What should I do after the pose?

Return upright slowly and pause. Bend the knees, place the hands behind you, or lie down in a neutral position. A dramatic “counterpose” is unnecessary.

Your next step

For the next two weeks, practise one repeatable version two or three times per week:

  • Sit at a height that makes upright sitting comfortable.
  • Bend the knees and use a strap.
  • Fold to a 3–5 out of 10 stretch.
  • Hold for 20–30 seconds while breathing normally.
  • Rest upright and repeat once.
  • Record the setup, sensation, and next-day response.

If calm is the priority, support the torso and head and choose a shorter, genuinely restful hold. If flexibility is the priority, progress one variable at a time – slightly less knee bend, a little more time, or a marginally shorter strap. Never change all three at once.

The useful version of Paschimottanasana is not the deepest one. It is the version you can practise consistently, recover from and refine without fear or force.

Medical and editorial note

This article provides general yoga education, not medical advice, diagnosis, treatment, or rehabilitation. Individual anatomy, health conditions, medication, pregnancy, and surgical history can change what is appropriate. Consult a qualified healthcare professional and an appropriately trained yoga teacher when needed.

For publication, add a named author biography showing relevant yoga education and teaching experience. Because this article includes contraindications and health evidence, obtain review by a qualified clinician or physiotherapist and display the reviewer’s name, credentials, and review date. Recheck the evidence and outbound links at least annually.

Dr. Anirudh Gurupratap Singh

Founder & Head Teacher – Mrityunjay Yogpeeth Dr. Anirudh Gurupratap Singh is the founder, and the vision behind Mrityunjay Yogpeeth is to pass on the wisdom of yoga from great yoga masters to students of yoga. Dr. Singh is a beloved teacher, healer and guide whose life has been dedicated to the spiritual and physical uplifting of people through authentic yoga practice and Vedic tradition.

Bhujangasana in Traditional Hatha Practice: Alignment, Benefits, and Contraindications

Bhujangasana

TL;DR

  • Bhujangasana means “Serpent Pose.” The name combines bhujaṅga (serpent or snake) and āsana (posture).
  • The posture is described in the Gheraṇḍa Saṃhitā 2.42–43, a premodern Hatha-related text. Its traditional benefits are expressed in the language of digestive fire, freedom from disease and the awakening of the serpent power.
  • A sound modern technique keeps the legs active and pelvis grounded, lengthens the spine, lifts the sternum forward and up, and uses the hands without forcing maximum lumbar extension.
  • Baby Cobra—a low lift with light hand pressure—is the best default for many beginners. Straight arms are neither required nor proof of correct alignment.
  • Plausible physical effects include practicing controlled spinal extension, strengthening back and shoulder-girdle muscles, and lengthening the front of the trunk. A small electromyography study found trunk and shoulder-girdle muscle activity during Bhujangasana within a Surya Namaskar sequence.
  • Research suggesting that yoga can modestly help some people with chronic non-specific low-back pain concerns multi-component yoga programmes, not Cobra Pose alone. Bhujangasana should not be presented as a stand-alone cure.
  • Stop if the pose produces sharp, pinching, radiating or worsening pain; numbness; tingling; weakness; dizziness; breathlessness beyond normal exertion; or abdominal pressure that feels unsafe.
  • Avoid or obtain clinical clearance for prone Cobra after recent abdominal or spinal surgery, during pregnancy when lying prone is no longer comfortable or appropriate, with an acute injury, or when a clinician has advised against spinal extension or weight-bearing through the hands.

What is Bhujangasana?

Sanskrit: भुजङ्गासन · Transliteration: Bhujaṅgāsana · Common English name: Cobra Pose or Serpent Pose

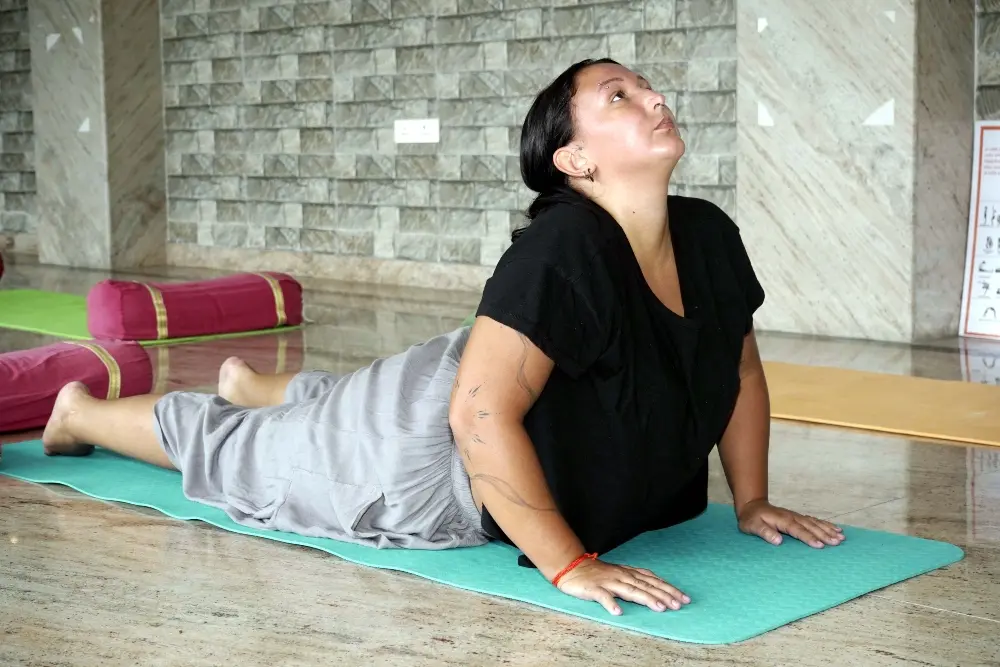
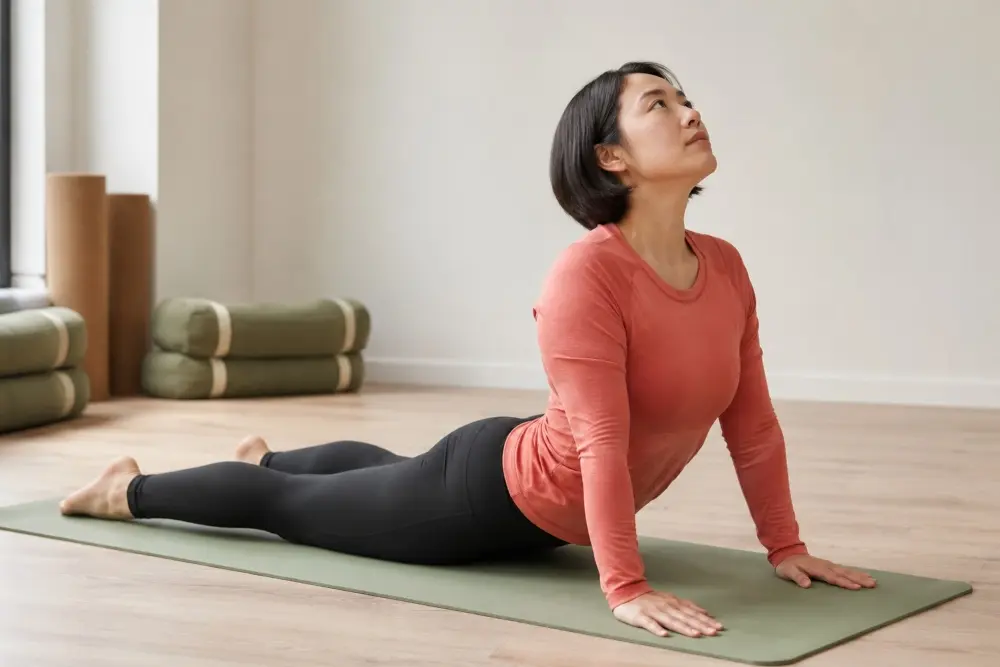
Bhujangasana is performed lying face down. The feet and lower body remain on the ground while the upper spine extends and the chest rises. The silhouette resembles a cobra raising its hood.

It is often taught in three related forms:

  • Baby Cobra: low lift, elbows bent, little pressure through the palms;
  • Classical or moderate Cobra: a higher lift with the pelvis and lower body grounded; and
  • High Cobra: a deeper backbend in which the arms may approach straight, but only if the extension is distributed comfortably and the pelvis remains grounded.

These are not achievement levels. A lower Cobra may produce a clearer, safer and more integrated action than a high pose. The useful version is the one in which the practitioner can breathe steadily and leave without pain.

Bhujangasana in traditional Hatha practice

student practicing bhujangasana during hatha yoga training in rishikesh

The textual source

Bhujangasana appears in the Gheraṇḍa Saṃhitā, a premodern Sanskrit manual commonly associated with the Hatha yoga corpus. In the GRETIL Sanskrit text of verses 2.42–43, the practitioner places the body from the toes to the navel on the ground, supports the ground with the palms and raises the head like a serpent.

The next verse says that the practice increases dehāgni—the body’s fire—destroys disease and awakens bhujagī, the serpent-like goddess or kundalini. These are traditional textual claims, embedded in a premodern yogic model of body, vitality and liberation. They should be represented accurately as tradition, not converted into guarantees that Cobra cures digestive, hormonal, respiratory or spinal disease.

The wider purpose of asana

The Gheraṇḍa Saṃhitā presents a seven-part discipline in which cleansing, posture, mudra, sensory withdrawal, breath regulation, meditation and absorption contribute to the transformation of the practitioner. In this framework, asana is not merely stretching or fitness. It cultivates bodily firmness and prepares the practitioner for subtler work.

Bhujangasana’s serpent image also resonates with the text’s subtle-body language. A traditional practitioner may therefore approach the posture as an integration of:

  • a stable physical base;
  • disciplined but unforced effort;
  • coordinated breath;
  • inward attention; and
  • preparation for pranayama, concentration or meditation.

What the classical description does—and does not—specify

The old instructions are brief. It identifies the shape and ground contact, but does not prescribe the modern details commonly heard in studios: exact hand position, precise foot distance, shoulder-blade cues, a fixed gaze, a numbered breath count or a universal degree of elbow extension.

Modern alignment language is therefore an interpretive teaching method, informed by anatomy, pedagogy and the needs of present-day students. Different Hatha lineages may teach the pose differently without one variation owning the entire tradition.

The central alignment principle

Bhujangasana should feel like a long, distributed arc, not a hinge driven into the lower back.

The pose combines:

  • spinal extension;
  • hip extension or maintenance of the front-hip line;
  • shoulder extension and scapular control;
  • elbow flexion or extension depending on height;
  • wrist extension when the palms bear weight; and
  • anterior trunk lengthening.

The lumbar spine naturally extends more readily than the thoracic spine. If the practitioner simply pushes hard through the hands, the movement may concentrate at the lower back while the upper chest and shoulders remain poorly organized. The remedy is not to flatten the lumbar curve; it is to reduce height, lengthen forward through the crown and sternum, activate the posterior chain without gripping, and let the upper trunk participate.

How to practise Bhujangasana step by step

yoga student performing cobra pose

1. Prepare the surface and your body

Use a stable, non-slip mat. Avoid practising immediately after a large meal because the abdomen is compressed against the floor. Begin with gentle shoulder movement, Cat–Cow, a low Sphinx or another preparation appropriate to your body.

If lying prone is painful or unsuitable, use a standing or seated alternative rather than forcing the setup.

2. Establish the prone foundation

Lie on the abdomen with the legs extended back. Place the tops of the feet on the mat. Start with the legs parallel and about hip-width apart; a teacher may invite a narrower position if it is comfortable for the hips, sacrum and lower back.

Reach back through the toes while lengthening forward through the crown of the head. Gently engage the legs so the knees face down and the thighs feel organized. Avoid squeezing the buttocks as hard as possible; use enough posterior support to stabilize the pelvis without creating a cramp or jamming the sacrum.

3. Place the hands deliberately

Place the palms beside the lower ribs or just behind the shoulder line, fingers facing generally forward. Keep the forearms roughly vertical in a low Cobra and draw the elbows back rather than flaring them wide.

Hand placement can vary with arm length, shoulder mobility and the intended height. Hands too far forward may encourage pushing and shoulder elevation; hands too far back may demand more wrist extension or spinal range than is available.

Spread the fingers and distribute pressure through the whole hand, especially the base of the index finger and thumb, without collapsing into the wrist.

4. Initiate the lift from the back body

On an inhalation, lengthen forward and begin to lift the head and upper chest using the spinal extensor and upper-back muscles. Keep the low ribs or more of the front trunk down in Baby Cobra.

Test your effort by briefly making the hands light. If the chest collapses immediately, you may be using the arms as the primary engine. Replace the hands and use them as support, not as a jack that forces height.

5. Organize the shoulders and chest

Broaden the collarbones. Guide the shoulders away from the ears and let the shoulder blades support the back of the rib cage without aggressively pinching them together.

Lift and lengthen the sternum forward. Keep the lower front ribs connected rather than thrusting them sharply ahead. The elbows may stay bent; their degree of bend follows the height of the torso and the body’s proportions.

6. Choose a neutral, comfortable neck

Look slightly forward and down at first. Lengthen the back of the neck and keep the base of the skull spacious. If the upper spine extends comfortably, the gaze may gradually move forward or slightly upward. Throwing the head back does not deepen the useful thoracic action and can irritate a sensitive neck.

7. Breathe without strain

Take one to five quiet breaths. Let the inhalation expand the side and back ribs as well as the upper chest. Let the exhalation maintain length and reduce unnecessary tension.

Do not hold the breath to imitate a shape. Breath retention belongs to specific practices and should not be added casually, particularly by beginners or people with cardiovascular, respiratory or pregnancy-related considerations.

8. Exit with control

On an exhalation, bend the elbows as needed and lower the chest, ribs and forehead without dropping. Turn the head to one side or rest the forehead on stacked hands if comfortable. Notice the effect before repeating.

For many practitioners, two or three deliberate repetitions are more useful than a long, fatigued hold.

Alignment from feet to crown

Region Useful action Common error Better cue
Feet and legs Reach back through toes; keep legs active and parallel Feet roll out; legs are passive “Lengthen back through all ten toes”
Pelvis Keep pubic region and front pelvis grounded comfortably Pelvis lifts or lower back compresses “Press down gently and lengthen forward”
Abdomen and ribs Maintain length through front body; choose height that allows breath Belly is braced rigidly or low ribs thrust “Lift the sternum, not only the chin”
Hands and wrists Spread pressure through the palm; use hands as support Heel of hand bears all weight “Root the index-finger base and keep the hand broad”
Elbows Point generally back; bend as needed Elbows flare or lock to chase height “Let arm shape follow spinal capacity”
Shoulders Broaden collarbones; shoulders move away from ears Shoulders shrug and chest collapses “Create space between ears and shoulders”
Neck and gaze Continue the curve of the upper spine Head drops back independently “Keep the back of the neck long”
Breath Quiet, continuous and unforced Breath is held or becomes strained “Lower the pose until breathing is easy”

Breathing in a traditional Hatha context

students practicing meditation in a yoga class

Modern classes commonly coordinate the ascent with inhalation and the descent with exhalation. This is mechanically intuitive: inhalation can accompany chest expansion, while exhalation can support a controlled return.

Traditional Hatha practice, however, is broader than matching one movement to one breath. Depending on lineage and stage of training, asana may prepare the body for pranayama or be held with attentive natural breathing. Avoid adding forceful breathing, prolonged retention or energetic locks solely because a posture is called “traditional.” Those techniques have their own methods, prerequisites and contraindications.

A safe baseline is:

  • inhale to lengthen and rise;
  • breathe naturally while holding;
  • exhale to lower; and
  • keep the face, throat and jaw quiet.

If breath becomes jerky, shallow or compelled, reduce the height or leave the pose.

What muscles work in Cobra Pose?

Bhujangasana is not only a passive stretch. It requires coordinated activity through the posterior body and shoulder girdle.

A small surface-electromyography study of postures within Surya Namaskar reported activity of the erector spinae, lower trapezius and latissimus dorsi during Bhujangasana, with higher muscle activity during transitions than during the held pose. The study helps describe muscular demand, but it does not prove that Cobra alone prevents or treats back pain.

Depending on form and effort, the posture may involve:

  • spinal extensors maintaining the backbend;
  • lower trapezius and other scapular muscles organizing the shoulder blades;
  • latissimus dorsi contributing to shoulder and trunk control;
  • gluteal and posterior thigh muscles supporting the pelvis and legs;
  • triceps contributing more as the elbows extend; and
  • abdominal and anterior hip tissues lengthening across the front body.

Anatomy differs among people. Bone shape, spinal curves, tissue mobility, pain history and proportions affect how high a comfortable Cobra will be.

students practising Bhujangasana in Rishikesh

Benefits: what tradition says and what evidence supports

Bhujangasana may support spinal extension, back-muscle endurance, mobility, and mindful breathing, while traditional claims should remain within their spiritual context and not be presented as medical facts.

Traditional benefits

The Gheraṇḍa Saṃhitā associates Bhujangasana with an increase in bodily fire, removal of disease and awakening of serpent power. Within traditional practice, “fire” may be understood in relation to vitality, transformation or digestion, and kundalini belongs to a subtle-body and spiritual framework.

Present these claims as part of the text’s worldview. Statements such as “detoxifies organs,” “cures all diseases,” “heals infertility,” “burns belly fat” or “awakens kundalini in everyone” are not responsible for modern health claims.

Reasonable movement and practice benefits

When suited to the practitioner and taught well, Bhujangasana can:

  • practise active spinal extension;
  • strengthen endurance and coordination in back and scapular muscles;
  • lengthen the anterior trunk and hip region;
  • counterbalance prolonged flexed postures as part of a varied movement practice;
  • develop awareness of how the pelvis, ribs, shoulders and neck relate;
  • coordinate movement with calm breathing; and
  • prepare for other prone backbends or selected Hatha sequences.

These are plausible practice outcomes, not guaranteed medical effects. The dose, variation and response matter.

What research says about yoga and low-back pain

Research has found that multi-component yoga programmes may offer small to moderate improvements in pain or function for some people with chronic non-specific low-back pain. A 2020 systematic review and meta-analysis reported evidence ranging from very low to moderate quality and found yoga broadly comparable with other exercise or physical-therapy exercise for pain and disability. A large randomized trial comparing yoga, stretching and a self-care book found better function and symptoms for yoga than the self-care book, while yoga was not clearly superior to conventional stretching.

The critical limitation is that these interventions combine multiple postures, breathing, relaxation, education, adaptation and teacher contact. They do not establish that Bhujangasana by itself treats a slipped disc, sciatica, chronic pain or another diagnosis.

Back pain also responds differently to different directions of movement. Extension may feel relieving for one person and aggravating for another. If you use Cobra for pain, it should be selected and progressed according to an individual assessment—not a generic promise.

Stress, breathing and wellbeing

Yoga research often evaluates whole programmes that include attention, breathing, relaxation and social participation. Any calming effect of a thoughtfully taught Cobra may come from the wider practice, not from a unique biochemical property of the posture. Do not claim that the pose alone treats anxiety, depression, asthma or cardiovascular disease.

cobra pose practice for improving spinal extension

Contraindications and precautions

“Contraindication” is often used too loosely in yoga writing. Some situations call for avoiding the posture, some require medical clearance, and others simply require a lower variation. The appropriate decision depends on diagnosis, symptoms, healing stage, professional advice and the exact form of Cobra.

Do not practise and seek prompt assessment when

  • pain follows a serious accident or significant trauma;
  • back pain is accompanied by loss of feeling around the genitals or anus;
  • there are new bladder or bowel changes;
  • pain, tingling, weakness or numbness affects both legs;
  • there is sudden severe or rapidly worsening pain;
  • fever, unexplained weight loss or feeling generally unwell accompanies spinal pain; or
  • the posture causes chest pain, faintness, new neurological symptoms or severe breathlessness.

These are not “alignment problems.” The NHS back-pain guidance lists several of these as reasons for urgent or emergency assessment.

Avoid the standard prone pose until appropriately cleared

  • Recent abdominal, spinal, chest, shoulder or wrist surgery: healing tissue and surgical instructions take precedence. Obtain clearance from the treating team.
  • Acute fracture or significant acute injury: do not load or stretch an injured area without assessment.
  • Pregnancy when prone lying is uncomfortable or unsuitable: use a standing, seated or side-lying alternative and consult an obstetric professional or prenatal specialist. ACOG recommends pregnancy-specific modification and discussing activity with an obstetric clinician.
  • A clinician’s restriction on spinal extension or hand weight-bearing: follow the reasoned restriction until reviewed.
  • Open wounds, painful abdominal pressure or another condition made worse by lying on the abdomen: choose a non-prone alternative.

Obtain individualized guidance or modify carefully when

  • there is current or recurrent low-back pain, radiating leg pain or a diagnosed disc condition;
  • there is spondylolisthesis, spinal stenosis, inflammatory spinal disease or significant scoliosis;
  • osteoporosis or fracture risk is present;
  • neck pain, cervical radiculopathy, dizziness or headaches are provoked by neck position;
  • wrist, hand, elbow or shoulder pain is aggravated by weight-bearing;
  • there is an abdominal hernia or a painful abdominal condition;
  • there is significant cardiopulmonary disease, uncontrolled blood pressure or a reason to avoid breath retention; or
  • the practitioner is older, deconditioned or returning after a long break.

The U.S. National Center for Complementary and Integrative Health considers yoga generally safe for healthy people when performed properly under qualified guidance, but notes that injuries occur and that older adults may need additional caution. A systematic review of randomized trials found serious yoga-related adverse events uncommon, while adverse-event reporting across studies was imperfect.

Sensations that mean “come out now”

Leave the pose if you feel:

  • sharp, catching or pinching pain;
  • pain radiating into an arm, buttock or leg;
  • new numbness, tingling or weakness;
  • pressure concentrated in one spinal point;
  • wrist, elbow or shoulder pain that increases with loading;
  • dizziness, nausea, visual disturbance or faintness;
  • inability to breathe comfortably; or
  • abdominal or pelvic pressure that feels wrong.

A muscular effort or mild, broad stretch may be acceptable; pain is not a requirement for progress. The NHS advises stopping back exercises if pain worsens and seeking professional advice.

Modifications and alternatives

Baby Cobra

Keep the chest low, elbows bent and hands light. Lift mainly with the back muscles for one to three breaths. This reduces the temptation to push into maximal extension and is a useful starting point for learning control.

Sphinx Pose

Place the forearms on the floor, usually with elbows near or slightly forward of the shoulders. Sphinx removes wrist extension and can make the position easier to sustain, although it is not automatically suitable for every lower back. Move the elbows farther forward or lower the chest if the lumbar area feels compressed.

Cobra with hands farther forward

Move the hands slightly forward to reduce the height and demand for wrist and spinal range. Maintain whole-hand contact and keep the shoulders organized.

Fingertip or block-supported Cobra

In some teaching contexts, fingertips or stable blocks beside the ribs can help reduce palm loading and encourage the back body to initiate the lift. This requires sufficient hand control and a non-slip setup; it is not appropriate for painful fingers or unstable supports.

Standing Cobra at a wall

Stand facing a wall with hands at chest height. Press lightly into the wall while lifting the sternum and extending the upper spine without throwing the head back. This removes prone abdominal pressure and makes the range easy to control.

Seated thoracic extension

Sit on a stable chair, support the hands on the thighs or behind the head, and extend gently through the upper back while keeping the lower ribs organized. This can be useful when floor transfer or prone lying is unsuitable.

Locust preparation

With arms beside the body and palms facing in, lift the head and upper chest a small amount without using the hands. This teaches active posterior support, but it is still a prone extension and shares some precautions.

Common mistakes and how to correct them

correct technique for practicing bhujangasana

Mistake 1: pushing to straight arms

Why it happens: Straight arms look like the “full pose.”

Correction: Bend the elbows and lower until the chest can lengthen forward, the pelvis stays grounded and the breath remains easy. Arm straightness is optional.

Mistake 2: hinging only in the lower back

Why it happens: The lumbar spine moves more readily than the thoracic spine.

Correction: Reduce height, engage the legs, lengthen the sternum forward and invite upper-back participation. A smaller arc distributed through more of the spine is usually preferable.

Mistake 3: lifting the pelvis

Why it happens: The practitioner is moving toward Upward-Facing Dog or using excessive arm force.

Correction: Keep the front pelvis grounded. If the thighs and pelvis lift, name and teach the posture as a different shape rather than calling it Cobra.

Mistake 4: shrugging the shoulders

Why it happens: The hands push down while the chest remains collapsed.

Correction: Broaden the collarbones, move the shoulders away from the ears and let the sternum travel forward before seeking height.

Mistake 5: throwing the head back

Why it happens: Upward gaze is mistaken for spinal extension.

Correction: Begin with a forward-and-down gaze. Let neck extension emerge only as a continuation of upper-spine movement.

Mistake 6: legs completely passive or gluteals clenched hard

Why it happens: Practitioners receive absolute cues such as “relax the buttocks” or “squeeze everything.”

Correction: Use balanced leg and gluteal activity to support the pelvis while retaining length and breath. The correct amount is individual.

Mistake 7: breath retention and facial strain

Why it happens: The pose is too high or effort is treated as intensity.

Correction: Lower until breathing is smooth; relax the jaw, tongue and eyes.

Bhujangasana, Sphinx and Upward-Facing Dog compared

Feature Baby or classical Cobra Sphinx Pose Upward-Facing Dog
Arm position Elbows bent or partly extended Forearms grounded Arms generally straight
Lower-body contact Pelvis and legs remain grounded Pelvis and legs remain grounded Thighs and pelvis lift from floor
Wrist load Variable; can be meaningful Minimal wrist extension Greater hand and wrist loading
Typical use Controlled spinal extension and back-body action Supported, lower or sustained extension Stronger transition or held backbend
Key caution Do not force height into lumbar spine Not automatically pain-free for lumbar conditions Requires more shoulder, wrist, trunk and leg capacity

These postures are related but not interchangeable. In a flow class, moving from knees–chest–chin or Chaturanga into Upward-Facing Dog is a different mechanical task from entering a deliberate Hatha Cobra from prone.

How long should you hold Bhujangasana?

There is no universal therapeutic dose. For a healthy beginner, a conservative starting point is:

  • two or three repetitions;
  • one to three natural breaths per repetition;
  • a low or moderate height; and
  • rest between repetitions.

An experienced practitioner may hold longer within a coherent sequence, provided breath and alignment remain steady. More height, duration or repetitions are not automatically better. End the set before technique deteriorates.

When and how to include Cobra in a Hatha sequence

practitioner performing bhujangasana with proper technique

Bhujangasana can be thoughtfully placed within Hatha sequences, with specific preparation, mindful transitions, appropriate counterposes, and sequencing adapted to individual needs and lineage.

Before Bhujangasana

Prepare the relevant areas rather than performing a generic warm-up:

  • shoulder circles or scapular movement;
  • Cat–Cow in a comfortable range;
  • low Sphinx with active length;
  • prone leg activation;
  • a gentle Locust preparation; or
  • a standing chest-opening movement.

After Bhujangasana

Pause prone and observe. A neutral rest, gentle Child’s Pose or easy spinal movement may feel appropriate, but a deep counterpose is not mandatory. Avoid snapping immediately from a strong backbend into a maximal forward bend.

In a traditional practice arc

Bhujangasana may sit among other strengthening and backbending postures before pranayama, mudra or seated work. The exact order depends on lineage, purpose and practitioner. A traditional label does not justify a fixed universal sequence.

Teaching Bhujangasana responsibly

Responsible teaching emphasizes screening, choice, consent, observation, and staying within professional scope rather than forcing alignment or making medical claims.

Ask before prescribing

A teacher should ask about pregnancy, surgery, osteoporosis, acute injury, current pain and relevant clinical advice. Do not diagnose the student or promise a cure.

Demonstrate options, not a hierarchy

Show Baby Cobra, Sphinx and non-prone alternatives as equally legitimate choices. Avoid language such as “beginner version” if it implies that a deeper spinal angle is the goal.

Use consent-based assistance

Do not press a student’s shoulders back or force the spine deeper. Obtain specific consent before touch and use verbal or visual cues first. Manual adjustment cannot reveal what a student’s joints or nerves are experiencing.

Observe function

Look for breath holding, shoulder elevation, hand collapse, pelvic lifting, asymmetric movement and a painful facial response. Ask what the student feels and where. A beautiful silhouette is not proof of a useful experience.

Stay within scope

A yoga teacher can offer movement options and refer onward. A teacher should not tell a student that Cobra will repair a disc, cure sciatica, reverse infertility, stimulate a named organ or replace medical care.

yoga teacher explaining bhujangasana in a hatha yoga class in rishikesh

Frequently asked questions

1. Is Bhujangasana the same as Cobra Pose?

Yes. Bhujangasana is commonly translated as Cobra Pose or Serpent Pose. The Sanskrit bhujaṅga means serpent or snake, and āsana means posture.

2. Is Bhujangasana a traditional Hatha yoga pose?

It is described in the Gheraṇḍa Saṃhitā 2.42–43, a premodern text associated with the Hatha yoga corpus. The modern studio form and detailed alignment cues reflect later teaching developments as well as lineage-specific interpretation.

3. Is Cobra Pose in the Hatha Yoga Pradipika?

Bhujangasana is not among the named postures described in the commonly received Haṭha Yoga Pradīpikā list. Its clear classical description is in the later Gheraṇḍa Saṃhitā. “Traditional Hatha” is broader than one book.

4. Should the arms be straight?

Not necessarily. Bent elbows are normal in Baby and moderate Cobra. Straighten only to the degree that the chest remains broad, the spine feels evenly organized, the pelvis stays grounded and breathing remains comfortable.

5. Should the legs be together or hip-width apart?

Both appear in modern teaching. Hip-width often gives a stable, accessible starting point. A narrower position may suit some bodies and lineages. Choose the placement that permits symmetrical leg action and a comfortable sacrum and lower back.

6. Should I squeeze the buttocks?

Use the gluteal muscles enough to support hip extension and pelvic stability, but avoid maximal gripping if it creates compression or cramps. The useful effort varies by person and pose height.

7. Is Bhujangasana good for lower-back pain?

It may feel helpful for some people and aggravating for others. Evidence supports some multi-component yoga programmes for chronic non-specific low-back pain, not Cobra as a universal treatment. Seek assessment for persistent, severe, radiating or neurologically accompanied pain.

8. Can Cobra fix a slipped or herniated disc?

No generic posture can be promised to “fix” a disc. Some rehabilitation approaches use carefully selected extension movements, but suitability depends on symptoms and assessment. Do not self-prescribe deep Cobra for radiating pain, numbness or weakness.

9. Can I practise Bhujangasana during pregnancy?

Once prone lying causes abdominal pressure or is no longer comfortable, use a standing or seated alternative. Pregnancy exercise advice is individualized; discuss it with an obstetric professional and a qualified prenatal teacher. Avoid hot yoga and other practices specifically discouraged by your clinician.

10. What if my wrists hurt?

Reduce hand pressure, move the hands forward, use a low Baby Cobra, try Sphinx, or choose a wall variation. Stop if pain persists. Wrist pain can arise from several conditions and should not be pushed through.

11. Where should I look?

Start slightly forward and down so the neck remains long. Move the gaze only as far upward as the upper spine can support without pinching, dizziness or strain.

12. Can Bhujangasana reduce belly fat?

There is no credible evidence that one posture selectively burns abdominal fat. Body composition changes depend on many factors, including overall activity, nutrition, sleep, health and genetics.

13. Does Cobra improve digestion or stimulate abdominal organs?

The traditional text speaks of increasing bodily fire. Modern claims that the pose treats constipation, ulcers, liver disease or another digestive condition are not established by pose-specific clinical evidence. Abdominal pressure may be uncomfortable or inappropriate for some conditions.

14. Is Bhujangasana suitable every day?

Some healthy practitioners can use a gentle version regularly, while others need recovery or a different movement balance. Frequency should reflect response, total practice load and health status. Persistent soreness or worsening symptoms are reasons to reduce or stop and seek guidance.

A safe-practice checklist

A practical safety checklist for Bhujangasana helps practitioners assess readiness, maintain controlled alignment and breathing, recognize warning signs, and respond appropriately after the pose.

Before the pose:

  • I have no red-flag symptoms or medical restriction that makes this inappropriate.
  • Prone lying and hand placement are comfortable.
  • I can choose a lower or non-prone version without feeling that I have failed.

During the pose:

  • My legs and pelvis provide a stable base.
  • My chest travels forward and up rather than only upward.
  • My shoulders are not crowding my ears.
  • My neck continues on the spinal line.
  • I can breathe naturally.
  • I feel no sharp, radiating, neurological or escalating pain.

After the pose:

  • I lower with control.
  • Symptoms are unchanged or better, not worse.
  • I can move and breathe normally.
  • Any concerning response is documented and discussed with an appropriate professional.

Your next practice

Approach Bhujangasana as an inquiry rather than a performance. Begin with three low Cobras. On each repetition, keep the hands progressively lighter and notice whether the chest can lengthen forward through back-body effort. Stop at the first height where the shoulders stay broad, the pelvis remains grounded and the breath is quiet.

Then rest and ask:

  • Where did the movement occur?
  • Could I breathe into the side and back ribs?
  • Did one area feel compressed?
  • Did the second or third repetition become clearer—or merely higher?
  • How did my body feel one minute later?

Traditional Hatha practice values disciplined attention. In Bhujangasana, that attention matters more than the height of the cobra’s hood.

Dr. Anirudh Gurupratap Singh

Founder & Head Teacher – Mrityunjay Yogpeeth Dr. Anirudh Gurupratap Singh is the founder, and the vision behind Mrityunjay Yogpeeth is to pass on the wisdom of yoga from great yoga masters to students of yoga. Dr. Singh is a beloved teacher, healer and guide whose life has been dedicated to the spiritual and physical uplifting of people through authentic yoga practice and Vedic tradition.

Vrikshasana (Tree Pose) for Balance and Focus: How Beginners Can Build Stability Safely

vrikshasana

TL;DR

Vrikshasana (Tree Pose) is a beginner-friendly standing balance posture that builds stability, concentration, and postural awareness through correct alignment and steady breathing. Proper foot placement, a fixed drishti, and gradual progression from wall support to freestanding balance help beginners practice safely while avoiding strain on the knees, hips, and lower back.

Supported vs Unsupported Vrikshasana Practice

Factor Wall or Chair-Supported Practice Freestanding Practice
Suitable For Complete beginners, seniors, those with balance concerns Practitioners with basic balance confidence
Difficulty Level Lower; reduces fall risk while learning alignment Moderate; requires core engagement and steady drishti
Focus Area Foot placement, knee alignment, breath awareness Full-body balance, concentration, and postural control
Benefits Builds confidence, reduces strain, safer entry point Strengthens ankle, foot, and core stability further
Limitations Less challenge to balance and focus May cause wobbling or improper alignment if rushed
Best Use Case Early learning stage or physical limitations Progressing toward advanced standing balance postures

Introduction

Beginners often assume Tree Pose is simply standing on one leg. In reality, experienced yoga teachers know that Vrikshasana is one of the first postures to reveal that balance begins with attention rather than strength. At Mrityunjay Yogpeeth, students learn this posture gradually through breath, alignment, and awareness before progressing to advanced standing asanas. 

This guide explains the correct alignment principles, common mistakes, and safe progressions for beginners. It is written for practitioners who are new to balance postures and want a clear, structured approach to learning Tree Pose correctly.

yoga teacher performing vrikshasana

What Is Vrikshasana?

Vrikshasana (Tree Pose) is a single-leg standing balance posture practiced in Hatha Yoga to cultivate steadiness, grounding, and mental focus before moving into more demanding standing balances.

Sanskrit: Vriksha = tree, Asana = posture.

Vrikshasana is one of the very few standing postures found in medieval Hatha Yoga texts – most standing poses taught today are 20th-century additions. It appears in the 17th-century Gheranda Samhita (2.36), which describes placing one foot on the opposite thigh and standing grounded “like a tree.” Classical Hatha Yoga used postures like this to cultivate sthira (steadiness) and sukha (ease) – the two qualities Patanjali names in the Yoga Sutras as essential to any asana. The tree symbolism is literal: rooted and firm, yet flexible enough to sway without falling.

Key characteristics:

  • Single-leg standing balance requiring core engagement and steady breath
  • Foot placed on the inner calf or inner thigh – never on the knee joint
  • Steady gaze (drishti) and even breath are what actually hold the balance
  • Often taught early in beginner and 200 Hour Yoga Teacher Training sequences, since it reveals foundational gaps in a student’s alignment and focus
  • Builds ankle, knee, and hip stability that later feeds into poses like Half Moon and Warrior III

Benefits: strengthens the standing leg, opens the bent-knee hip, improves balance and proprioception, and sharpens concentration.

Note: not a substitute for medical care – modify or avoid with recent hip, knee, or ankle injury.

Who Should Avoid or Modify Vrikshasana?

Although Vrikshasana is a beginner-friendly posture, it may need to be modified for individuals with recent ankle, knee, or hip injuries; chronic knee instability; severe balance disorders such as vertigo; or those recovering from lower-limb surgery. If you have a medical condition that affects balance or joint stability, consult a qualified Yoga instructor or healthcare professional before practicing.

If your balance is not great, practice using a wall or a heavy chair to lightly support yourself for safety while mastering the pose. Gradually decreasing dependency on support as balance and alignment improve prevents falls or injury for beginners while increasing stability.

Medical Disclaimer

Yoga may support overall well-being but should not replace professional medical advice, diagnosis, or treatment. Individuals with medical conditions should consult a qualified healthcare professional before beginning a Yoga practice.

yoga students performing tree pose

Vrikshasana Benefits: What Is Actually Supported

Yoga postures are often associated with physical and mental benefits, but claims should be stated carefully and only where evidence supports them.

  • Balance and coordination: Standing balance postures are commonly included in yoga-based programs, which are studied for their potential to support balance and postural stability (National Center for Complementary and Integrative Health, NCCIH).
  • Focus and concentration: Maintaining a single-point gaze, known as drishti, is a traditional technique used to steady attention during balance postures.
  • Leg and ankle strength: Regular practice can help strengthen the muscles of the standing foot, ankle, calf, and hip that contribute to balance and stability during everyday movements. 
  • Postural awareness: Practicing alignment in Vrikshasana can support awareness of hip and shoulder positioning that carries into daily posture.

When balancing in Tree Pose, the standing ankle is making hundreds of micro-adjustments – barely perceptible changes. This improves the condition of the stabilising musculature around the ankle and hip far more effectively than just standing still.

Tree Pose Variations and Modifications (By Level)

Vrikshasana adapts easily to different balance levels, making it one of the most beginner-to-advanced-friendly standing poses in yoga. Once the basic alignment feels steady, these variations let you progress – or scale back – without losing the core benefits of the pose.

  • Wall or chair-supported: Stand near a wall or hold a chair back for light hand support. Best for complete beginners and seniors building initial confidence and reducing fall risk while learning foot placement.
  • Half Tree Pose: Rest the foot on the calf instead of the inner thigh. Best for beginners who want more stability while still practicing correct knee and hip alignment.
  • Arms-overhead / Anjali Mudra: Progress from palms pressed together at the chest to arms extended overhead. Best for practitioners with a steady freestanding base who want to add postural and shoulder engagement.
  • Partner Tree Pose: Two practitioners stand side by side, lightly supporting each other’s raised arm or shoulder. Best for group classes and building shared-balance awareness.
  • Eyes-closed variation: Close the eyes only once freestanding balance is confident. Best for advanced practitioners looking to challenge proprioception and inner-ear balance.

Choosing the right variation for your current level helps build genuine stability rather than forcing a pose the body isn’t ready for – the safest way to progress in Vrikshasana over time.

Which Muscles Does Tree Pose Strengthen?

Vrikshasana works the body through sustained, active stillness rather than movement, which makes its strengthening effect easy to underestimate. Holding the pose engages far more muscle groups than its calm appearance suggests.

Standing leg: The ankle stabilizers and calf muscles make constant small adjustments to keep you upright, while the quadriceps and glutes support the hip and knee joints through the full hold. This continuous micro-engagement is what builds strength, even though the leg appears still.

Core and postural muscles: The abdominal and oblique muscles are recruited to stabilize the pelvis and avoid hip drop on the side with the lifted leg. As the arms reach overhead, so too do the postural muscles of the spine and shoulders kick in to help reinforce the upright alignment that is at the core of this pose. It is this blending of core and postural engagement that provides the full-body stabilizing effect of Tree Pose, rather than mere leg work.

Why this matters for posture and everyday balance: These same stabilizing muscles are the ones relied on for everyday movements – stepping over uneven ground, standing on one leg to put on shoes, or recovering from a stumble. Regular practice reinforces the muscular coordination behind those everyday moments of balance, making Tree Pose as functional as it is meditative.

In short, Vrikshasana is not merely a balance pose – it is stealthy, abstruse total-body conditioning. Since all parts of the body – ankles, legs, core, and spine – are engaged to maintain this shape, regular practice can significantly enhance stability on and off the mat.

yoga teacher training student performing vrikshasana

How Should You Breathe During Vrikshasana?

Breathing plays a quiet but important role in maintaining balance during Vrikshasana. Instead of forcing deep breaths, allow your inhale and exhale to flow naturally through the nose. A steady rhythm helps the body stay relaxed and makes it easier to hold the posture with control.

As you settle into the pose, let the breath expand gently into the abdomen rather than lifting the shoulders. This diaphragmatic breathing reduces unnecessary tension and encourages better stability by keeping the body grounded and the core gently engaged.

With many beginners, the first thing they do is hold their breath when wobbling. Even though this seems like the natural thing to do, it can create a stiffening effect that makes balancing harder. If you feel that you are beginning to get shaky, then come back to a gentle equal breath before making any changes.

Remember that Vrikshasana is not about standing perfectly still. Small movements are a normal part of balancing. When calm breathing is combined with a steady drishti (fixed gaze), the body can make subtle corrections naturally, allowing the pose to feel more stable, focused, and effortless over time.

Step-by-Step Alignment

Correct alignment reduces strain on the standing knee and lower back. Follow these steps in sequence.

  • Stand tall in Tadasana (Mountain Pose) with feet hip-width apart.
  • Shift your weight onto the right foot, keeping the standing leg active but not locked.
  • Bend the left knee and place the sole of the left foot against the right inner ankle, calf, or inner thigh. Avoid placing the foot directly on the knee joint.
  • Press the lifted foot and standing leg gently into each other while keeping the pelvis level and the spine elongated. Avoid leaning the hips to one side, as balanced weight distribution creates greater stability. 
  • Bring the palms together at the chest in Anjali Mudra, or extend the arms overhead if balance feels steady.
  • Fix your gaze on a still point ahead (drishti) to support concentration.
  • Breathe steadily for 5 to 8 breaths, then release and repeat on the other side.

Why Does Drishti Improve Balance?

Drishti means fixing your gaze on a single, unmoving point. While it is a traditional yogic technique for improving concentration, modern movement science also explains why it enhances balance.

  • Supports the vestibular system: The vestibular system in the inner ear helps the body detect movement and maintain equilibrium. A steady gaze reduces unnecessary head movement, allowing this system to work more efficiently.
  • Improves visual fixation: Focusing on one fixed object gives the brain consistent visual information, reducing distractions and making it easier to maintain a stable posture.
  • Calms the nervous system: A steady gaze combined with slow, controlled breathing helps reduce unnecessary muscular tension and encourages better coordination between the brain and body during balance postures.
  • Develops yogic concentration: Traditionally, drishti is used to cultivate ekagrata (one-pointed concentration). In Vrikshasana, this focused awareness steadies both the body and the mind, transforming the posture into a meditative practice rather than just a physical balance exercise.

Instead of looking around the room, choose a fixed point at eye level about 1–2 metres ahead and keep your gaze there throughout the pose. Even experienced practitioners use drishti to improve stability and mental focus.

yoga practitioner performing tree pose

Common Mistakes Beginners Make

Most balance issues in Vrikshasana come down to a handful of avoidable habits. Recognizing these early makes the pose safer and far easier to hold.

  • Placing the foot on the knee joint — this can strain the knee ligaments; the foot should rest above or below the joint, never directly on it.
  • Locking the standing knee — this reduces the small micro-adjustments needed for balance and can strain the joint over time; keep the leg active but softly bent.
  • Holding the breath — beginners often tense up and stop breathing, which increases instability; steady, even breathing keeps the nervous system calm and the body balanced.
  • Rushing into arm variations — raising both arms overhead before the base is stable often causes wobbling and loss of alignment; master the grounded stance first.
  • Looking around the room — shifting gaze breaks concentration and balance; fixing the eyes on a single still point (drishti) helps significantly.

Beginner Modifications by Practitioner Type

Practitioner Type Recommended Modification Reason How to Apply It
Complete beginners Practice near a wall for support Builds confidence before freestanding balance and reduces fall risk while learning correct foot placement Stand with the back or side facing a wall; use light fingertip contact only if needed, and focus on keeping the standing knee soft, not locked
Office workers Place foot at calf level, not thigh (Half Tree Pose) Easier to maintain after long sitting hours, when hips and ankles are stiffer and less mobile Take a short standing break, rest the foot against the calf rather than the inner thigh, and use the pause to gently mobilize the hips before sitting back down
Seniors Use a chair for light hand support Reduces fall risk while building stability, especially important for those managing balance or joint concerns Hold the back of a sturdy chair with one hand, keep the lifted foot low (ankle or calf), and prioritize steady breathing over height of the foot placement
Students Practice barefoot on a non-slip mat Improves foot grip and proprioception, and the required drishti (fixed gaze) doubles as a pre-study focus exercise Practice on a mat rather than a slippery floor, fix the gaze on a single still point, and hold for 5–8 breaths as a short concentration reset between study sessions
Yoga teachers-in-training Practice both sides with drishti focus Builds the alignment and cueing skills needed to safely teach standing balance postures to future students Practice observing foot placement, knee alignment, and pelvis level on both sides, while also rehearsing how to verbally cue these points for a student

Practical Examples

These examples show how beginners, students, office workers, and yoga teachers can bring Vrikshasana into their everyday routines, not just onto the mat.

Office workers: After hours of sitting, the hips, ankles, and lower back often feel stiff and disconnected. Stepping away from the desk for even one minute to practice Vrikshasana against a wall can help reintroduce active balance, gently mobilize the hips, and reset posture before returning to work. It’s a small, practical break that counters the effects of prolonged sitting without requiring a full workout session.

Students preparing for exams: Review also comes with a lot of restlessness and your brain going from one idea to another. A constant drishti in Vrikshasana develops the single-point concentration required for long hours of book study and provides a useful two-to-three minute break between periods of revision. It can help tame pre-exam jitters before settling in to study when paired with a few rounds of slow, gentle breath.

Yoga teachers-in-training: For anyone working toward certification, Vrikshasana is more than a pose to master personally – it’s one of the first postures they’ll need to teach safely to others. Understanding the biomechanics involved, including correct foot placement, knee alignment, and common compensation patterns, is directly relevant to leading standing balance postures with confidence. This is exactly the kind of alignment-first teaching approach covered in foundational yoga teacher training curricula.

Seniors and rehabilitation contexts: Vrikshasana is also often introduced in gentler forms – using a chair or wall for support – to help older adults or those recovering from minor injuries rebuild confidence in single-leg balance, which is closely tied to fall prevention in daily life.

yoga teacher in tree pose

How Vrikshasana Fits into Traditional Yoga Practice

In traditional Yoga practice, Vrikshasana is more than a balance exercise. According to classical Yogic teachings, steady posture and calm awareness are essential qualities of every asana. Patanjali describes an ideal posture as one that combines steadiness (sthira) and ease (sukha) in Yoga Sutra 2.46.

Tree Pose is commonly introduced early in Hatha Yoga and Yoga Teacher Training programmes because it helps practitioners develop:

  • Physical stability before progressing to advanced balancing postures
  • Breath awareness while maintaining alignment
  • Concentration through the use of a fixed drishti (gaze point)
  • Mind-body coordination that supports both practice and teaching

Learning these foundational principles prepares students for more complex standing postures while reinforcing safe alignment habits.

How Tree Pose Is Taught in a 200 Hour Yoga Teacher Training

Postures like Vrikshasana are taught within the Asana Practice & Alignment module of our 200 Hour Yoga Teacher Training in Rishikesh – a 22-day, Yoga Alliance USA-certified residential course (RYT 200) covering Hatha and Ashtanga Vinyasa styles, open to complete beginners through intermediate practitioners. Tree Pose is typically introduced early in the training, alongside other foundational standing postures, as part of building a base for more advanced balancing work later in the course.

Because this is a teacher training and not a general yoga class, the focus goes beyond simply performing the pose correctly. Trainees learn how to verbally cue alignment for future students – pelvis level, spine elongated, standing leg active but not locked, foot placed on the inner ankle, calf, or inner thigh and never the knee joint. Batches are kept to roughly 12 – 18 students, with 3 – 4 experienced teachers per group, which allows for individual feedback on balance, drishti, and foot placement that’s difficult to give in a larger class setting.

Alignment work in this module is paired with dedicated Human Anatomy & Yogic Physiology classes, so trainees understand the underlying joint mechanics and muscle engagement behind the pose, not just its shape. Asana practice takes place both in the morning (Hatha and Vinyasa-based) and afternoon (Ashtanga-based) sessions, with anatomy and teaching methodology classes scheduled around them, so alignment principles learned in practice are reinforced the same day through theory and teaching practice. By the end of the course, graduates are equipped to teach postures like Vrikshasana safely and confidently, backed by Yoga Alliance USA (RYT 200) certification recognized internationally.

What trainees specifically learn in this module:

  • Correct and incorrect foot placement, and the joint-safety reasoning behind each
  • How to give verbal alignment cues to future students, not just perform the pose themselves
  • Hands-on correction from experienced teachers in small batches of 12–18 students
  • The anatomical and physiological basis for the pose’s alignment principles
  • How the pose fits into a broader daily sequence of Hatha, Vinyasa, and Ashtanga practice
  • Practicing both as a student and as a future instructor, including giving and receiving teaching feedback

Frequently Asked Questions

1. Is Vrikshasana suitable for complete beginners?

Yes. Vrikshasana is considered a foundational balance posture and is commonly taught early in beginner classes, provided the foot is placed correctly and support such as a wall is used when needed.

2. What’s the difference between Tree Pose and Half Tree Pose?

Half Tree Pose places the lifted foot on the calf instead of the inner thigh, offering more stability while still training the same balance and alignment skills — a good stepping stone before the full pose.

3. Can Tree Pose help with posture from sitting all day?

Yes. The pose engages the core, hips, and spine in an upright alignment, which can help counteract the rounded, seated posture common after long hours at a desk.

4. How long should a beginner hold Vrikshasana?

Beginners should aim for 5 to 8 steady breaths per side, prioritizing correct alignment over duration.

5. Is Tree Pose taught in 200-hour yoga teacher training courses?

Yes. It’s typically introduced early as a foundational standing balance posture and is part of the Asana Practice & Alignment module in Mrityunjay Yogpeeth’s 200-Hour YTT in Rishikesh.

Conclusion

Mastering Vrikshasana begins with patience, steady breathing, and consistent attention to alignment rather than holding the pose for longer periods. As balance improves, practitioners develop greater body awareness, concentration, and confidence that support both everyday movement and progression into more advanced standing postures. These foundational principles are also explored in depth during structured Yoga Teacher Training programmes, where alignment, anatomy, and teaching methodology are studied systematically. 

Understanding postures like Vrikshasana in depth is also part of building the technical and teaching foundation covered in structured Yoga Teacher Training programs.

Learning Tree Pose correctly is only the beginning of a deeper yoga journey. At Mrityunjay Yogpeeth, Vrikshasana is taught through detailed alignment, anatomy, breathing, and teaching methodology as part of our internationally recognized Yoga Teacher Training Courses. If you’re ready to move beyond simply performing poses and understand the principles behind them, explore our upcoming Yoga Alliance-certified programmes in Rishikesh.

Dr. Anirudh Gurupratap Singh

Founder & Head Teacher – Mrityunjay Yogpeeth Dr. Anirudh Gurupratap Singh is the founder, and the vision behind Mrityunjay Yogpeeth is to pass on the wisdom of yoga from great yoga masters to students of yoga. Dr. Singh is a beloved teacher, healer and guide whose life has been dedicated to the spiritual and physical uplifting of people through authentic yoga practice and Vedic tradition.

Surya Namaskar: 12 Steps, Benefits, Breathing Pattern, Mantras & Beginner Mistakes

TL;DR

Surya Namaskar, or Sun Salutation, is a complete yoga practice made up of 12 powerful asanas performed in a flowing sequence with breath awareness. It is not just a warm-up  – it improves flexibility, strengthens the body, supports weight management, balances the nervous system, and prepares the mind for meditation.

For beginners, 3-4 rounds daily are enough. With practice, you can gradually increase to 6, 12, or more rounds depending on your health and fitness goals. The most important part of Surya Namaskar is not speed, but coordination between breath, movement, and awareness.

Traditionally practised at sunrise while facing east, Surya Namaskar is a beautiful combination of physical exercise, breathwork, gratitude, and spiritual discipline.

Surya Namaskar Asanas at a Glance

Step Sanskrit Name English Name
1 Pranamasana Prayer Pose
2 Hasta Uttanasana Raised Arms Pose
3 Hasta Padasana Standing Forward Fold
4 Ashwa Sanchalanasana Equestrian Pose / Low Lunge
5 Phalakasana Plank Pose
6 Ashtanga Namaskara Eight-Limbed Salutation
7 Bhujangasana Cobra Pose
8 Adho Mukha Svanasana Downward-Facing Dog
9 Ashwa Sanchalanasana Equestrian Pose / Low Lunge
10 Hasta Padasana Standing Forward Fold
11 Hasta Uttanasana Raised Arms Pose
12 Tadasana Mountain Pose

Introduction

If there is one yoga practice that almost every beginner hears about first, it is Surya Namaskar.

Some people come to it because they want flexibility. Some come because they want weight loss. Some want a morning routine that wakes up the body. And some simply want to understand why this ancient sequence is practised in almost every yoga school across India.

But Surya Namaskar is much more than 12 physical movements.

It is a complete practice where the body moves, the breath guides, and the mind becomes steady. When performed correctly, each posture prepares the body for the next one. Each inhale creates expansion. Each exhale creates surrender. Slowly, the sequence becomes less like exercise and more like meditation in motion.

What Is Surya Namaskar?

Surya Namaskar means “salutation to the sun.”

The word “Surya” means sun, and “Namaskar” means greeting, bowing, or offering respect. Traditionally, Surya Namaskar is practised early in the morning, facing the rising sun. It is a way of expressing gratitude to the sun, which is considered the source of light, energy, and life.

In yogic tradition, the sun is not only seen as something outside us. It also represents inner energy, clarity, discipline, vitality, and consciousness.

That is why Surya Namaskar works on many levels:

It strengthens the physical body.
It improves the breath.
It awakens energy.
It calms the mind.
It builds discipline.
It prepares the body for deeper yoga practice.

Although many modern yoga classes use Sun Salutation as a warm-up, traditional Hatha and Ashtanga yoga consider it a complete practice in itself.

A single round of Surya Namaskar includes forward bends, backbends, lunges, plank, cobra, and downward dog. This means the entire body is stretched, strengthened, and energised in one continuous sequence.

Surya Namaskar Asanas at a Glance

Why Surya Namaskar Is More Than a Warm-Up

Many beginners think Surya Namaskar is only a preparation before yoga asanas. But when practised with awareness, it becomes a full-body practice.

It includes spinal movement, leg strengthening, arm balance, chest opening, core engagement, hamstring stretching, hip mobility, and breath control.

In one round, you move the body through:

Forward bending
Backward stretching
Lunging
Plank strengthening
Chest opening
Hip extension
Shoulder activation
Spinal lengthening

This is why Surya Namaskar is often called a complete yogic workout.

But its deeper benefit comes from breath coordination. Without proper breathing, the sequence becomes only physical exercise. With correct breathing, it becomes yoga.

The breath is what changes Surya Namaskar from movement into meditation.

Before You Begin: Important Preparation Notes

Before practising Surya Namaskar, keep these points in mind.

Practise on an empty stomach. Ideally, wait 3 to 4 hours after a meal.

Morning is the best time. Practising at sunrise is considered most beneficial.

Face east if possible. This follows the traditional method of greeting the rising sun.

Warm up gently. Rotate the neck, shoulders, wrists, hips, knees, and ankles before starting.

Use a non-slip yoga mat. This helps protect the wrists, knees, and feet.

Move slowly in the beginning. Speed should come only after proper alignment and breathing are learned.

Do not practise with pain. Mild stretching is fine, but sharp pain is a warning sign.

If you have high blood pressure, heart disease, hernia, recent injury, pregnancy, or severe back problems, consult a doctor and a qualified yoga teacher before practising.

The 12 Steps of Surya Namaskar

Let us now understand each posture in detail.

Step 1: Pranamasana - Prayer Pose

Steps

Stand at the front of your mat with your feet together.

Distribute your body weight equally on both feet.

Keep your spine straight and shoulders relaxed.

Bring your palms together in front of your chest in Namaskar Mudra.

Exhale gently and become aware of your breath.

Benefits

Calms the nervous system.
Improves balance and posture.
Creates focus before beginning the sequence.
Develops a feeling of gratitude and awareness.

Common Mistake

Many beginners stand casually in this pose. Keep the body active but relaxed. The feet should be grounded, the spine should be tall, and the mind should be present.

Pranamasana - Prayer Pose

Step 2: Hasta Uttanasana - Raised Arms Pose

Steps

Inhale and lift both arms above your head.

Keep your biceps close to your ears.

Stretch upward through your fingertips.

Gently arch the upper back.

Push the pelvis slightly forward without compressing the lower back.

Benefits

Opens the chest and lungs.
Stretches the abdomen and spine.
Improves breathing capacity.
Energises the body.

Common Mistake

Do not bend only from the lower back. Lengthen the whole spine first, then gently move into the backbend.

Hasta Uttanasana - Raised Arms Pose

Step 3: Hasta Padasana - Standing Forward Fold

Steps

Exhale and bend forward from the hips.

Keep the spine long as you fold down.

Place your palms beside your feet if possible.

Bend your knees slightly if your hamstrings feel tight.

Relax the head and neck.

Benefits

Stretches the hamstrings, calves, and back.
Tones the abdomen.
Improves blood circulation toward the head.
Helps reduce stiffness in the spine.

Common Mistake

Do not force your palms to the floor by rounding the back aggressively. A long spine is more important than touching the ground.

Hasta Padasana - Standing Forward Fold

Step 4: Ashwa Sanchalanasana - Equestrian Pose

Steps

Inhale and take your right leg back.

Place the right knee on the floor.

Keep the left foot between your palms.

Lift the chest forward.

Look slightly upward without straining the neck.

Benefits

Stretches the hip flexors.
Improves flexibility in the legs and spine.
Opens the chest.
Supports digestion and abdominal function.

Common Mistake

Do not let the front knee move too far beyond the ankle. Keep the knee aligned with the heel for better stability.

Ashwa Sanchalanasana - Equestrian Pose

Step 5: Phalakasana - Plank Pose

Steps

Hold the breath gently or inhale as you take the left leg back.

Keep both legs straight.

Place the shoulders above the wrists.

Keep the body in one straight line from head to heels.

Engage the abdomen lightly.

Benefits

Strengthens the arms, shoulders, core, and legs.
Improves posture.
Builds stamina.
Supports spinal stability.

Common Mistake

Avoid dropping the hips too low or lifting them too high. The body should stay straight and strong.

Phalakasana - Plank Pose

Step 6: Ashtanga Namaskara - Eight-Limbed Salutation

Steps

Exhale and lower your knees to the floor.

Bring the chest and chin down to the mat.

Keep the hips slightly raised.

Eight parts of the body touch the floor: two feet, two knees, two hands, chest, and chin.

Keep the abdomen slightly lifted.

Benefits

Strengthens the arms, shoulders, and chest.
Improves spinal flexibility.
Builds body control.
Prepares the body for Cobra Pose.

Common Mistake

Do not collapse the whole body flat on the floor. The hips should remain slightly lifted, and the abdomen should not rest fully on the mat.

Ashtanga Namaskara - Eight-Limbed Salutation

Step 7: Bhujangasana - Cobra Pose

Steps

Inhale and slide the chest forward.

Place the legs flat on the mat.

Keep the elbows bent and close to the body.

Lift the chest gently.

Keep the shoulders away from the ears.

Look forward or slightly upward.

Benefits

Strengthens the back muscles.
Opens the chest and shoulders.
Improves spinal flexibility.
Stimulates abdominal organs.
Helps reduce fatigue and dullness.

Common Mistake

Do not push too hard with the hands. Cobra should be lifted with support from the back muscles, not by forcing the spine.

Bhujangasana - Cobra Pose

Step 8: Adho Mukha Svanasana - Downward-Facing Dog

Steps

Exhale and lift the hips upward.

Form an inverted V shape with the body.

Press the palms firmly into the mat.

Lengthen the spine.

Try to move the heels toward the floor, but do not force them.

Benefits

Stretches the spine, hamstrings, calves, and shoulders.
Improves blood flow toward the head.
Strengthens the arms and legs.
Relieves stiffness in the back.

Common Mistake

Do not round the spine just to bring the heels down. Keep the spine long. Bent knees are acceptable for beginners.

Adho Mukha Svanasana - Downward-Facing Dog

Step 9: Ashwa Sanchalanasana - Equestrian Pose

Steps

Inhale and bring the right foot forward between your palms.

Lower the left knee to the floor.

Lift the chest.

Look forward gently.

Keep the front knee aligned with the ankle.

Benefits

Opens the opposite hip flexor.
Improves balance and coordination.
Stretches the thighs and groin.
Stimulates digestion.

Common Mistake

Beginners often struggle to bring the foot forward in one step. It is completely fine to use the hand to adjust the foot position.

Ashwa Sanchalanasana - Equestrian Pose

Step 10: Hasta Padasana - Standing Forward Fold

Steps

Exhale and bring the left foot forward.

Keep both feet together.

Place the palms beside the feet if possible.

Relax the head and neck.

Keep the knees bent if needed.

Benefits

Stretches the back body.
Improves flexibility in the legs.
Massages the abdominal region.
Calms the mind.

Common Mistake

Do not lock the knees forcefully. Soft knees protect the lower back and allow a safer forward fold.

Hasta Padasana - Standing Forward Fold

Step 11: Hasta Uttanasana - Raised Arms Pose

Steps

Inhale and slowly rise.

Lift the arms above the head.

Stretch the whole body upward.

Gently arch back from the upper spine.

Keep the core lightly engaged.

Benefits

Opens the chest.
Improves lung expansion.
Stretches the abdomen.
Restores energy after the forward fold.

Common Mistake

Do not come up too quickly. Rise slowly with the inhale to avoid dizziness.

Hasta Uttanasana - Raised Arms Pose

Step 12: Tadasana - Mountain Pose

Steps

Exhale and bring the arms down beside the body.

Stand tall with feet grounded.

Relax the shoulders.

Observe the breath and body sensations.

Allow the round to complete.

Benefits

Balances the body.
Relaxes the nervous system.
Improves posture.
Helps you feel the effect of the sequence.

Common Mistake

Do not immediately rush into the next round. Take a brief pause and let the breath settle.

Tadasana - Mountain Pose

Complete Breathing Pattern of Surya Namaskar

Breathing is the soul of Surya Namaskar. The general rule is simple:

Inhale when the body opens or expands.

Exhale when the body folds or contracts.

Step Pose Breath
1 Pranamasana Exhale
2 Hasta Uttanasana Inhale
3 Hasta Padasana Exhale
4 Ashwa Sanchalanasana Inhale
5 Phalakasana Hold / Inhale
6 Ashtanga Namaskara Exhale
7 Bhujangasana Inhale
8 Adho Mukha Svanasana Exhale
9 Ashwa Sanchalanasana Inhale
10 Hasta Padasana Exhale
11 Hasta Uttanasana Inhale
12 Tadasana Exhale

When the breath becomes smooth, the movement becomes smooth. When the movement becomes smooth, the mind becomes calm.

That is the real beauty of Surya Namaskar.

How Many Rounds of Surya Namaskar Should You Do?

The number of rounds depends on your experience, strength, and purpose.

For beginners: 3 to 4 rounds daily are enough.

For general health: 6 to 12 rounds can be practised regularly.

For weight management: 12 to 24 rounds may be helpful when combined with proper diet and lifestyle.

For advanced practitioners: 54 or 108 rounds may be practised occasionally under guidance.

Do not increase rounds too quickly. The body needs time to adapt.

It is better to practise 4 mindful rounds every day than 20 rushed rounds once a week.

Best Time to Practise Surya Namaskar

The best time to practise Surya Namaskar is early morning, preferably during sunrise.

Morning practice helps awaken the body, activate circulation, improve digestion, and create mental clarity for the day.

Traditionally, it is practised facing east to honour the rising sun.

You can also practise in the evening, but avoid doing it immediately after meals or when the body is extremely tired.

Best Time to Practise Surya Namaskar

12 Surya Namaskar Mantras

Each step of Surya Namaskar can be connected with a mantra dedicated to the sun. These mantras add a spiritual and meditative dimension to the practice.

  1. Om Mitraya Namaha  – Salutations to the friend of all
  2. Om Ravaye Namaha – Salutations to the shining one
  3. Om Suryaya Namaha – Salutations to the source of energy
  4. Om Bhanave Namaha – Salutations to the one who illuminates
  5. Om Khagaya Namaha – Salutations to the one who moves through the sky
  6. Om Pushne Namaha – Salutations to the giver of strength
  7. Om Hiranyagarbhaya Namaha – Salutations to the golden cosmic self
  8. Om Marichaye Namaha – Salutations to the rays of the sun
  9. Om Adityaya Namaha – Salutations to the son of Aditi
  10. Om Savitre Namaha – Salutations to the stimulating power of the sun
  11. Om Arkaya Namaha  – Salutations to the one worthy of praise
  12. Om Bhaskaraya Namaha  – Salutations to the giver of wisdom and light

You do not need to chant loudly. Beginners can simply repeat the mantras mentally or practise with awareness of gratitude.

Health Benefits of Surya Namaskar

Physical Benefits

  • Strengthens the full body.
  • Improves flexibility in the spine, hips, hamstrings, and shoulders.
  • Tones the abdomen, arms, legs, and back.
  • Supports healthy weight management.
  • Improves posture and body alignment.
  • Enhances blood circulation.
  • Supports digestion and metabolism.
  • Improves cardiovascular endurance when practised regularly.

Mental Benefits

  • Improves focus and concentration.
  • Reduces stress and restlessness.
  • Creates mental clarity.
  • Balances the nervous system.
  • Builds discipline and consistency.
  • Helps develop breath awareness.

Spiritual Benefits

  • Creates gratitude toward the sun.
  • Builds awareness of body and breath.
  • Prepares the mind for meditation.
  • Connects movement with mantra and intention.
  • Encourages inner discipline and self-observation.
Health Benefits of Surya Namaskar

Is Surya Namaskar Good for Weight Loss?

Yes, Surya Namaskar can support weight loss when practised consistently along with a balanced diet and healthy lifestyle.

Because it involves continuous movement, it increases heart rate, improves metabolism, strengthens muscles, and burns calories. But the real benefit is not only calorie burning.

Surya Namaskar also supports digestion, hormonal balance, discipline, and body awareness — all of which are important for long-term weight management.

For weight loss, beginners can start with 4 to 6 rounds and slowly increase to 12 rounds or more as stamina improves.

Never sacrifice alignment for speed. Fast but incorrect practice can lead to injury.

Who Should Avoid or Modify Surya Namaskar?

Surya Namaskar is powerful, but it is not suitable for everyone in the same way.

Be cautious if you have:

Recent wrist injury
Knee pain
Lower back pain
Slip disc
High blood pressure
Heart condition
Hernia
Glaucoma
Pregnancy
Severe arthritis
Recent surgery

Pregnant women should avoid traditional Surya Namaskar after the first trimester unless guided by an experienced prenatal yoga teacher.

People with medical conditions should consult a doctor before starting.

Yoga should heal the body, not strain it.

5 Common Mistakes Beginners Make in Surya Namaskar

1. Moving Too Fast

Many beginners rush through the sequence because they think faster means better. But speed without awareness turns Surya Namaskar into a mechanical exercise.

Move slowly first. Speed can come later.

2. Forgetting the Breath

The breath is what connects the postures. Without breath awareness, the practice loses its yogic quality.

Remember: inhale when opening, exhale when folding.

3. Forcing Flexibility

You do not need to touch the floor in Forward Fold or bring the heels down in Downward Dog on the first day.

Use modifications. Bend the knees. Respect your body.

4. Collapsing the Lower Back

In Raised Arms Pose and Cobra Pose, many students compress the lower back. Keep the core active and lengthen the spine before bending.

5. Practising Inconsistently

One intense session a week will not give the same benefit as a few mindful rounds daily.

Consistency is more important than intensity.

Beginner Modifications for Surya Namaskar

If you are new to the practice, use these simple modifications:

  • Bend your knees in Hasta Padasana.
  • Keep the back knee down in Ashwa Sanchalanasana.
  • Hold Plank for a shorter time.
  • Keep Cobra low instead of lifting high.
  • Bend the knees in Downward-Facing Dog.
  • Move slowly between poses.
  • Rest after each round if needed.

These modifications do not make the practice less effective. They make it safer and more intelligent.

FAQs About Surya Namaskar

What is Surya Namaskar?

Surya Namaskar is a sequence of 12 yoga poses performed in a flowing order with coordinated breathing. It is also known as Sun Salutation and is traditionally practised at sunrise.

How many steps are there in Surya Namaskar?

There are 12 steps in one round of Surya Namaskar. These include Prayer Pose, Raised Arms Pose, Forward Fold, Low Lunge, Plank, Eight-Limbed Salutation, Cobra, Downward-Facing Dog, and returning poses.

Can beginners do Surya Namaskar?

Yes, beginners can practise Surya Namaskar. Start with 3 to 4 slow rounds and use modifications such as bending the knees or keeping Cobra low.

What is the best time to do Surya Namaskar?

The best time is early morning during sunrise, preferably on an empty stomach and facing east.

Is Surya Namaskar good for weight loss?

Yes, regular practice can support weight loss by improving metabolism, burning calories, strengthening muscles, and improving digestion.

How many rounds of Surya Namaskar should I do daily?

Beginners can start with 3 to 4 rounds. For general fitness, 6 to 12 rounds are good. Advanced practitioners may do more under guidance.

Can I do Surya Namaskar every day?

Yes, Surya Namaskar can be practised daily if your body feels comfortable and you do not have any medical restrictions.

Should Surya Namaskar be done fast or slow?

Beginners should practise slowly with correct breathing and alignment. Faster rounds can be done later for stamina and fitness.

Who should not do Surya Namaskar?

People with serious back pain, wrist injury, knee injury, hernia, high blood pressure, heart problems, or pregnancy should consult a doctor or yoga teacher before practising.

What is one complete round of Surya Namaskar?

One complete round usually includes the 12 poses performed once, beginning with one leg going back and then repeating with the opposite leg for balance.

Conclusion

Surya Namaskar is one of the most complete and powerful practices in yoga. It strengthens the body, improves flexibility, balances the breath, calms the mind, and builds inner discipline.

But to receive its full benefits, it must be practised with awareness.

Do not rush. Do not force. Do not compare your body with anyone else.

Start with a few rounds. Learn the correct alignment. Coordinate each movement with the breath. Over time, Surya Namaskar becomes more than a morning routine — it becomes a daily ritual of energy, gratitude, and self-connection.

Whether your goal is fitness, flexibility, weight loss, or spiritual growth, Surya Namaskar gives you a complete foundation for a balanced yoga practice.

Dr. Anirudh Gurupratap Singh

Founder & Head Teacher – Mrityunjay Yogpeeth Dr. Anirudh Gurupratap Singh is the founder, and the vision behind Mrityunjay Yogpeeth is to pass on the wisdom of yoga from great yoga masters to students of yoga. Dr. Singh is a beloved teacher, healer and guide whose life has been dedicated to the spiritual and physical uplifting of people through authentic yoga practice and Vedic tradition.

Butterfly Pose, or Baddha Konasana: Benefits, Steps, Variations, Precautions, and Beginner-Friendly Practice Guide

Butterfly Pose, or Baddha Konasana

What Is Butterfly Pose, or Baddha Konasana?

Butterfly Pose, or Baddha Konasana, is a seated yoga posture where the soles of the feet come together, the knees open out to the sides, and the spine stays tall. It is also commonly called the Bound Angle Pose, Cobbler’s Pose, or the butterfly stretch. In Sanskrit, “Baddha” means bound, “Kona” means angle, and “Asana” means posture.

This pose is widely practiced in yoga, mobility routines, warm-ups, cool-downs, prenatal yoga, meditation, and stretching sessions because it targets the hips, groin, inner thighs, and lower back. Yoga Journal describes Baddha Konasana as a go-to posture for opening the hips and stretching the inner thighs, while also encouraging an upright spine and active core engagement.

At first glance, Butterfly Pose looks simple. You sit down, bring your feet together, and let your knees fall open. But when practiced mindfully, it becomes much more than a basic stretch. It teaches you how to sit with awareness, lengthen the spine, soften unnecessary tension, breathe into tight areas, and create more comfort in the hips and pelvis.

For many people, especially those who sit for long hours, drive frequently, work at a desk, or exercise intensely, the hips and inner thighs can become stiff. Cleveland Clinic notes that tight hips are common and that stretching and strengthening the hips can help improve flexibility and relieve pressure. Butterfly Pose is one of the most accessible ways to begin working with that tightness.

This guide explains everything you need to know about Butterfly Pose, or Baddha Konasana: how to do it safely, what muscles it affects, its benefits, common mistakes, variations, contraindications, and how to include it in your yoga practice.

What Is Butterfly Pose Good For?

Butterfly Pose is mainly used to stretch the inner thighs, groin, hips, and lower back. It may help improve hip mobility, support better seated posture, reduce stiffness from prolonged sitting, and prepare the body for meditation or deeper yoga poses. It is beginner-friendly, but people with knee, hip, groin, or lower-back injuries should practice with props or guidance.

The pose is especially useful for:

  • Tight hips
  • Inner thigh stiffness
  • Groin mobility
  • Seated posture awareness
  • Gentle lower-body stretching
  • Relaxation and breath awareness
  • Preparation for meditation
  • Beginner yoga practice

However, Butterfly Pose should not be forced. The knees do not need to touch the floor. The goal is not to “look flexible,” but to create a safe, sustainable stretch.

Yoga Student Performing Butterfly Pose

How to Do Butterfly Pose, or Baddha Konasana: Step-by-Step Instructions

Step 1: Sit on the floor

Begin seated on a yoga mat or firm surface. Extend your legs forward in front of you. Sit evenly on both sitting bones. If your lower back rounds or your knees lift very high, sit on a folded blanket, cushion, or yoga block.

This small lift can make the pose much more comfortable because it tilts the pelvis slightly forward and helps the spine lengthen.

Step 2: Bend your knees

Bend both knees and bring the soles of your feet together. Let your knees open out to the sides. Your legs will form a diamond-like shape.

Do not push your knees down with your hands. Let gravity and breath do most of the work.

Step 3: Adjust the distance of your feet

Bring your heels toward your pelvis only as much as feels comfortable. The closer the heels are to the body, the more intense the stretch may feel in the groin and inner thighs. Moving the feet farther away usually makes the pose gentler.

A common beginner-friendly version is to keep the feet slightly forward, creating a wider diamond shape.

Step 4: Hold your feet or ankles

Hold your feet, ankles, or shins. Choose the position that allows your shoulders to relax and your spine to stay upright.

Avoid pulling aggressively on the feet. Your hands are there for support, not force.

Step 5: Lengthen your spine

Sit tall. Imagine the crown of your head rising upward. Keep your chest open, shoulders relaxed, and neck long.

Yoga Journal emphasizes the role of the core and back muscles in this pose, especially because they help prevent the spine from rounding and the chest from collapsing.

Step 6: Relax the thighs and hips

Allow the knees to soften toward the floor naturally. They do not need to touch the ground. For many bodies, the knees will remain high, and that is completely normal.

Use blocks, cushions, or folded blankets under the knees if there is strain.

Step 7: Breathe slowly

Take slow, steady breaths. Inhale to lengthen the spine. Exhale to soften the hips, inner thighs, and jaw.

Stay for 30 seconds to 2 minutes if you are a beginner. More experienced practitioners may hold the pose longer, especially in restorative or yin-style practices.

Step 8: Come out gently

To exit, use your hands to help bring your knees together. Extend your legs forward and gently shake them out.

Avoid snapping the knees closed or rushing out of the pose, especially if you have held it for a long time.

Proper Alignment in Butterfly Pose

Good alignment in Butterfly Pose is not about forcing the knees down. It is about creating a stable, comfortable, and spacious position.

Here are the main alignment points:

Spine: Keep the spine long rather than collapsed. If your lower back rounds, sit on a height.

Pelvis: Try to sit on the front edge of the sitting bones. A slight forward tilt of the pelvis helps reduce strain in the lower back.

Feet: Press the outer edges of the feet gently together. The soles may face upward slightly, but avoid twisting the ankles uncomfortably.

Knees: Let the knees open naturally. Support them if they hover high or feel strained.

Shoulders: Keep the shoulders soft and away from the ears.

Neck: Keep the head balanced over the spine instead of jutting the chin forward.

Breath: Keep breathing smoothly. If the breath becomes tight, the pose is probably too intense.

Student Performing Butterfly Pose

Muscles Worked and Stretched in Butterfly Pose

Butterfly Pose primarily stretches and mobilizes the lower body. It is especially known as a hip-opening posture.

The main areas involved include:

Inner thighs

The inner thigh muscles, also called the adductors, are strongly involved. These muscles help draw the legs toward the midline of the body. When the knees open outward in Butterfly Pose, the inner thighs lengthen.

Groin

The groin area receives a noticeable stretch. This is why many athletes, runners, dancers, and people with tight hips use the butterfly stretch in mobility routines.

Hips

The pose encourages external rotation at the hips. This makes it useful for people who feel restricted in cross-legged sitting, squats, lunges, or seated meditation.

Lower back

When practiced with proper support, Butterfly Pose may help ease general lower-back stiffness by encouraging a more balanced seated position. But if the spine rounds heavily or the practitioner forces forward, it may aggravate discomfort. Support is important.

Pelvic floor region

Some physical therapy and movement resources describe the butterfly stretch as relevant for the groin and pelvic floor region, though individual needs vary, and anyone with pelvic pain should seek professional guidance. Hinge Health describes the butterfly stretch as a movement that can improve flexibility in the inner thighs, groin, and pelvic floor region.

Benefits of Butterfly Pose, or Baddha Konasana

1. Stretches the inner thighs and groin

The most obvious benefit of Butterfly Pose is the stretch it provides to the inner thighs and groin. This can be especially helpful for people who feel tight after sitting, running, cycling, strength training, or long travel.

Because the pose is seated and easy to modify, it is accessible for many beginners.

2. Improves hip mobility

Butterfly Pose encourages the hips to externally rotate. Over time, this may support better mobility in other movements, such as squats, lunges, seated poses, and cross-legged sitting.

Cleveland Clinic highlights hip-opening stretches as a way to improve flexibility and reduce pressure in tight hips. Butterfly Pose fits naturally into that category.

3. Supports better posture

Although many people think of Baddha Konasana only as a hip stretch, it also teaches upright sitting. To sit tall in the pose, the spine, core, and back muscles must participate.

If you collapse the chest, round the back, and drop the head, the pose becomes less effective and may strain the lower back. But when practiced with height under the hips, it can encourage better awareness of spinal alignment.

4. Helps counteract prolonged sitting

Long hours of sitting can contribute to tight hips, stiff inner thighs, and poor posture. Butterfly Pose offers a simple way to open the front and inner hip region after a sedentary day.

This does not mean one stretch can erase all the effects of sitting. Movement variety matters. But adding Butterfly Pose to a daily routine can be a useful starting point.

5. May help with relaxation

Butterfly Pose can be practiced actively or passively. In a more restorative version, you can support the knees with cushions and focus on slow breathing. This makes the pose calming and grounding.

The National Center for Complementary and Integrative Health notes that yoga research suggests possible benefits for stress management, mental and emotional health, sleep, balance, and general wellness. Butterfly Pose, when practiced gently, can be part of a calming yoga routine.

6. Prepares the body for meditation

Many meditation postures require comfortable hip opening and an upright spine. Baddha Konasana can help prepare the body for seated meditation by gradually opening the hips and training postural awareness.

For people who struggle to sit cross-legged, Butterfly Pose with props can be a useful alternative.

7. Useful in warm-ups and cool-downs

Butterfly Pose can be used before a yoga flow to prepare the hips, or after exercise to stretch the inner thighs and groin. Cleveland Clinic notes that stretching can support flexibility and balance when used as part of a routine or warm-up and cool-down.

For a warm-up, keep it dynamic and gentle. For a cool-down, hold it still and breathe slowly.

8. Beginner-friendly and easy to modify

One reason Butterfly Pose is so popular is that it can be adapted for different bodies. You can sit on a blanket, place blocks under the knees, move the feet farther forward, practice against a wall, or try a reclined version.

The pose does not require advanced strength or balance, making it suitable for many beginners when practiced carefully.

yoga student performing baddha konasana

Common Mistakes in Butterfly Pose

Mistake 1: Forcing the knees down

This is the most common mistake. Many people press their knees toward the floor, thinking that deeper is better. This can strain the knees, hips, groin, or inner thighs.

Instead, let the knees descend naturally. Support them with blocks or cushions if needed.

Mistake 2: Rounding the lower back

If your pelvis tilts backward, your lower back may round. This can create discomfort and reduce the benefits of the pose.

Sit on a folded blanket or cushion to elevate the hips. This often makes the pose immediately more accessible.

Mistake 3: Pulling the feet too close

Bringing the heels close to the pelvis creates a stronger stretch. But for tight hips, it may be too intense. Move the feet farther away to reduce pressure.

Mistake 4: Holding the breath

Tension in the hips often causes people to hold their breath. Keep the breath smooth. If you cannot breathe comfortably, reduce the intensity.

Mistake 5: Bouncing aggressively

Some people flap their knees rapidly like butterfly wings. A gentle dynamic movement may be fine as a warm-up, but aggressive bouncing can irritate the joints or muscles.

Use slow, controlled movement instead.

Mistake 6: Ignoring pain

A stretch may feel intense, but it should not feel sharp, pinching, burning, or painful. Pain is a signal to stop, adjust, or come out of the pose.

Butterfly Pose for Beginners

If you are new to yoga or have tight hips, practice Butterfly Pose with support from the beginning. You do not need to wait until you feel discomfort.

Try this beginner version:

  1. Sit on a folded blanket or firm cushion.
  2. Bring the soles of your feet together.
  3. Move your feet slightly away from your pelvis.
  4. Place yoga blocks, pillows, or rolled blankets under your knees.
  5. Hold your ankles or shins.
  6. Sit tall and breathe for 30 seconds.
  7. Come out slowly and stretch your legs forward.

Repeat 2 to 3 times.

The key is consistency. A gentle version practiced regularly is usually more effective than an intense version practiced occasionally.

Butterfly Pose Variations

1. Supported Butterfly Pose

This is the best variation for beginners, tight hips, knee sensitivity, or restorative practice.

Place cushions, yoga blocks, or folded blankets under both knees. Sit on a folded blanket if the lower back rounds. Let the body relax while maintaining a comfortable upright position.

This variation reduces strain and allows the nervous system to settle.

2. Dynamic Butterfly Pose

In this version, you gently move the knees up and down like butterfly wings.

Sit tall, hold the feet or ankles, and slowly lift and lower the knees. Keep the movement small and controlled. Do not bounce forcefully.

The Dynamic Butterfly Pose can be useful as a warm-up before deeper hip-opening postures.

3. Forward Fold Butterfly Pose

From seated Butterfly Pose, inhale to lengthen the spine. As you exhale, hinge slightly forward from the hips.

Keep the back long at first. Do not force the head toward the feet. You can rest your elbows on your thighs or place a bolster in front of you for support.

This variation intensifies the stretch, so it is not necessary for beginners.

4. Reclined Butterfly Pose

Lie on your back and bring the soles of your feet together. Let the knees open out to the sides. Support the knees with pillows or blocks.

This version is often called Supta Baddha Konasana, or Reclined Bound Angle Pose. It is commonly used in restorative yoga and relaxation practices.

5. Wall-Supported Butterfly Pose

Sit with your back against a wall. Bring the soles of the feet together and let the knees open.

The wall helps keep the spine upright, making this a useful option for people who tend to slump.

6. Chair Butterfly Variation

Sit on the edge of a chair. Bring the soles of the feet together if possible, or place the feet wider than hip-width and let the knees open outward.

This is a gentler option for people who cannot comfortably sit on the floor.

Student Performing Baddha Konasana

How Long Should You Hold Butterfly Pose?

For beginners, hold Butterfly Pose for 30 seconds to 1 minute. As comfort improves, you can gradually increase to 2 to 5 minutes, especially in restorative or yin-style practice.

A practical guideline:

  • Warm-up: 20 to 30 seconds with gentle movement
  • Cool-down: 1 to 2 minutes still
  • Restorative practice: 3 to 5 minutes with props
  • Meditation prep: 2 to 5 minutes with support

Longer is not automatically better. The quality of breath, comfort, and alignment matter more than duration.

When Is the Best Time to practice the Butterfly Pose?

You can practice the Butterfly Pose at different times depending on your goal.

Morning

Use it gently in the morning to loosen the hips and prepare the body for the day. Keep the hold shorter because the body may feel stiffer after sleep.

After sitting

Practice Butterfly Pose after long work sessions, travel, or driving. It can help you reconnect with the hips and lower back.

Before yoga

Use a dynamic version to warm up the hips before seated poses, lunges, or hip-opening sequences.

After exercise

Use a supported still version after workouts to stretch the inner thighs and groin.

Before meditation or sleep

Use a supported or reclined version with slow breathing to calm the body and mind.

Butterfly Pose Breathing Technique

Breathing is what turns Butterfly Pose from a stretch into a yoga posture.

Try this simple breathing pattern:

  1. Inhale through the nose and lengthen the spine.
  2. Exhale slowly and soften the inner thighs.
  3. Inhale and broaden the chest.
  4. Exhale and relax the jaw, shoulders, and hips.
  5. Continue for 5 to 10 breaths.

Avoid forcing the stretch during the exhale. Think of releasing tension rather than pushing the knees down.

man doing butterfly pose

Precautions and Contraindications

Butterfly Pose is beginner-friendly, but it is not automatically suitable for everybody. Practice with care if you have any of the following:

  • Knee injury or knee pain
  • Hip injury or hip replacement history
  • Groin strain
  • Severe sciatica
  • Lower-back pain aggravated by sitting
  • Pelvic pain
  • Recent surgery
  • Pregnancy-related discomfort
  • Arthritis affecting the hips or knees

NCCIH advises that older adults and people with medical issues should talk with their healthcare providers and yoga teachers before starting yoga, especially to learn appropriate modifications and safe form.

Also remember that yoga is a complementary wellness practice, not a substitute for medical diagnosis or treatment. If you have persistent pain, numbness, tingling, swelling, or injury-related symptoms, consult a qualified healthcare professional.

Is Butterfly Pose Safe During Pregnancy?

Butterfly Pose is often used in prenatal yoga, but pregnancy changes the body significantly. Hormonal changes, pelvic pressure, balance changes, and individual medical conditions all matter.

A supported version may feel comfortable for some pregnant practitioners, especially when sitting on a cushion and supporting the knees. However, deep forward folding, forcing the knees down, or holding intense stretches for too long may not be appropriate.

Pregnant practitioners should work with a qualified prenatal yoga teacher and consult their healthcare provider, particularly if they have pelvic girdle pain, symphysis pubis dysfunction, bleeding, high-risk pregnancy, or medical restrictions.

Butterfly Pose for Tight Hips

If you have tight hips, Butterfly Pose may feel intense even before you begin folding forward. That is normal.

Use these tips:

  • Sit higher on a blanket or cushion.
  • Move the feet farther away from the pelvis.
  • Place support under both knees.
  • Keep the spine upright instead of folding forward.
  • Hold for shorter periods.
  • Practice consistently rather than aggressively.

Many people make the mistake of trying to “open” the hips quickly. Hip mobility develops gradually. Forcing can cause irritation or injury.

A good tight-hip practice might look like this:

  1. Seated Butterfly Pose with support – 1 minute
  2. Gentle dynamic knee movement – 30 seconds
  3. Supported still hold – 1 minute
  4. Rest with legs extended – 30 seconds

Repeat daily or several times per week.

Butterfly Pose for Knee Pain: What to Know

If you feel Butterfly Pose in your knees more than your hips or inner thighs, adjust immediately. The knees should not be the main site of sensation.

Try these modifications:

  • Place blocks or pillows under the knees.
  • Move the feet farther forward.
  • Sit on a higher support.
  • Avoid pressing the knees down.
  • Keep the stretch mild.
  • Come out if there is sharp or twisting pain.

The knees are hinge joints, and they do not like being forced into positions created by tight hips. If the hips are restricted, the knees may take the pressure. Support prevents this.

yoga teacher performing butterfly pose

Butterfly Pose vs. Cobbler’s Pose vs. Bound Angle Pose

These names are often used interchangeably:

Butterfly Pose: The common fitness and yoga name. It often refers to the seated posture with soles together and knees open. Sometimes it includes gentle knee movement.

Baddha Konasana: The Sanskrit name used in yoga traditions.

Bound Angle Pose: The English translation of Baddha Konasana.

Cobbler’s Pose: A traditional name inspired by the seated position associated with cobblers.

In many modern yoga classes, all four terms refer to the same basic posture.

Active vs. Passive Butterfly Pose

Butterfly Pose can be practiced actively or passively.

Active Butterfly Pose

In the active version, you sit tall, engage the core, lengthen the spine, and maintain an alert posture. This version is useful for building postural strength and awareness.

Passive Butterfly Pose

In the passive version, you use props and allow the body to soften. This version is common in restorative and yin yoga. It is useful for relaxation and longer holds.

Neither version is better. Choose based on your goal.

Use the active Butterfly Pose when you want posture and strength. Use the passive Butterfly Pose when you want release and relaxation.

A 10-Minute Butterfly Pose Practice for Beginners

Here is a simple beginner-friendly practice:

Minute 1: Easy seated breathing

Sit on a blanket or cushion. Cross the legs or extend them forward. Breathe slowly.

Minutes 2 – 3: Gentle hip warm-up

Bend and straighten the knees. Move the legs side to side. Keep everything gentle.

Minutes 4 – 5: Supported Butterfly Pose

Bring the soles of the feet together. Place blocks or cushions under the knees. Sit tall and breathe.

Minute 6: Dynamic Butterfly

Gently lift and lower the knees in a small range. Move slowly.

Minutes 7 – 8: Still Butterfly Hold

Return to stillness. Inhale to lengthen the spine. Exhale to soften the hips.

Minute 9: Optional gentle forward hinge

Hinge forward slightly only if comfortable. Keep the spine long.

Minute 10: Release and rest

Bring the knees together. Extend the legs forward. Shake them out and notice how the hips feel.

Who Should Practice Butterfly Pose?

Butterfly Pose may be helpful for:

  • Beginners learning seated yoga
  • Desk workers with tight hips
  • Runners and cyclists with inner thigh stiffness
  • People preparing for meditation
  • Yoga practitioners working on hip mobility
  • Anyone wanting a gentle lower-body stretch

It may not be appropriate, or may require professional guidance, for:

  • People with acute knee injuries
  • People with hip joint injuries
  • People recovering from groin strains
  • People with severe lower-back pain
  • People with pelvic pain conditions
  • Pregnant practitioners with complications
  • Older adults with mobility limitations, unless modified

Yoga can be broadly beneficial for wellness, but safety and individualization matter. NCCIH notes that yoga may support multiple areas of wellness, but people with health conditions should practice appropriately and seek guidance when needed.

yoga practitioner performing butterfly pose

Expert Tips for Better Practice

Use props before you need them

Props are not a sign of weakness. They help the body relax and align safely.

Keep the pose pain-free

A mild stretch is fine. Sharp pain is not.

Prioritize the spine

If sitting upright is difficult, elevate the hips. A tall spine is more important than low knees.

Let gravity work

Do not push. Over time, the hips may soften naturally.

Practice regularly

Short, consistent practice is usually better than occasional intense stretching.

Combine with strengthening

Flexibility is useful, but the hips also need strength. Pair Butterfly Pose with gentle hip and glute strengthening for balanced mobility.

Frequently Asked Questions About Butterfly Pose, or Baddha Konasana

Is Butterfly Pose good for beginners?
Yes. Butterfly Pose is generally beginner-friendly because it is seated, simple to understand, and easy to modify. Beginners should sit on a cushion and support the knees if the hips feel tight.
Why do my knees stay high in Butterfly Pose?
High knees usually mean the hips or inner thighs are tight, or your pelvis is tilting backward. Sit on a folded blanket and place blocks under your knees. There is no need to force the knees down.
Should my knees touch the floor?
No. Your knees do not need to touch the floor. The purpose of the pose is to create a safe stretch, not to achieve a specific shape.
Can I do Butterfly Pose every day?
Many people can practice a gentle version daily, especially with props. However, if you feel pain or soreness, reduce the intensity or frequency.
How long should I hold Butterfly Pose?
Beginners can start with 30 seconds to 1 minute. With experience and support, you may hold it for 2 to 5 minutes.
Is Butterfly Pose good for hip flexibility?
Yes, it can support hip flexibility because it stretches the inner thighs and encourages external rotation of the hips. It works best when practiced consistently and without force.
Can Butterfly Pose help lower-back pain?
It may help some people reduce stiffness, especially when supported properly. But if sitting in the pose worsens lower-back pain, use props, reduce the hold, or consult a healthcare professional.
Is Butterfly Pose the same as Baddha Konasana?
Yes. Butterfly Pose is a common English name for Baddha Konasana. It is also called Bound Angle Pose or Cobbler’s Pose.
Can I fold forward in Butterfly Pose?
Yes, but only if your hips and back allow it comfortably. Hinge from the hips rather than rounding aggressively. Beginners should first learn the upright version.
What should I feel in Butterfly Pose?
You may feel a stretch in the inner thighs, groin, and hips. You should not feel sharp pain in the knees, hips, or lower back.

Final Thoughts

Butterfly Pose, or Baddha Konasana, is one of the most useful seated yoga postures for beginners and experienced practitioners alike. It stretches the inner thighs, opens the hips, encourages upright posture, and can help the body settle into stillness. It is simple enough to practice at home, yet subtle enough to teach patience, body awareness, and breath control.

The most important lesson of Butterfly Pose is not how close your knees get to the floor. It is how well you listen to your body. A safe, supported version of the pose is far more valuable than a forced version that creates strain.

Use props generously. Keep the spine long. Breathe slowly. Let the hips open gradually. Whether you practice it after a long day of sitting, before meditation, after a workout, or as part of a yoga sequence, Baddha Konasana can become a grounding and reliable posture in your wellness routine.

Dr. Anirudh Gurupratap Singh

Founder & Head Teacher – Mrityunjay Yogpeeth Dr. Anirudh Gurupratap Singh is the founder, and the vision behind Mrityunjay Yogpeeth is to pass on the wisdom of yoga from great yoga masters to students of yoga. Dr. Singh is a beloved teacher, healer and guide whose life has been dedicated to the spiritual and physical uplifting of people through authentic yoga practice and Vedic tradition.

Mantras: Meaning, Types, Benefits, Spiritual Power, and How to Chant Correctly

Mantras: Meaning, Types, Benefits

TL;DR

Mantras are repeated sounds, words, or phrases used to focus the mind, calm thoughts, and support meditation or spiritual practice. The word “mantra” comes from Sanskrit: “man” means mind, and “tra” means tool or instrument, so a mantra is often understood as a tool for the mind.

People chant mantras to improve concentration, reduce mental restlessness, support emotional balance, deepen meditation, and connect with spiritual awareness. Beginners can start with simple mantras like Om, So Hum, Om Shanti, I am calm, or I am present for 5–10 minutes daily.

Mantras may support relaxation and mindfulness, but they should not be used as a replacement for medical treatment, therapy, or professional mental health care.

What Are Mantras?

A mantra is a sound, syllable, word, or phrase that is repeated during meditation, prayer, or spiritual practice. Its main purpose is to give the mind a steady focal point.

When the mind becomes distracted, the mantra acts like an anchor. Instead of following every thought, you gently return your attention to the repeated sound or phrase.

In simple words:

A mantra is a repeated sound or phrase used to focus the mind and create inner calm.

Mantras can be chanted aloud, whispered, or repeated silently in the mind. Some mantras come from ancient spiritual traditions, while others are simple personal phrases used for mindfulness and self-awareness.

What is the Meaning of a mantra?

The word mantra comes from Sanskrit.

  • Man means mind.
  • Tra means tool, instrument, or vehicle.

So, the meaning of mantra is often explained as:

A tool for the mind.

This meaning is important because mantras are not just ordinary words. They are used intentionally to guide the mind away from distraction and toward focus, peace, and awareness.

Why Do People Chant Mantras?

People chant mantras for different reasons. Some use them as part of spiritual practice, while others use them for meditation, stress relief, emotional balance, or better focus.

Common reasons include:

Purpose How Mantras May Help
Meditation Give the mind one clear point of focus
Stress relief Support slow breathing and relaxation
Focus Reduce wandering thoughts
Emotional balance Create a calming daily routine
Spiritual growth Deepen devotion, awareness, or inner connection
Mindfulness Bring attention back to the present moment
Self-discipline Build consistency through daily practice

The power of mantra practice comes from repetition, attention, rhythm, and intention.

Historical and Spiritual Origins of Mantras

Mantras have deep roots in ancient Indian spiritual traditions. They are especially connected with the Vedas, Upanishads, yoga, tantra, and devotional practices.

In Vedic tradition, mantras were passed down orally from teacher to student. Pronunciation, rhythm, and tone were considered important because the sound pattern itself was believed to carry spiritual meaning.

In yogic traditions, mantras are used to calm the mind and support higher awareness. In devotional traditions, mantras are often associated with a deity, a sacred name, or a divine quality. In tantric traditions, mantras may be combined with breathwork, visualization, and ritual practice.

Today, mantras are practiced by spiritual seekers, yoga practitioners, meditators, and people who want a simple way to calm the mind.

mantra chanting during yoga retreat

How Do Mantras Work?

Mantras can be understood from both a spiritual and a practical meditation perspective.

Spiritual View

In spiritual traditions, mantras are considered sacred sounds or vibrations. Practitioners believe that repeating a mantra can purify the mind, awaken inner awareness, and connect the individual with a higher state of consciousness.

For example, Om is often described in yogic tradition as a sacred sound connected with universal consciousness.

Practical Meditation View

From a meditation perspective, a mantra works by giving the mind something steady to return to.

When thoughts appear, you do not need to fight them. You simply notice them and return to the mantra. Over time, this practice may help train attention and reduce mental restlessness.

Mantra repetition may support:

  • Better focus
  • Slower breathing
  • Mental calmness
  • Emotional steadiness
  • Present-moment awareness
  • A regular meditation habit

The process is simple: repeated focus creates mental stability.

The Power of Sound and Vibration

Sound affects the body and mind. A soothing sound can calm us, while a harsh sound can disturb us. Mantras use this natural relationship between sound, rhythm, breath, and attention.

When you chant a mantra aloud, the sound creates vibration in the body. When you repeat it silently, the mind follows the rhythm internally. In both cases, the mantra gives your awareness a steady direction.

However, the sound alone is not everything. Intention matters.

A mantra repeated mechanically may have a limited effect. A mantra repeated with attention, patience, and sincerity becomes a stronger practice.

Types of Mantras

Not all mantras are the same. Different mantras are used for different purposes.

Type of Mantra Meaning Examples Best For
Bija mantras Seed sounds with symbolic energy Om, Lam, Ram, Hreem Traditional practice, chakra focus
Vedic mantras Mantras from ancient Vedic tradition Gayatri Mantra Ritual, prayer, meditation
Devotional mantras Sacred names or phrases Om Namah Shivaya, Hare Krishna Devotion and spiritual connection
Buddhist mantras Mantras used in Buddhist practice Om Mani Padme Hum Compassion and mindfulness
Peace mantras Mantras for calmness and harmony Om Shanti Shanti Shanti Relaxation and inner peace
Personal mantras Self-chosen phrases I am calm, I am present Beginners and daily mindfulness

Best Mantras for Beginners

Beginners should choose a mantra that is simple, easy to remember, and comfortable to repeat.

Here are some beginner-friendly mantras:

1. Om

Best for: Simple meditation and spiritual focus.

Om is one of the most well-known sacred sounds in Indian spiritual traditions. It is short, easy to chant, and often used at the beginning or end of meditation.

2. So Hum

Best for: Breath-based meditation.

“So Hum” is often interpreted as “I am that.” You can repeat So while inhaling and Hum while exhaling.

3. Om Shanti

Best for: Peace and relaxation.

“Shanti” means peace. This mantra is often used to invite calmness and harmony.

4. I Am Calm

Best for: Non-religious mindfulness practice.

This is a simple personal mantra for people who want a secular practice.

5. I Am Present

Best for: Focus and grounding.

This mantra helps bring attention back to the present moment.

How to Choose the Right Mantra

The right mantra depends on your purpose.

Your Goal Suggested Mantra
Inner peace Om Shanti
Better focus Om or I am present
Breath awareness So Hum
Spiritual devotion Om Namah Shivaya
Self-confidence I am steady
Stress relief I am calm
Compassion Om Mani Padme Hum

Choose one mantra and stay with it for some time. Constantly changing mantras can make it harder to build depth in practice.

Benefits of Chanting Mantras

Mantra practice may support mental, emotional, and spiritual well-being when done consistently.

1. Helps Calm the Mind

The mind naturally jumps from one thought to another. A mantra gives it one steady focus. This may help reduce mental noise and create inner stillness.

2. Supports Stress Relief

Chanting often slows the breath. Slow, rhythmic breathing can help the body relax and create a sense of calm.

3. Improves Focus

Repeating a mantra trains attention. Every time you return to the mantra, you strengthen your ability to concentrate.

4. Supports Emotional Balance

A regular mantra practice may help create space between emotions and reactions. This can make it easier to respond calmly instead of reacting impulsively.

5. Builds Self-Awareness

During mantra practice, you begin to notice how often the mind wanders. This awareness helps you understand your thought patterns more clearly.

6. Deepens Meditation

Many beginners struggle with silent meditation because the mind feels too active. A mantra gives the mind a simple object of focus, making meditation easier.

7. Strengthens Spiritual Connection

For spiritual practitioners, mantras can create devotion, surrender, inner purity, and a deeper connection with the divine or higher consciousness.

8. Creates a Positive Daily Habit

Practicing a mantra every day creates structure. Even a few minutes of daily chanting can become a peaceful ritual.

yoga retreat student chanting mantras

Can Mantras Help With Stress and Anxiety?

Mantras may help some people manage stress by calming the mind, slowing the breath, and creating a steady focus.

A simple stress-relief practice is:

  1. Sit comfortably.
  2. Close your eyes.
  3. Inhale slowly.
  4. Silently repeat So.
  5. Exhale slowly.
  6. Silently repeat Hum.
  7. Continue for 5 minutes.

This practice may help you feel more grounded. However, mantra meditation is not a cure for anxiety disorders, depression, trauma, or other mental health conditions. If you are struggling, seek support from a qualified professional.

Spiritual Powers of Mantras

The “spiritual power” of mantras is often misunderstood. It does not necessarily mean instant miracles or supernatural control.

In a deeper sense, the spiritual power of mantras comes from their ability to transform the inner state of the practitioner.

Mantras may help develop:

  • Inner peace
  • Concentration
  • Devotion
  • Self-discipline
  • Emotional purification
  • Awareness
  • Patience
  • Compassion
  • Connection with the divine
  • A deeper understanding of the self

In spiritual traditions, mantras are believed to purify the mind and awaken higher consciousness. In practical terms, this may be experienced as calmness, clarity, emotional balance, and a stronger connection with the present moment.

Mantras and the Subconscious Mind

The subconscious mind is shaped by repetition. Thoughts, emotions, beliefs, and habits become stronger when repeated regularly.

Mantras work through the same principle.

When you repeat a calming or sacred phrase every day, the mind begins to associate that sound with stillness, focus, and peace. Over time, the mantra may become an inner anchor.

For example, if you regularly chant I am calm, the phrase may naturally return to your mind during stressful moments. This can help you pause, breathe, and respond more consciously.

This is why consistency matters more than intensity.

Mantra Meditation Practice

Mantra meditation is simple and beginner-friendly.

The practice involves repeating a chosen mantra while keeping your attention on the sound, rhythm, or meaning of the mantra.

You can practice mantra meditation in three ways:

Method How It Works Best For
Loud chanting Chanting the mantra audibly Beginners, group practice, energy
Whisper chanting Repeating softly Gentle private practice
Silent repetition Repeating in the mind Deep meditation and quiet places

No method is better for everyone. Choose the one that feels natural and sustainable.

How to Chant Mantras Correctly: Step-by-Step Guide

You do not need to be perfect to begin. Start simply.

Step 1: Choose One Mantra

Pick a mantra that feels meaningful and easy to repeat.

Examples:

  • Om
  • So Hum
  • Om Shanti
  • I am calm
  • I am present

Step 2: Sit Comfortably

Sit on a chair, cushion, or floor. Keep your back straight but not stiff. Relax your shoulders and face.

Step 3: Breathe Slowly

Take a few deep breaths before starting. Let your body settle.

Step 4: Start Repeating the Mantra

Repeat the mantra aloud, softly, or silently.

Do not rush. Keep the rhythm steady and natural.

Step 5: Focus on the Sound

Listen to the sound or feel the mantra in your mind. If you are chanting silently, focus on the inner repetition.

Step 6: Return When the Mind Wanders

Your mind will wander. This is normal.

When you notice distraction, gently return to the mantra without judging yourself.

Step 7: Practice for 5–10 Minutes

Beginners can start with 5 minutes daily. Once it feels natural, increase the time gradually.

Dr. Aniruddh Guru Pratap Singh Chanting Mantras

What Is Japa Mantra Practice?

Japa means repetition of a mantra. It is often practiced with a mala, a string of 108 beads.

In Japa practice, you repeat the mantra once for each bead. This helps you keep count and maintain rhythm.

How to Practice Japa

  1. Hold the mala in one hand.
  2. Choose your mantra.
  3. Repeat the mantra once per bead.
  4. Move to the next bead after each repetition.
  5. Continue until you complete the mala.
  6. Keep your focus on the mantra, not on speed.

Japa is useful for people who want a more structured mantra practice.

Vocal Chanting vs Silent Chanting

Both vocal and silent chanting can be effective.

Vocal Chanting Silent Chanting
Uses audible sound Happens inside the mind
Helpful for beginners Helpful for deeper meditation
Creates physical vibration Builds inner concentration
Good for group practice Good for private practice
Easier to maintain rhythm Can be done anywhere quietly

If you are new, start with vocal chanting. Once you become comfortable, try silent repetition.

When Is the Best Time to Chant Mantras?

The best time to chant mantras is the time you can follow consistently.

Common times include:

  • Early morning
  • Before meditation
  • After yoga
  • During stressful moments
  • Before sleep
  • Evening after work

Traditionally, early morning is considered ideal because the mind is usually quieter. But if morning is not possible, choose any time that works for your routine.

Consistency is more important than the exact time.

How Long Should You Chant a Mantra?

Beginners can start with 5 to 10 minutes daily.

A simple guide:

Level Duration
Beginner 5 minutes
Regular practitioner 10–20 minutes
Deep practice 20+ minutes or one mala

Quality matters more than duration. Five minutes of focused chanting is better than thirty minutes of distracted chanting.

Importance of Consistency and Intention

Consistency is one of the most important parts of mantra practice.

Chanting once in a while may bring temporary calm, but daily practice creates bigger change. Repetition trains the mind to return to stillness more easily.

Intention is also important.

Before chanting, ask yourself:

  • Why am I practicing?
  • Do I want peace?
  • Do I want to focus?
  • Do I want a spiritual connection?
  • Do I want emotional balance?

A clear intention gives direction to the practice. When consistency and intention come together, mantra chanting becomes more meaningful and powerful.

Common Mistakes in Mantra Practice

Avoid these common beginner mistakes:

Mistake Better Approach
Expecting instant results Practice patiently
Forcing concentration Return gently to the mantra
Changing mantras too often Stay with one mantra for some time
Chanting mechanically Practice with attention and intention
Worrying too much about pronunciation Learn gradually
Practicing only when stressed Build a daily habit
Ignoring the breath Let breath and mantra work together
Comparing your practice with others Focus on your own journey

Mantra practice should feel steady, gentle, and sincere. It is not about pressure or perfection.

Are Mantras Religious?

Some mantras are religious or devotional. For example, many Sanskrit mantras are connected with Hindu, Buddhist, Sikh, or yogic traditions.

However, mantra practice can also be non-religious.

A person can repeat simple phrases like:

  • I am calm.
  • I am present.
  • I breathe in peace.
  • I let go.

So, mantras can be:

  • Spiritual
  • Religious
  • Meditative
  • Personal
  • Secular

It depends on the mantra and the intention of the person practicing it.

Who Should Practice Mantras?

Mantra practice can be helpful for many people, including:

  • Beginners in meditation
  • People who want better focus
  • People dealing with everyday stress
  • Yoga practitioners
  • Spiritual seekers
  • People who want a calming daily routine
  • Anyone interested in mindfulness

Mantras are simple and accessible. You do not need special equipment or advanced spiritual knowledge to begin.

However, people with severe anxiety, trauma, depression, or other mental health concerns should use mantra meditation as a supportive practice, not as a replacement for professional care.

Yoga Teacher Practicing Mantras

Are Mantras Scientifically Proven?

Mantra practice has similarities with meditation, breath awareness, rhythmic repetition, and focused attention. These practices are often associated with relaxation, improved attention, and emotional regulation.

However, not every traditional claim about mantras has been scientifically proven.

The balanced view is:

  • Spiritually, mantras are sacred sounds used for transformation and higher awareness.
  • Practically, mantras are repeated sounds or phrases that help focus the mind.
  • Scientifically, mantra-like meditation may support relaxation and attention, but more research is needed for specific claims.

Mantras are best understood as a supportive practice for mental calmness, focus, and spiritual growth.

Simple Daily Mantra Routine for Beginners

Here is an easy routine you can follow:

  1. Choose one mantra.
  2. Sit comfortably.
  3. Close your eyes.
  4. Take three slow breaths.
  5. Repeat the mantra slowly.
  6. Continue for 5 minutes.
  7. When your mind wanders, return gently.
  8. End with a moment of silence.

Example:

Inhale: So
Exhale: Hum

Practice this daily for one week and notice how your mind and body feel.

Frequently Asked Questions About Mantras

What is a mantra?

A mantra is a repeated sound, word, or phrase used to focus the mind, support meditation, and create inner calm.

What does mantra mean?

The word mantra comes from Sanskrit. “Man” means mind, and “tra” means tool or instrument. A mantra means “a tool for the mind.”

What is the best mantra for beginners?

Good beginner mantras include Om, So Hum, Om Shanti, I am calm, and I am present.

How long should I chant a mantra?

Beginners can chant for 5–10 minutes daily. With practice, you can increase the time to 15–20 minutes or use a mala for 108 repetitions.

Can I chant a mantra silently?

Yes. Silent chanting is effective and can be useful for deeper meditation or quiet environments.

Do I need perfect pronunciation?

For traditional Sanskrit mantras, pronunciation is important, but beginners should not become stressed about perfection. Learn slowly and practice sincerely.

Can mantras reduce stress?

Mantras may help reduce everyday stress by calming the mind, slowing the breath, and creating a steady point of focus.

Can mantras change your life?

Mantras can support positive change when practiced consistently. They may improve focus, emotional balance, self-awareness, and inner peace over time.

Are mantras only for Hindus?

No. Many traditional mantras come from Hindu, Buddhist, Sikh, and yogic traditions, but mantra-style repetition can also be practiced in a secular way.

When should I chant mantras?

Morning and evening are common times, but the best time is whenever you can practice consistently.

Which is better: chanting aloud or silently?

Both are useful. Chanting aloud helps beginners stay focused, while silent chanting is helpful for deeper inner meditation.

How many times should I repeat a mantra?

You can repeat a mantra for a fixed time, such as 5–10 minutes, or count repetitions using mala beads. A traditional mala usually has 108 beads.

Conclusion

Mantras are simple but powerful tools for the mind. By repeating a sound, word, or phrase with attention and intention, you can train the mind to become calmer, clearer, and more focused.

In spiritual traditions, mantras are sacred vibrations used for devotion, purification, and higher awareness. In daily life, they can also be used as practical tools for meditation, stress relief, mindfulness, and emotional balance.

The key is not perfection. The key is consistency.

Start with one simple mantra. Practice for a few minutes every day. Let your breath become steady, let your mind return to the sound, and let the practice grow naturally.

Over time, mantra chanting can become a peaceful daily habit that supports clarity, inner balance, and self-awareness.

Dr. Anirudh Gurupratap Singh

Founder & Head Teacher – Mrityunjay Yogpeeth Dr. Anirudh Gurupratap Singh is the founder, and the vision behind Mrityunjay Yogpeeth is to pass on the wisdom of yoga from great yoga masters to students of yoga. Dr. Singh is a beloved teacher, healer and guide whose life has been dedicated to the spiritual and physical uplifting of people through authentic yoga practice and Vedic tradition.

The Ultimate Guide to the Sacral Chakra: How to Heal, Balance, and Unlock Your Emotional and Creative Flow

Guide to the Sacral Chakra

The yoga system of ancient times established the profound foundation of the chakra system, a holistic framework that continues to influence modern wellness, psychology, and somatic therapies. This enduring belief system holds that human beings possess not only a gross physical form but also a complex, subtle energy body that extends beyond physical boundaries. Within this energetic architecture, there are distinct energy centers called chakras, which act as neuro-energetic hubs that control and regulate our emotional, mental, and spiritual states. Among these, the Sacral Chakra – known in Sanskrit as the Svadhisthana Chakra – serves as the primary center governing all aspects of emotional expression, creative manifestation, sexual energy, and the capacity for joyful experiences. This intricate system controls our internal feelings in tandem with our external expressions and social interactions.   

The Sacral Chakra carries critical importance for contemporary society. In a modern era characterized by hyper-productivity and digital disconnection, individuals frequently tend to ignore, suppress, or intellectualize their emotional needs. The chakra system, however, demonstrates the vital process of handling our emotional experiences organically, allowing us to feel deeply without losing control or becoming overwhelmed. Tracking the flow of our emotions leads us to discover deeper levels of comprehension, which inherently supports the lifelong process of self-discovery and holistic well-being.

Fundamentally, the Sacral Chakra represents the ability to flow seamlessly between various states of existence while maintaining an underlying state of happiness, security, and emotional equilibrium. The Svadhisthana system functions properly when it enables us to navigate life’s inevitable fluctuations with creative expression and emotional freedom. This comprehensive report explains how to deeply understand the Sacral Chakra system, helping individuals identify systemic imbalances while providing evidence-based and historically rooted techniques to achieve peace through chakra-related healing methods.

Understanding the Sacral Chakra: Anatomy of the Subtle Body

Often referred to simply as the Second Chakra, the Sacral Chakra or Svadhisthana is a dynamic vortex of energy located in the lower abdomen. Anatomically speaking, this energy center reaches out across the pelvic basin, beginning approximately two to three inches below the navel and descending toward the pubic bone. This specific positioning connects us strongly with our emotional body, providing the fundamental energetic guidelines on how we enjoy sensory pleasure, form interpersonal relationships, and express our inherent creative abilities.   

Etymology and Symbolism

To truly grasp the essence of the Second Chakra, one must understand its etymological roots. The Sanskrit term Svadhisthana is a compound word derived from sva, meaning “self,” and adhisthana, meaning “dwelling place” or “seat”. Therefore, the Sacral Chakra translates to “one’s own dwelling place,” representing the sacred inner space where the authentic self, untethered emotions, and true creative essence reside.   

In traditional esoteric iconography, the Sacral Chakra is universally represented by the water elemental symbol, visually depicted as a white crescent moon resting at the center of a lotus flower with six vibrant vermilion or orange petals. The system uses water (Jala) as a profound metaphor for emotional states. Just as water can be turbulent, calm, deep, shallow, or endlessly flowing, human emotions are cyclical and ever-changing. Water cannot be rigidly contained without building immense pressure, nor can it flow without a channel; similarly, emotional energy must be allowed to move dynamically yet safely.   

Orange is the resonant color of the Sacral Chakra. This specific vibrational frequency indicates energetic power, artistic inspiration, and profound energetic warmth. It blends the grounding, survival-based life force of the Root Chakra’s red with the joyful, intellectual optimism of the Solar Plexus Chakra’s yellow. It is strictly through the unhindered flow of this orange energy throughout the body that we can authentically experience emotion, connect deeply with others, and achieve personal balance within the chakra system.

anatomy of sacral chakra

Origins and Philosophy of the Chakra System

The chakra system originated from ancient Indian spiritual texts, the Vedas and Upanishads, which specifically describe its complex principles through traditional yogic and tantric lineages. These ancient teachings explain that chakras function as subtle energy centers that directly affect both physical vitality and spiritual well-being. While the Root Chakra (Muladhara) governs raw survival, the Svadhisthana Chakra governs complex emotional states, human desire, and creative or artistic abilities.   

In traditional Eastern philosophy, chakras exist as non-material elements that individuals experience as focal energy points existing throughout their subtle body (the Pranamaya Kosha). The system operates through essential energetic functions that control the flow of prana (life force energy). Prana serves as the fundamental life force that maintains physical health, mental awareness, and emotional regulation. The Sacral Chakra, in particular, operates through emotional movement, which directly connects to our lived experiences, our memories, and our interpersonal bonds.   

Today, chakras have become an essential component of contemporary holistic psychological practices, which people increasingly utilize for their comprehensive health needs. While traditional scientific methods do not provide direct empirical measurements for chakras as physical organs, extensive modern research widely recognizes the undeniable physiological link between emotional well-being, nervous system regulation, and physical health. The energy centers find optimal balance through meditation, targeted yoga postures, and mindfulness practices, which together create a reliable pathway for people to achieve spiritual and practical wellness through chakra healing. 

The Psychological Architecture: Carl Jung and Svadhisthana

According to contemporary psychological studies and depth psychology, the Sacral Chakra is deeply responsible for the way we express our feelings and how we connect with other people. It allows us to form real, vulnerable bonds with people when we are not suffocated by pathological guilt and fear. Understanding this chakra gives people the emotional stabilization necessary to bridge their physical sensations with their psychological states.   

The Night Sea Journey and the Unconscious

The renowned Swiss psychiatrist Carl G. Jung recognized the profound psychological utility of the chakra system, exploring it extensively in his seminars on Kundalini Yoga. Jung posited that the transition from the first chakra to the second chakra represents a monumental shift in human consciousness. He described the Root Chakra as the “surface of the world,” grounded in earthly, material survival. However, crossing into the Svadhisthana requires descending into the dark, fluid depths of the unconscious mind.   

Jung utilized the archetype of the “Night Sea Journey” – a concept popularized by mythologist Joseph Campbell – to describe the psychology of the Sacral Chakra. In this mythic trope, the hero is swallowed by the Leviathan, a terrifying sea monster dwelling at the bottom of the ocean. Psychologically, this signifies the symbolic death of the rigid, purely survival-based ego, leading to a baptism into the waters of true emotional reality. The power that previously sustained the individual in the conscious, material world of the Root Chakra suddenly becomes an adversary when entering the Sacral Chakra, as the individual must abandon pure materialism to confront their irrational desires, deep-seated fears, and bodily discomforts.  

Jung noted that a child transitions into the psychology of Svadhisthana as soon as they begin to notice their own physical body, feel discomfort, and assert “I”. This marks the exact moment when consciousness separates from the totality of the collective unconscious, leaving the pristine world of childhood behind to grapple with the dualities of pleasure and pain.   

The Shadow Qualities and the Wound of Denial

To fully understand Svadhisthana, one must examine its “shadow” qualities. In holistic psychological paradigms, to live in the shadow frequency of a chakra is to be completely guided by the foundational wound associated with that energy center. We make decisions from that wound, relate to others through its lens, and often become consumed by it.   

The primary wound of the Sacral Chakra is the “wound of denial”. Human neurobiology is naturally driven by the desire for pleasure (dopamine, serotonin) and the avoidance of pain (cortisol, adrenaline). However, in the shadow of Svadhisthana, this natural drive mutates into a vicious cycle of craving and aversion, driven by an inability to tolerate emotional discomfort. This wound is the seed of addictive behaviors, severe relationship conflicts, and a slew of unhealthy habits.   

Furthermore, Sacral energy is fundamentally about connection and partnership. When operating from the shadow, this drive forces individuals to seek connection regardless of the personal cost, resulting in chronic people-pleasing behaviors, a lack of boundaries, and a desperate need for external validation. Individuals who struggle to say no or feel their own worth frequently hold deep somatic tension in the pelvic basin and lower abdomen—the exact physical location of the Sacral Chakra.   

Richard Barrett’s Stages of Development

This Jungian framework parallels modern psychological models, such as Richard Barrett’s Seven Stages of Psychological Development. Within Barrett’s model, the second stage – termed the “Conforming” stage – aligns directly with Svadhisthana. During this developmental phase, humans focus on forming meaningful relationships and exploring emotional depth. Emotional intelligence becomes the paramount metric of growth, and the primary tension lies in balancing personal identity against the desire for collective belonging. 

psychiatrist Carl G. Jung

Characteristics of a Balanced Sacral Chakra

The Sacral Chakra achieves optimal emotional flow when it maintains a balanced state. This equilibrium enables people to experience their feelings deeply without any need for pathological suppression or excessive, volatile emotional expression. Individuals who possess a balanced Svadhisthana system maintain stable internal emotions while authentically showing their feelings to others. They possess the capacity to experience intense emotions, yet they handle these feelings through proper, regulated methods, which ultimately benefits their long-term personal development.   

Emotional and Creative Manifestation

The balanced state of the Svadhisthana Chakra produces creativity as its main characteristic. This is not limited to traditional fine arts; the ability to create new things exists within people through their artistic skills, musical talents, innovative business ideation, and complex problem-solving abilities. In a balanced state, this creativity exists as a natural process that moves forward without forceful effort, mirroring the natural flow of water, which demonstrates the essential qualities of this chakra. Creative ideas appear seamlessly, creating a powerful drive to show artistic expression through various forms of work and everyday activities.   

Healthy Intimacy and Relationships

The existence of healthy relationships functions as a primary indicator for maintaining balanced sacral states. A balanced individual radiates warmth, confidence, and generosity. Their relationships provide a deep connection without creating toxic dependency. Partners share an intimate bond that includes the ability to experience profound sensory pleasure without experiencing any lingering feelings of guilt or shame. The life experience develops its full meaning because one can experience life through active, joyous participation while staying grounded and present in their current state of awareness.  

Signs of an Imbalanced Sacral Chakra

When the Svadhisthana Chakra falls out of alignment, the resulting physical and emotional dissonance can profoundly impact an individual’s quality of life. An imbalanced Sacral Chakra typically manifests through two distinct pathological patterns, showing either an underactive (deficient) or an overactive (excessive) condition.   

Underactive conditions cause individuals to experience complete emotional disconnection and numbed feelings. The individual shows severe creativity deficits, an exceptionally low libido, and a general lack of drive, which creates significant problems when attempting to establish meaningful connections with others. They may exhibit a profound fear of pleasure and a resistance to any form of change.   

Conversely, the overactive Sacral Chakra causes people to experience excessive emotional distress and volatility. People show extreme emotional attachment, resulting in codependency and a desperate need for others to guarantee their safety. They require constant entertainment and sensory stimulation to avoid sitting by themselves. The person will act impulsively without thinking about the consequences of their actions, facing severe challenges in controlling their emotional and physical limits.   

Because chakras are inextricably linked to the endocrine and nervous systems, blockages in the Sacral Chakra manifest physically in the pelvic region. The following table outlines the comprehensive symptoms associated with Svadhisthana dysregulation:

System / Category Symptoms of a Blocked or Imbalanced Sacral Chakra
Physical (Musculoskeletal) Chronic lower back pain (especially in the lumbar region), severe hip stiffness, tightness in the pelvic floor, and joint discomfort in the lower body.
Physical (Organ Systems) Reproductive health issues (e.g., irregular menstrual cycles, erectile dysfunction), urinary and bladder problems, kidney dysfunction, and poor fluid metabolism.
Emotional State Emotional numbness, chronic overwhelm, mood swings, extreme sensitivity, depression, and pervasive feelings of fear and betrayal.
Creative & Psychological Complete loss of creativity, creative blocks, addictive behaviors, lack of self-worth, feeling alienated from one’s own desires, and fear of change.
Interpersonal & Relational Codependent relationship patterns, fear of intimacy, inability to express emotions, difficulty setting boundaries, and extreme swings between desire and disinterest.

The process of Sacral Chakra healing requires people to identify these particular symptoms, which they must learn to recognize with honesty. The first step to achieving balance requires the development of acute self-awareness. A person can only restore balance to their chakra system through consistent emotional pattern observation, which must be conducted without making harsh self-judgments.  

Preparing for Chakra Healing: Setting the Container

The practice of chakra healing necessitates a protective psychological and physical space, which must be firmly established before practitioners commence their deep emotional work. The mind achieves its optimal state for healing through a peaceful and silent environment, enabling individuals to attain heightened consciousness. The physical space requires no complex design; simple, clean elements create a better environment for processing complex internal information.

The internal mindset holds equal significance to the external environment. The process of chakra healing requires practitioners to develop themselves gently, without violently forcing changes to their current state. Attempting to strong-arm the psyche into releasing trauma triggers the nervous system’s fight-or-flight response, causing the body to brace further. The practice needs people to proceed with profound openness and patience so their bodies can naturally recover. Intention functions as a strong influence because it guides people to achieve equilibrium and peacefulness.

Self-observation serves as an essential component for this development. The state of the Sacral Chakra can be accurately determined by tracking emotional responses to specific environmental triggers and documenting the resulting behaviors. The deliberate process of developing this awareness establishes the definitive path to permanent and significant life changes.

Step-by-Step Guide to Balancing the Sacral Chakra

Balancing the Sacral Chakra is an active, ongoing process that combines visualization, somatic grounding, and breathwork. The following foundational protocol can be utilized daily to establish energetic equilibrium:

  1. Establish the Posture: Your body should sit down in a peaceful area while your spine remains straight, yet your body stays entirely relaxed. Ground your sit bones into the earth or your chair.
  2. Focus the Awareness: Your body should close its eyes while you gently focus your attention on your lower abdomen, specifically the area two inches below the navel, which serves as the physical epicenter for the Sacral Chakra.   
  3. Initiate Breath Monitoring: You should start to monitor your breath pattern through mindful breathing activities. The breath needs to move through your body in a natural, smooth, and unforced way.
  4. Visualize the Energy: While you breathe in, your mind’s eye should imagine a warm, vibrant orange light. Visualize this light expanding throughout your lower abdomen space to activate the Sacral Chakra, bringing it to a comforting and consistent energy level.   
  5. Release and Exhale: Your body should exhale all its emotional weight while intentionally releasing pelvic tension and physical discomfort. Each exhaled breath brings you a sense of lightness and release, helping you remove stagnant energy while attaining emotional balance and internal flow.
  6. Observe the Emotional Wave: When you experience intrusive thoughts or heavy emotions during this process, you should observe them without responding, evaluating, or suppressing them. The emotional wave should pass through your awareness like gentle ocean waves. Emotional flow must occur naturally for genuine Sacral Chakra healing to take place.   
  7. Return to Presence: Your body should gradually become aware of your physical presence and your current environment. The ground connection beneath you helps you reach complete awareness of your current state. The practice ends with you experiencing both peacefulness and balance, bringing a mild but profound emotional consciousness.
Sacral Chakra

Sacral Chakra Meditation and Crystal Healing Techniques

The practice of specialized visualization meditation serves as the most powerful natural technique for restoring balance to the Sacral Chakra, as this energy center requires both emotional movement and unblocked energy flow to function properly.   

Visualization and Water Metaphors

Because water is the ruling element of Svadhisthana, the practice requires you to center your mind by picturing a river that moves smoothly or ocean waves that rise and fall in their natural, uninterrupted patterns. These aquatic images demonstrate the natural way emotions should move through the human psyche. This movement should occur without any kind of blocking, hidden suffering, or active control. The natural flow of your own emotions will begin to mirror this visualization, establishing a progressive process that leads to a deeply relaxed state, permitting emotional energy to move through the pelvic region in a balanced manner.   

Crystal Programming and Cord Cutting

To amplify the meditation, practitioners frequently integrate specific mineralogical frequencies. Crystals such as Carnelian and Tiger’s Eye possess vibrational signatures that perfectly align with the Sacral Chakra’s orange frequency. A highly structured, 11-minute visualization protocol utilizing a Carnelian crystal has demonstrated profound efficacy :   

  • Hold a cleansed Carnelian crystal in your hands, close your eyes, and take three deep breaths.
  • Program the crystal by stating (aloud or internally): “I ask that the highest vibration of love and light connect with my highest self to clear all unwanted energy and any previous programming. I command this crystal to hold the intention of balancing my sacral chakra.”    
  • Lie comfortably on your back and place the crystal directly over your Sacral Chakra for exactly 11 minutes.
  • Visualize a brilliant orange light filling the space, acting as a healing solvent that cuts the cords of past emotional blocks, traumas, and toxic relational attachments.   

Mantra Meditation (The Sound of VAM)

The practice of mantra meditation through the sound repetition of “VAM” serves as a highly effective, ancient technique for healing the Sacral Chakra. The Svadhisthana Chakra, which this bija (seed) mantra represents, contains a sound pattern that matches its specific bio-energetic frequency. The practice of chanting “VAM” at a low volume, or through silent mental repetition, creates subtle somatic vibrations in the pelvic floor that enable people to attain chakra activation and balance their energy. Repeating this practice establishes a deeper neurological connection with your emotional center. The rhythmic pattern of mantra meditation helps people achieve inner peace, allowing natural somatic healing processes to take over.   

Emotional Awareness Meditation

Emotional awareness meditation teaches people to experience their feelings without judgment. Instead of reacting impulsively to emotions as they arise, you learn to observe them as they occur, witnessing their presence without assigning them a moral value (good or bad). This technique develops profound inner strength while decreasing your tendency to respond emotionally to triggering situations.   

Through this practice, you will start to realize that emotions exist strictly as temporary physiological feelings that do not define your permanent personality. Observing your emotions allows you to create vital distance between your core self and your fleeting feelings, resulting in drastically increased mental clarity and emotional equilibrium. This practice of gentle observation helps develop strong grounding skills, crucial for maintaining your emotional center during times of extreme instability.

Yoga Practices for the Sacral Chakra

Yoga functions as the primary physical practice that maintains equilibrium for the Sacral Chakra because this energy center exists precisely where the body controls hip movement, lower abdominal strength, and pelvic power. The physical body actively stores suppressed emotions – particularly trauma, guilt, and shame – in the deep fascial networks of the hips and psoas muscles, resulting in chronic physical stiffness and bodily discomfort.   

The body can release this accumulated tension through targeted, gentle yoga practices that stretch the pelvic basin, enabling energy to flow without restrictions. The way these movements are practiced is just as important as the poses themselves. The Sacral Chakra requires soft and fluid movements; therefore, postures should be performed with slow, mindful, and flowing transitions. Aggressive stretching can cause the nervous system to brace, whereas gentle transitions stop blockages and avoid bodily tension.   

The following table details the most effective yoga postures for balancing the Sacral Chakra:

Yoga Pose (Sanskrit & English) Biomechanical Action Energetic and Emotional Benefit
Baddha Konasana (Bound Angle / Butterfly Pose) External rotation and opening of the hips and groin. Releases suppressed emotions held in the pelvic floor; provides a gentle, deeply effective release of sexual and emotional blockages.
Eka Pada Rajakapotasana (Pigeon Pose) Deep external rotation of the anterior hip stretches the psoas. One of the deepest hip openers; highly effective for processing and releasing stored fear, trauma, and tension held deep within the hips.
Utkata Konasana (Goddess Pose) Wide-stance squat, activating the pelvis and inner thighs. Activates the pelvis, builds strength and confidence, and awakens dormant creative and feminine (Shakti) energy.
Anjaneyasana (Low Lunge) Opens the front of the pelvis and hip flexors. Encourages receptivity, adaptability, and emotional openness by releasing the area where physical control is often held.
Ananda Balasana (Happy Baby Pose) Hip flexion and gentle lower back release. Reconnects the practitioner with pure joy, invites childlike curiosity and pleasure, and releases deep lower back tension.
Mandukasana (Frog Pose) Advanced bilateral hip abduction. Highly intense but exceptionally powerful for shattering deeply held emotional tension and defense mechanisms in the groin.

The regular practice of these yoga techniques delivers compounding advantages for both physical health and emotional well-being. The body develops significantly increased flexibility, particularly in its hips and lower spine, while the mind becomes more receptive to vulnerability. The combination of physical opening and mindful breathing helps you release trapped emotions while developing the self-awareness needed to handle future emotional waves healthily.  

Sacral Chakra Meditation and Crystal Healing

Breathing Techniques (Pranayama)

Breath exists as the absolute physiological connector between the body and mind, making this connection vital in the practice of Sacral Chakra work. The body experiences disrupted energy flow because emotional energy imbalances lead to disruptions in the autonomic nervous system, causing shallow, sympathetic (fight-or-flight) breathing.   

The practice of pranayama (breath control) establishes a regulated energy system through its ability to quiet the body and help practitioners stay aware of their current somatic experience. The body achieves emotional equilibrium through slow-paced breathing, which creates a steady parasympathetic pattern that enables erratic emotional energy to reach a state of deep calmness.   

Deep Abdominal Breathing

Deep abdominal (diaphragmatic) breathing stands as the most effective baseline method for healing the Sacral Chakra. The practice involves taking gentle nasal breaths that force the lower abdomen to expand outward like a balloon, while maintaining a natural pattern that prevents the chest and shoulders from lifting. This physical movement activates the Sacral Chakra center through the direct, mechanical push of the diaphragm toward the pelvic basin.   

Exhalation leads to a slow abdominal release, enabling the body to expel stored physical tensions and heavy emotional burdens. The method requires maintaining a state of relaxed breathing, which should remain entirely natural without any forceful or aggressive breath control. The body naturally reaches a peaceful state through this process, supporting the organic functions of Svadhisthana.

Through consistent practice, breathwork develops into a profound awareness and transformation tool. It creates emotional distance, helping people control their knee-jerk reactions. You learn to analyze your emotions with a better understanding and calmer physiology. Continuous breath awareness creates balance between bodily systems, maintaining natural energy movement and forging a stronger bond between physical sensations, mental states, and emotional feelings.

Lifestyle Practices to Balance the Sacral Chakra

It is completely necessary to do more than merely meditate and practice yoga to achieve Sacral Chakra balancing; systemic healing depends heavily on how you live every single day of your life. Practicing simple, mindful lifestyle changes helps support your energy center outside of formal therapeutic environments, allowing you to regain permanent emotional balance.   

Nutrition and Hydration

This chakra functions directly according to how people select their food and living conditions. Because water is its essential ruling element, the Sacral Chakra requires people to consume fresh, vibrant foods with exceptionally high water content.   

Eating orange-colored foods is an incredibly effective, scientifically supported way to nourish the physical body while aligning with the energetic frequency of the chakra. Highly recommended foods include sweet potatoes, carrots, pumpkins, butternut squash, melons, mangos, and orange citrus fruits. Nuts, seeds, and fermented foods are also crucial, as they support the reproductive and digestive systems located in the lower abdomen.   

Hydration is paramount. Practitioners recommend infusing pure, filtered water with orange fruits – such as clementines, oranges, tangerines, and golden raspberries – to visually and biochemically support the sacral center.   

Hydrotherapy and Environmental Immersion

Water restoration happens naturally when we intentionally spend time around bodies of water. Walking barefoot along meandering rivers, relaxing by still lakes, and engaging in outdoor walking are important ways for people to connect with nature, find emotional balance, and relieve the accumulated stress of modern life.   

When outdoor water is inaccessible, therapeutic bathing is highly recommended. Languishing in a warm bath infused with two cups of Epsom salts (magnesium sulfate) and high-frequency essential oils, particularly rose oil, creates an optimal environment for physical relaxation and self-love.   

Creative Pursuits and Authentic Relationships

Structurally, the Sacral Chakra is the genesis of all human creativity. You can increase its vitality by intentionally making space to facilitate your emotional release process through art. Creative pursuits – such as painting, free-writing, playing music, and unchoreographed dancing – give vital external expression to your inner sensations. These resources allow you to express yourself freely, helping you rediscover your intrinsic joy, creative energy, and personal freedom.   

Furthermore, maintaining the Sacral Chakra equilibrium requires healthy interpersonal relationships and partnerships. This chakra dictates how humans show their emotions through social connections and sexual intimacy. The foundation of healthy relationships rests on honesty, mutual respect, and the establishment of well-defined, unshakeable personal boundaries. The ability to develop open emotional expression, paired with a firm comprehension of personal limits, enables the creation of a secure environment. The body experiences severe imbalance when people choose to hide their emotions or refuse to acknowledge their emotional state. Proper emotional recognition enables deep intimacy and drastically better mental health.   

Emotional Healing and Shadow Work

Emotional healing functions as the absolute core element enabling people to achieve equilibrium for their Sacral Chakra. This energy center acts as the foundation for the entirety of the human emotional experience – how we process trauma, how we express joy, and how we navigate intimacy.

People who deal with a blocked Svadhisthana face immense challenges when they attempt to control their emotions through the mechanisms of guilt, shame, fear, and the unhealed history of their past pain. The physical body actively stores these unprocessed emotions, creating physical discomfort and severe energetic blocks.   

The Practice of Non-Denial

The first and most vital step toward healing is simply acknowledging these emotions without falling back into the “wound of denial”. Your actual, unvarnished feelings – no matter how ugly or uncomfortable they may seem – create the only path that leads to emotional release and permanent personal change.   

You must allow your feelings to develop naturally without attempting to avoid the discomfort that inevitably arises from emotional pain and distressing memories. You should observe your feelings with a peaceful, clinical understanding while maintaining behavioral self-control. Your emotions will rapidly become less intense once you start to simply observe them instead of exhausting your energy trying to prevent them from existing.

Through the consistent practice of mindfulness, you will realize that emotional experiences exist only for a brief physiological window and do not transform into permanent states unless they are suppressed. Accepting your emotions completely enables you to let your feelings pass through you without creating devastating internal struggles.

The practice of emotional awareness ultimately develops into a state of profound freedom, bringing a feeling of physical and psychological lightness. When people release their hidden emotions, body resistance and muscular tension decrease dramatically, allowing the energy in the Sacral Chakra to flow freely. Daily existence begins to show vastly improved emotional stability, mental clarity, and deep peacefulness. This process changes all aspects of your relationship with your own mind, transforming you from someone who avoids emotions out of fear to someone who understands and masters them.

Balance the Sacral Chakra

Benefits of a Balanced Sacral Chakra

The benefits of successfully balancing the Svadhisthana Chakra permeate every facet of human existence, spanning the physical, emotional, and spiritual realms.

Emotional Stability: The balanced state of the Sacral Chakra enables you to maintain unwavering emotional stability while experiencing the full spectrum of emotional states. You no longer lack the ability to regulate your reactions, and your mind remains clear even in times of crisis. Your baseline emotional comfort increases, bringing you a greater, embodied understanding of inner peace, radical self-acceptance, and complete emotional health.   

Creative Flow: The natural flow of creativity occurs effortlessly when this chakra achieves its balanced state. Innovative and creative ideas appear without effortful, grinding thought. This creates a powerful, joyful need to show artistic expression through various forms of work and everyday problem-solving activities. This process helps individuals continuously develop themselves while collaborating harmoniously with others to expand their skills.   

Physical Vitality: The balanced state of the Sacral Chakra provides immense physical benefits, boosting raw vital energy and complete bodily health, with highly specific benefits for the lower body. The practice of balancing this center improves emotional-physical awareness, enabling the muscular system (particularly the pelvic floor and hips) to achieve greater relaxation, natural movement patterns, and perfect alignment with the body’s natural biorhythms.   

Spiritual Connection: The spiritual state of this balance creates a deep, resonant experience of existence that connects all aspects of life. Your movement through the world becomes smooth as you stop aggressively opposing the natural flow of reality. This brings you to a permanent state of presence, psychological stability, and profound connection with both your authentic self and your surrounding environment.  

Scientific and Psychological Perspective

While the chakra system originates in esoteric tradition, the modern scientific and psychological communities have conducted extensive research into the methodologies used to heal the Sacral Chakra. Techniques such as meditation, mindfulness practices, somatic yoga, and specific breathwork protocols have been heavily scrutinized and validated by clinical science.

These methods create measurable, highly specific effects on both brain functionality and autonomic nervous system operations. The practices enable the human body to shift from sympathetic dominance (fight-or-flight) into a parasympathetic state of deep relaxation. This biological shift leads directly to decreased blood levels of stress hormones (like cortisol) and an increase in mental tranquility. Regular practice is clinically proven to lead to better emotional control, improved executive concentration skills, and enhanced total mental health. While the strict scientific community does not currently recognize chakras as physical, dissectible energy centers, scientists thoroughly document and validate the actual physiological advantages that result from these chakra-balancing techniques.   

From a purely psychological perspective, the Sacral Chakra functions as a vital metaphor that links emotional health directly to total physical well-being. Psychological studies confirm that the body experiences literal physical pain when unexpressed emotions build up, creating chronic stress and anxiety over extended periods. The developed ability to identify, process, and share feelings through healthy interpersonal methods leads to undeniable mental equilibrium and psychological resilience. Modalities such as targeted journaling, professional therapy sessions, and mindful somatic awareness practices enable people to deal with their emotions effectively, leading to vastly reduced internal struggle and supreme emotional self-control.   

The connection between the esoteric and the empirical demonstrates how ancient yogic knowledge and modern scientific research function perfectly as a complementary system. The combination of these methods creates a comprehensive chakra healing protocol that serves as a complete, evidence-based method for achieving mental harmony and physical satisfaction in daily life.

Common Mistakes and Challenges in Chakra Healing

The path to balancing the Sacral Chakra is not without its pitfalls. Practitioners frequently encounter specific challenges and commit common errors that can severely stall their healing progress.

Rushing the Healing Process

People frequently make their first major error in chakra healing when they aggressively attempt to force an emotional release. Individuals in modern society are conditioned to expect instant gratification, leading them to believe that emotional healing requires fast, dramatic catharsis. However, this forceful method creates significantly more neurological stress than it solves.   

Natural emotional development requires a person to give their feelings adequate time, space, and safety to proceed organically. Any attempt to artificially speed up or forcefully control the psychological treatment process will cause the mind and body’s defense mechanisms to fight back, making true healing exponentially harder to achieve. Authentic emotional release happens gently, often quietly, when you finally allow feelings to surface on their own without applying pressure or passing judgment.

Neglecting the Physical Body

Chakra healing often becomes artificially limited because practitioners treat it as a purely mental or spiritual exercise, completely failing to pay attention to their gross physical bodies. Chakras connect directly to the biological organism; therefore, people must develop acute physical awareness to achieve emotional balance.   

The practices of yoga and breathwork, through their implementation of mindful biomechanical movement, are strictly necessary to help people release the physical tension that traps the emotional energy. The healing process only becomes truly effective when you combine physical somatic activities with your cognitive emotional understanding. This combined, holistic method develops a much more profound state of equilibrium, enabling the physical body and the psychological mind to function together in a peaceful, unified state.   

The Challenge of Expression and Self-Judgment

One of the greatest challenges individuals face when doing Svadhisthana work is overcoming their deep-seated inability to express what they truly feel. Due to past trauma or societal conditioning, people are terrified of being criticized or rejected when they express vulnerability, causing them to chronically suppress their emotions. Over the years, this fear builds dense energetic blockages and severe physical tension.   

Overcoming this requires individuals to summon immense courage and utilize self-acceptance as a bridge toward their healing goals. When individuals take small, manageable steps – such as private journaling or simply acknowledging their feelings to themselves without harsh self-criticism – their internal barriers slowly begin to break down.   

Self-judgment is the single greatest factor that slows the healing process. Inner resistance is newly formed every single time you judge yourself for “not doing enough work” or growing too slowly. Practitioners must use a gentle hand, demonstrating radical compassion toward themselves during the healing journey. When you dovetail your healing efforts with complete acceptance of exactly where you currently are, your emotional energy is finally permitted to move freely.

The Crucial Role of Consistency and Patience

The overarching process of healing the Sacral Chakra inherently requires significant time because it develops through deep, neurological personal progress, which demands complete dedication. Healing needs people to practice their chosen modalities repeatedly while patiently waiting for the compounding results to manifest.

The daily, consistent practice of short meditation and breathing exercises – performed with complete awareness of one’s emotions – brings about permanent structural results. This daily consistency is vastly superior to engaging in occasional, highly intense spiritual training sessions followed by weeks of neglect. The body and mind utilize gentle, repeated exercises to establish a new normal state without feeling threatened by external demands. This method of healing through steady, incremental progress allows you to build a secure internal space that fully supports your emotional growth toward achieving lasting balance.   

Furthermore, you must entirely cease comparing your personal psychological development to the perceived progress of others. Such comparisons create a toxic need to obtain progress rapidly, which invariably leads to unreliable, superficial development. The highly unique life experiences, traumas, and emotional baselines of individuals dictate that the healing process will look entirely distinct for each person. Progress comparisons create unnecessary psychological obstacles, resulting in frustration and self-doubt, which violently interrupt the natural growth process.

Instead, you must concentrate solely on your personal internal experiences and celebrate the minor progress you make each day. Every minor shift in your emotional understanding, every moment you successfully observe a feeling without reacting, creates immensely valuable progress toward your ultimate personal development. The complete transformation of the Svadhisthana system naturally progresses through various stages, which only become visible when you surrender to the process and allow time to do its work.

Comprehensive FAQ

  1. What exactly does the Sacral Chakra control?

The Sacral Chakra (Svadhisthana) is the primary energy center that governs the entirety of your emotional landscape, your innate creativity, your experience of sensory pleasure, and your interpersonal connections. Functionally, the system controls your emotional expression, your sexual energy, your ability to experience genuine happiness, and your capacity to build vulnerable, trusting bonds with other people. It acts as the bridge between raw, survival-based physical grounding and complex, heart-centered love.   

  1. How do I know for sure if my Sacral Chakra is blocked?

A blocked or imbalanced Sacral Chakra manifests through a spectrum of emotional, physical, and relational signs. You may experience severe emotional numbness (feeling entirely disconnected from your feelings), a complete lack of creative inspiration, a drastically lowered libido, and an intense struggle to form authentic connections with others. Physically, a blockage frequently presents as chronic lower back pain, severe stiffness in the hips, or reproductive and urinary health issues. The condition can also manifest as overactivity, characterized by extreme emotional volatility, codependency, and an insatiable need for external validation.   

  1. How long does it realistically take to balance the Sacral Chakra?

The time required to balance the Sacral Chakra varies wildly for each individual and depends entirely on the depth of their stored trauma and their dedication to the practice. Healing is not a linear timeline. However, the process of engaging in regular daily meditation, targeted somatic yoga, and lifestyle transformation will lead to gradual, compounding development. Most practitioners report noticing visible, significant improvements in their emotional stability and physical hip mobility within a few weeks of consistent, daily practice.   

  1. Can practicing yoga alone balance the Sacral Chakra?

While yoga plays an incredibly important, foundational role in balancing the Sacral Chakra by mechanically releasing physical tension and improving blood and energy flow to the pelvic region, it is rarely sufficient on its own. True, lasting healing requires a holistic approach. The combination of somatic yoga postures with visualization meditation, breathwork (pranayama) techniques, specific nutritional adjustments, and deep emotional shadow work establishes a complete, comprehensive system that supports extended, permanent healing.   

  1. Is a dramatic emotional release necessary for healing to occur?

Emotional release functions as a vital component of complete healing, but it does not need to be dramatic, explosive, or forced. Sacral Chakra healing requires emotional processing to occur as a natural, organic process. Attempting to force a cathartic breakdown often causes the nervous system to regress. The gentle process of allowing minor emotions to arise daily while maintaining mindful awareness and self-acceptance leads to authentic, sustainable healing, ultimately resulting in profound emotional liberation and unshakeable internal equilibrium.  

Conclusion

The Sacral Chakra, in all its complexity, teaches us how to profoundly understand the way our feelings connect with our physical bodies through continuous, fluid emotional movement. The Svadhisthana chakra demands that we live our lives through a heightened state of awareness regarding our present, sensory experiences. By making our darkest fears, our deepest desires, and our passing feelings more understandable to us, this vital energy center provides the ultimate blueprint for emotional balance. The feelings that we courageously allow ourselves to experience show us the definitive path that leads to a better understanding of ourselves and stronger, more authentic relationships with others.

People who successfully learn to let their feelings flow through their bodies – like water moving effortlessly down a stream – experience life with an unmatched level of freedom, ensuring their creativity, sexual vitality, and mental clarity remain fully intact.

We achieve genuine, lasting healing only by developing gentle awareness, rather than by aggressively trying to force our minds and bodies to change. Our physical body needs us to create a deeply safe, non-judgmental space because our complex emotions exist inside us, waiting to be observed without resistance. The intricate body-mind-emotion connection achieves perfect balance through this quiet awareness, successfully releasing decades of internal pressure. This holistic approach teaches us to handle life’s inevitable challenges with grounded mindfulness instead of responding to them through blind, automatic, trauma-based reactions.

Ultimately, we must abandon the toxic pursuit of perfection in our spiritual and psychological practices, choosing instead to focus on achieving sustainable balance throughout the entirety of our lives. We must learn how to surrender to the natural flow of the universe. Emotions must be permitted to experience their natural life cycle – flowing through different intensities before reaching their final state of dissipation, exactly as water does. Through the profound practice of self-acceptance, the Sacral Chakra teaches us to implicitly trust ourselves, to trust the wisdom of our bodies, and to trust the fluid journey of life itself. In doing so, our inner peace and our true, authentic identity discover magnificent new depths.

Dr. Anirudh Gurupratap Singh

Founder & Head Teacher – Mrityunjay Yogpeeth Dr. Anirudh Gurupratap Singh is the founder, and the vision behind Mrityunjay Yogpeeth is to pass on the wisdom of yoga from great yoga masters to students of yoga. Dr. Singh is a beloved teacher, healer and guide whose life has been dedicated to the spiritual and physical uplifting of people through authentic yoga practice and Vedic tradition.

The Meditation Guide: Types, Techniques, and Benefits

The Meditation Guide: Types, Techniques, and Benefits

Meditation is a practical way to train attention, notice thoughts without getting pulled into them, and return to the present moment with more steadiness. This guide explains what meditation is, where it comes from, how beginners can start, which types are most common, and what current research says meditation may and may not help with.

Introduction and Foundations

Meditation is often misunderstood as a way to “empty the mind” or feel calm instantly. In reality, it is a broad family of mind-body practices that help people work with attention and awareness more skillfully. Many forms use the breath, a word or phrase, a visual image, or present-moment awareness without judgment as the main point of focus.

Understanding Meditation

At its simplest, meditation means pausing on purpose and noticing what is happening in the mind and body. Thoughts may come and go. Emotions may rise and fade. Physical sensations may shift from moment to moment. The practice is not to force those experiences away, but to observe them with less resistance and return gently to an anchor such as the breath.

That is why beginners do not need a perfectly quiet mind to meditate well. A wandering mind is normal. The practice is in recognizing distraction, letting go of self-criticism, and beginning again.

Origins and Philosophy

Meditation has been practiced for thousands of years, and many meditative traditions began in Eastern cultures before being adapted for secular wellness and clinical use. While different traditions use different methods and language, they share a common thread: training awareness so that people can relate to experience with more clarity, steadiness, and intention.

yoga student meditating

Preparing for Meditation

You do not need special equipment or a perfect room. A quiet corner, a chair or cushion, and a few uninterrupted minutes are enough. A helpful setup usually includes a comfortable posture, a clear focus of attention, and an open attitude toward distractions rather than a fight against them.

Sit in a way that feels both relaxed and alert. Let your spine feel naturally upright, soften your shoulders, and rest your hands comfortably. If sitting on the floor feels uncomfortable, use a chair. Comfort matters because pain and stiffness can become unnecessary distractions.

Step-by-Step Beginner Guide

A simple beginner session can look like this:

  1. Sit comfortably and take a moment to settle.
  2. Bring attention to your breathing without trying to change it.
  3. When your mind wanders, notice it kindly and return to the breath.
  4. Continue for five to ten minutes, then pause for a few seconds before standing up.

If closing your eyes feels uncomfortable, keep them half-open with a soft gaze. If breath awareness feels frustrating, use body sensations, ambient sounds, or a short phrase such as “here” or “steady” as your anchor.

Breathing and Awareness

The breath is a common meditation anchor because it is always available and always present. You do not need to breathe deeply or in any special pattern unless you are intentionally doing a breathing exercise. For basic meditation, simply notice the inhale and exhale at the nose, chest, or belly.

Over time, this simple attention can help you notice tension earlier, settle the mind more quickly, and feel less swept away by mental noise.

Common Types and Techniques

There is no single “best” type of meditation. The most helpful style is usually the one you can practice consistently and comfortably.

Mindfulness meditation helps build present-moment awareness and a nonjudgmental attitude. In this practice, you notice your breath, body sensations, thoughts, emotions, and surrounding sounds. When your mind gets distracted, you gently bring your attention back to the present moment. Beginners can start with 5 to 10 minutes a day, and this method is highly suitable for beginners.

Focused attention meditation is used to strengthen concentration and mental steadiness. In this practice, you keep your attention on one chosen object, such as your breath, a sound, a mantra, or a candle flame. Whenever your mind wanders, you calmly return your focus to the chosen object. A 5 to 10-minute session is a good starting point, and this technique is also highly beginner-friendly.

Loving-kindness meditation, also known as Metta meditation, helps cultivate warmth, compassion, and goodwill. During this practice, you silently repeat phrases of kindness for yourself and others. These phrases may include wishes for peace, happiness, safety, and well-being. Beginners can practice this for 5 to 15 minutes. It is highly suitable for beginners and can be especially helpful for developing emotional balance and kindness.

Transcendental meditation and body scan meditation both encourage calm and deeper awareness. In transcendental meditation, a person softly repeats a mantra to help settle the mind. In body scan meditation, attention gradually moves through the body from head to toe, noticing sensations without judgment. A typical session can last 10 to 20 minutes. Overall, this practice may feel moderate for some beginners, but body scan meditation is especially beginner-friendly.

women performing meditation

Techniques Explained

Mindfulness meditation is often the easiest place to begin because it teaches you to notice experience as it is. Focused attention is useful when you want a very simple anchor and a clearer sense of how to return when the mind drifts. Loving-kindness can be especially helpful when the inner voice feels harsh or critical. Body scan is a strong option for people who feel disconnected from the body or hold a lot of physical tension.

If you are new, choose one method and stay with it for a week or two before changing styles. Consistency usually teaches more than constant switching.

Benefits of Meditation

Research does not support every claim made about meditation, but several benefits have meaningful evidence behind them:

  • Stress and distress: Mindfulness meditation programs can produce small to moderate reductions in negative dimensions of psychological stress.
  • Anxiety symptoms: Evidence reviews report modest improvements in anxiety, especially when meditation is practiced regularly over time.
  • Depression symptoms: Meditation may help reduce symptoms of depression, particularly as part of a broader care plan.
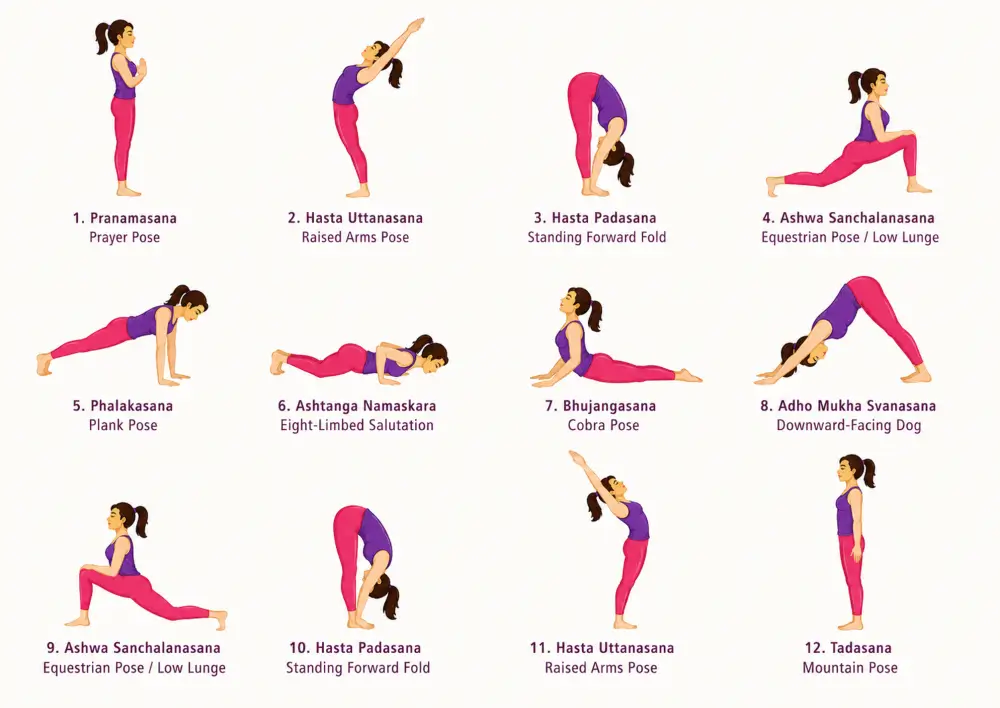
  • Chronic pain support: Evidence is mixed overall, but the case for chronic pain is stronger than it is for acute pain, and some reviews show small improvements.
  • Sleep quality: Mindfulness meditation may reduce insomnia and improve sleep quality.
  • PTSD symptoms: Some studies suggest meditation and mindfulness may reduce PTSD symptoms in certain groups.
  • Mental health-related quality of life: Reviews also suggest modest gains in mental well-being and quality of life.

Scientific Perspective

Current research is strongest for selected outcomes rather than every popular claim about meditation. A major systematic review and meta-analysis found moderate evidence for improvement in anxiety and depression and smaller effects for pain and stress-related outcomes. Separate research on chronic pain suggests modest benefits, but the quality of evidence still varies, and stronger trials are needed.
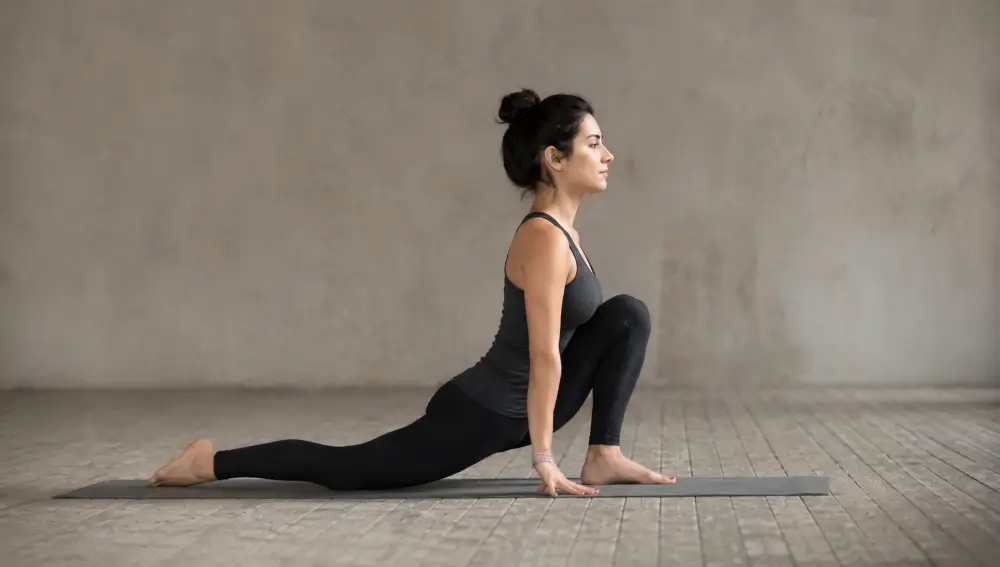
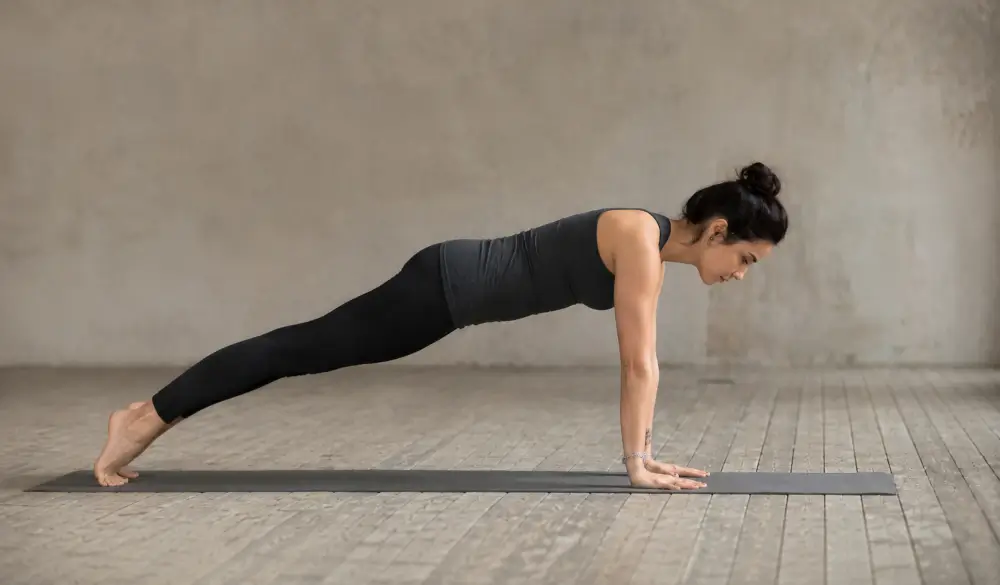
Scientists are also studying how meditation relates to the brain. In one small longitudinal imaging study, participation in an eight-week mindfulness-based stress reduction program was associated with increased gray matter concentration in regions linked to learning, memory, self-referential processing, and perspective taking. NIH also cautions that meditation studies can be difficult to compare because techniques, populations, and outcomes differ widely across studies.

Sleep research is especially promising for some groups. In a randomized clinical trial of older adults with moderate sleep disturbances, a structured mindfulness meditation program improved sleep quality more than a highly active sleep-hygiene education program at post-intervention.

yoga student performing meditation

Medical Disclaimer

This article is for general education and wellness. Meditation can support well-being, but it is not a substitute for medical, psychological, or emergency care. If you live with trauma, severe anxiety, depression, psychosis, chronic pain, or another medical condition – or if meditation makes distress worse – pause and speak with a qualified health professional before continuing. NIH notes that meditation is usually considered low risk, but some people do report negative experiences, including anxiety or depression.

Common Mistakes

Most beginners are not “bad” at meditation – they are simply noticing the mind for the first time. The most common mistakes are trying to eliminate every thought, sitting too long too soon, and rating every session as either good or bad. A wandering mind is not failure; returning is the training.

Challenges and How to Overcome Them

Restlessness, sleepiness, impatience, and lack of time are normal. If sitting still feels difficult, shorten the session, open your eyes slightly, or try walking meditation. If breath awareness feels activating, switch to body sensations or sounds. If you keep getting distracted, that is still practice. Each return strengthens the habit of awareness.

Creating a Daily Routine

Consistency matters more than intensity. A brief session practiced most days is usually more sustainable than an occasional long session. Tie meditation to an existing habit, such as making tea in the morning, taking a lunch break, or settling down before bed.

Mind-Body Connection

Meditation can make the link between mind and body easier to notice. Thoughts often show up physically as tight shoulders, shallow breathing, jaw tension, or a racing heartbeat. As awareness grows, you may catch these patterns earlier and respond with more calm and choice.

Consistency and Patience

Progress is rarely dramatic. Some sessions feel clear, and others feel scattered. What matters is showing up, practicing gently, and letting the effect build over time. Short, steady practice usually matters more than occasional intensity.

Meditation

Advanced Insights

As practice deepens, meditation often becomes less about trying to relax and more about recognizing mental habits in real time. Many people begin to notice a little more space between a trigger and their reaction. That subtle shift can make daily life feel steadier, less rushed, and more intentional.

FAQ

Is meditation suitable for beginners?

Yes. Start with a simple method such as breath awareness, body scan, or loving-kindness for a few minutes a day.

How long should I meditate each day?

Five to ten minutes is a realistic starting point. As the habit becomes easier, you can extend the session if it feels helpful.

What if my mind keeps wandering?

That is normal. The practice is not to stop thoughts, but to notice them and return gently.

Can meditation replace sleep or exercise?

No. Meditation can complement healthy routines, but it does not replace sleep, movement, medical care, or mental health treatment.

When will I notice results?

Some people notice a sense of calm fairly quickly, but deeper benefits usually come from regular practice over time.

Conclusion

Meditation is simple, but it is not shallow. It teaches you to pause, notice, and return. With steady practice, it can become a practical way to relate to stress with more clarity, meet emotions with less reactivity, and build a calmer relationship with your own mind.

Start small. Keep the method simple. Let consistency do the deeper work.

Dr. Anirudh Gurupratap Singh

Founder & Head Teacher – Mrityunjay Yogpeeth Dr. Anirudh Gurupratap Singh is the founder, and the vision behind Mrityunjay Yogpeeth is to pass on the wisdom of yoga from great yoga masters to students of yoga. Dr. Singh is a beloved teacher, healer and guide whose life has been dedicated to the spiritual and physical uplifting of people through authentic yoga practice and Vedic tradition.

Ardha Padmasana (Half Lotus Pose): Steps, Benefits, Precautions & Variations

Ardha Padmasana

The practice of yoga considers seated postures as vital elements that create a peaceful environment for practitioners to achieve complete awareness beyond their physical movements. The true essence of yoga lies beyond its common view as a practice for developing flexibility and performing active movements, as the discipline reaches its deepest state through silent meditation. The practice of sitting postures establishes an essential foundation that enables practitioners to observe their breath, meditate, and study their own thoughts. The techniques enable users to achieve full-body relaxation while their minds enter a state of peacefulness, allowing them to shift their attention from external activities to their internal world.

The practice of Ardha Padmasana functions as a simple transition between basic sitting and more difficult meditative positions. The position offers more structure than basic cross-legged seating, yet remains easier to perform than complete Lotus Pose. The practice establishes equilibrium, which enables beginners and experienced practitioners to develop comfort with stability and awareness of seated positions without experiencing excessive difficulty.

Pranayama meditation and traditional yoga practices use Ardha Padmasana because it enables practitioners to achieve both grounding and alertness. The lower body remains fixed while the spine ascends to create a position that combines both standing and restful elements. Yoga practitioners need to maintain silence through their controlled breathing patterns as they practice stillness.

Understanding Ardha Padmasana (Half Lotus Pose)

The word Ardha Padmasan comes from Sanskrit, where Ardhameans “half”, Padma literally means “lotus”, and Asana stands for “pose”. Padma means lotus, indicating that the name of the pose is an incomplete version of Lotus Pose or Padmasana Yoga asana. The practitioner then sits down and crosses one of their legs over the other bent leg. This is a very flower, to be sure, but the baseline design feels like lotus opened petals yoga is thought to represent full person advancement, mind clarity, and spiritual growth.

The opposite coolness in the natures of Ardha Padmasana includes two different, unmatched moments, for the construction of this position is what makes it firm and serene for your particle. With an imbalance like that, you create a natural want for the body to fall in a direction because weight is not distributed evenly, and as a result behaves unbalanced and weak. We visualise the torso rising through and up the spine while the pelvis remains glued to the floor. The shoulders drop, and the hands may rest in mudra or at the knees. You make users more stable by keeping them on the inside rather than the outside.

Lotus-derived postures have been intimately associated with meditation and respiratory practices for thousands of years. The legs’ configuration generates a stable base, somehow restricting movement and allowing human beings to sit for prolonged time periods. The first stage of lotus pose is Ardha Padmasana, or half lotus, as this is a practice teaching the hips to open with less stress and tension for the knees. According to the yoga development guideline, in light of the fact that advancement can only come through a profound and gradual process, this individual ought to pursue it with aware mindfulness.

Yoga Student Practicing Half Lotus Pose

Preparing the Body for Ardha Padmasana

People need to warm up their bodies before they can do Ardha Padmasana because they need to specifically focus on their hip joints, knee joints, and ankle joints. The pose requires the hips to turn outward, which permits leg movements that keep joints free from stress. The hip joints need to function properly because people use their knee joints as an alternative when their hip joints lack complete movement ability, which leads to painful or harmful conditions. The practice of building hip joint mobility helps create a secure base, which enables safer execution of the pose.

Practitioners face common difficulties, which include hip tightness, knee stiffness, and restricted overall body flexibility. The process includes these challenges, which require practitioners to proceed with gradual understanding instead of rushing through their training. Body adaptation occurs through regular exercise, particularly for individuals who have to sit in chairs for extensive periods and who move very little during their daily activities. Mindful yoga practice requires practitioners to respect their physical boundaries by practising without any effort to compel their body systems.

The body benefits from gentle preparatory movements, which lead to better comfort and improved experience because these movements generate positive outcomes. Simple practices like butterfly pose, seated forward bends, and slow hip rotations help release tension and improve joint mobility. Developing awareness of posture now becomes essential for our betterment. The body learns to maintain proper alignment through the practice of sitting upright with a neutral spine during all basic positions. The body achieves better stability, which helps people enter Ardha Padmasana with more natural control and comfort.

Step-by-Step Guide to Ardha Padmasana

For this exercise, you sit on the floor with your legs in front of your body. That means your low back lifts and the shoulders dip down. In other words, with your hands at the root of your thighs or by your hips. The first position has you noticing the movement inside your body that creates a firm foundation for you to stretch into the yoga pose.

Begin seated, and bend one of your legs to pull that foot in next to the thigh on the opposite side. Place the foot on the top thigh – sole up. If it feels ok, heel close to the low abdomen + “It’s a compression of your body” with all of that going forward, and they expect you to feel slow and deliberate with the movement. It helps the body not to get rigid, so while each step should be taken evenly, there is no stress in the knees and ankles.

You needed to point the alternate limb beneath you – until that knee plunged into dirt. What you have to do in this asana is that one leg has to be your base of the pose, but all your body remains relaxed. This is being in balance with gravity, evenly spaced between your sitting bones and the earth, gives you a sense of stillness.  If you feel like your left side is a little heavier than the right side, those will balance out really minor shifts of all your body.

It’s only once you’ve got the legs sorted that you can worry about the upper body. And you want some ease in the lengthening of your spine. You have to do it as you loosen up your shoulders and float your neck in line with the base of your spine. In case of, it helps keep the hands on the knees or in some simple mudra, e.g., chin mudra. Finally, let the eyes close – or the gaze soften enough so the body can invite deep, tender rest.

yoga student performing ardha padmasana

Breathing in Ardha Padmasana

Breath becomes vital for seated postures because practitioners focus on breath control during meditation, which includes Ardha Padmasana practice. The practice requires the breath to be free-flowing, yet the practitioner must sustain continuous, unbroken breathing through relaxed lung function. Your breath pattern shows the way to find your inner paradise. The position requires you to let your body breathe naturally according to its natural rhythm. Users reach peacefulness through soft awareness, which assists them in departing from their turbulent thoughts.

The body becomes more aware of its breathing when it maintains complete stillness, which allows it to remain in its space. Diaphragmatic breathing becomes much easier through this process of stopping. Your abdomen expands during your breath intake, while your stomach goes back to its normal position after your breath output. People must allow their body movements to develop through their own natural process because people should not attempt to exceed their natural human limits. The breathers will experience relaxed behaviour because the breathing technique helps them release all physical discomfort while they maintain correct body posture. You will learn to remain conscious of your physical self through the process of waiting, which will continue to develop your skill.

Breath serves as the sensitive connection point which connects both body and mind. The body achieves relaxation when a person breathes in a consistent pattern because the body interprets this pattern as a signal from the nervous system that indicates safety. Those who lack this state of tranquillity endure extreme physical distress while they attempt to remain seated. You begin your self-examination process after you create a physical barrier which isolates you from the active exterior environment. Ardha Padmasana and its variations provide methods for practising meditation and breathing awareness to achieve mental clarity, sustained concentration and inner peace.

Ardha Padmasana for Meditation

The meditation position Ardha Padmasana delivers practitioners equal comfort and stability, which makes it an appropriate position for their breathing exercises. The stable foundation created by the legs allows the body to maintain equilibrium without moving needlessly. The body reaches complete stillness, which allows the mind to reach a state of intense focus. The body remains in a fixed position, which helps you concentrate because it enables you to stay focused without needing to make adjustments or deal with interruptions. Your body weight begins to feel like a supportive force, which allows you to meditate at your preferred speed.

The most basic meditation method through this posture involves practising breath awareness. The practice of breath control begins when one sits in Ardha Padmasana. The process requires you to observe your breathing pattern throughout each breath cycle, which includes both inhalation and exhalation, without any attempt to control your breathing. The mind uses this silent observation method to maintain its focus, which helps to minimise both restlessness and mental activity. The breath serves as an anchor point, which creates a continuous cycle of breathing patterns that leads to a peaceful state of mind.

The people who watch their thoughts while maintaining distance from their thoughts discover this practice to be beneficial. You should let thoughts come and go without reacting to them or analysing them, similar to how you would observe clouds that travel across the sky. The practice establishes emotional distance from automatic thought patterns,s which leads to mental transparency. The daily practice of Ardha Padmasana requires you to spend only a few minutes each day, which will help you develop inner awareness. The practice establishes a growing state of physical silence, which enhances your capacity to understand your mind by means of your thoughts and your breath.

yoga student performing Half Lotus Pose

Benefits of Practising Ardha Padmasana

Ardha Padmasana offers both physical and mental benefits by improving flexibility, posture, and focus. Regular practice enhances body alignment, reduces stress, and creates a stable foundation for meditation and overall well-being.

Improves hip flexibility and mobility

Regular practice gradually opens the hips and improves joint movement. It supports safe external rotation, reduces pressure on the knees, and makes seated yoga postures more comfortable and stable.

Enhances posture and spinal alignment

This pose encourages an upright spine, relaxed shoulders, and an open chest. It is especially helpful for correcting slouched posture caused by prolonged sitting and builds long-term body awareness.

Promotes mental clarity and focus

The stable seated position, combined with controlled breathing, helps calm the mind. It reduces distractions and improves concentration, making it ideal for meditation and mindfulness practices.

Reduces stress and improves relaxation

Ardha Padmasana helps release physical tension and calms the nervous system. This leads to emotional balance, deeper relaxation, and an overall sense of inner peace.

Precautions and Safety Guidelines

The practice of Ardha Padmasana provides yogis with mental and emotional benefits that surpass the physical benefits of this yoga position. The practice of stillness, together with controlled breathing techniques, helps practitioners achieve better focus skills. The silent space enables users to concentrate because no mental disturbances exist. The pose helps the body to let go of stress, which enables it to achieve deeper relaxation. The practice of Ardha Padmasana provides emotional stability through its combination of relaxation techniques and mental peace, which supports your overall health.

The primary rule of this posture requires practitioners to protect their knees throughout the performance. The foot placement process requires movement to start from the hips, while the knee joint must remain stable during this process. Knee joint problems occur when people try to stretch their legs because their hip joints do not provide enough range of motion, which results in excessive force on the knee joint. The body needs to move at a slow speed, which should continue until the body reaches its natural boundaries. The practitioner maintains a safe and sustainable posture by keeping the foot in a relaxed state while avoiding any movements that involve pushing or pulling.

The process of entering and exiting Ardha Padmasana requires practitioners to perform their movements in a deliberate manner, which follows a slow pace. The body experiences joint discomfort when sudden movements occur because the body lacks control over its speed and direction. The pose requires you to exit when your body experiences sharp pain, together with pinching feelings and numbness.

yoga teacher performing ardha padmasana

Common Mistakes in Ardha Padmasana

The common error people make in Ardha Padmasana happens when they attempt to position their foot on the opposite thigh while lacking sufficient hip flexibility. The body forces movements because people need to open their hips, but they cannot achieve the required flexibility. This condition progresses over time to produce pain, which can result in injuries. The body should maintain a natural state of rest during the entire period of this posture.

The practitioner needs to perform the posture with slow movements, which enable their hips to open while their knees stay protected. Practitioners need to walk at a slow pace because this enables them to honour the physical boundaries of their bodies. The common problem with this pose occurs when practitioners allow their back to collapse into a slouched position. The back collapse results in two negative effects because it decreases the benefits of the posture, and it produces tension in the lower back and shoulder regions. Your body maintains better balance through an upright spine, which also enables correct breathing and improved energy circulation. The spine should not be forced into a straight position because the body needs to be able to lengthen itself naturally toward a stable yet comfortable position.

Practitioners tend to maintain excessive tension in their shoulders, face, and jaw without knowing about it. The hips should guide the movement because some people pressure their knees instead of moving with their hips. The subtle misalignments create difficulty for practitioners who must execute the correct posture. The Ardha Padmasana posture provides both stability and relaxation to practitioners who require only basic alignment maintenance. The posture achieves its full comfort and supportive nature through the release of body tension while the practitioner maintains full body awareness. The physical and mental benefits of the practice improve when the practitioner maintains full body awareness.

Variations of Ardha Padmasana

Beginners should start their first seated yoga postures by learning the basic cross-legged position. The basic posture enables the body to progress toward floor-sitting while people learn how to maintain proper alignment and find comfortable positions. The method provides an initial experience of hip opening, which requires minimal effort from the joints. People become better at sitting upright because they practice more, which helps them achieve Ardha Padmasana.

The Ardha Padmasana variation lets practitioners put their foot on their opposite leg at a lower point instead of putting it directly on their thigh. The posture intensity decreases through this method while the essential structure of the position stays unchanged. The solution proves helpful for people who struggle with hip tightness and knee discomfort. The modified practice enables you to develop your flexibility through gradual progression because it prevents you from practising beyond your current capabilities.

Ardha Padmasana exists as a position that connects Sukhasana and Padmasana. The position provides better balance and support than a basic cross-legged stance, yet it remains simpler than full Lotus. Practitioners should conduct their yoga practice through deliberate and unhurried movements. The body develops natural flexibility through regular practice, yet full Lotus achievement remains optional. The practice requires you to maintain comfort while developing awareness and progressing through your practice.

Modifications and Use of Props

The use of props in Ardha Padmasana creates better comfort for beginners who need to learn the basic posture. The folded blanket or firm cushion lets the person sit while their hips rise, which causes their pelvis to move into a slight forward position. The small adjustment helps the spine to achieve natural alignment while it decreases the risk of slouching. The body maintains an upright position because of the stable base, which produces no discomfort during the posture.

The additional support needs cushions, blocks, or folded towels which create an elevated position for the knees. This method works best for individuals who suffer from hip tightness or knee joint pain. Knee support allows the legs to attain full relaxation in the position while decreasing pressure on the knees. The props provide support to the body, which needs to reach the floor through their current body position, while they help people achieve gradual body relaxation.

The wall serves as a helpful tool for practising because it helps practitioners maintain proper spine alignment. The backrest against the wall provides soft support, which stops users from shoulder rounding and chest collapsing. The basic changes to Ardha Padmasana enable practitioners of all body types to practice this pose at their own flexibility level. The props create inclusive postures that help people practice comfortably while they focus on breathing and being aware of their bodies instead of experiencing physical discomfort.

student performing ardha padmasana half lotus pose

How to Sit Comfortably for Longer Durations

The process of continuous practice enables people to develop their ability to sit in Ardha Padmasana. Practitioners need to begin their practice with three to five minutes because their bodies require time to adapt to the position. The method enables the body, which contains the hips, knees, and lower back, to undergo its adaptation process without any physical stress. People experience discomfort when they try to sit for extended periods, so they must practice patience to achieve comfort and stability, which develops throughout multiple sessions.

Correct alignment requires equal importance, but it should not create increased stiffness for the body. The spine should maintain an upright position with its natural state of support and comfort. The body needs to make tiny changes when it starts to feel tense because that will help restore comfort. The adjustments require people to move their legs slightly differently from their current position, while they should also loosen their shoulder muscles and extend their spinal column. The goal is to achieve equilibrium between bodily stability and natural movement.

People can use tiny body movements during extended periods of sitting to stop themselves from experiencing numbness or discomfort. You can use weight shifts and pressure point detection to solve problems that occur before tension develops. The practice of body awareness training enables you to determine when to make movements and when to stay still. The main task requires you to find the right combination of relaxation and active presence. The correct method to handle your posture creates a supportive structure which enables you to experience enhanced comfort while maintaining your mind’s alertness.

Integrating Ardha Padmasana into Daily Practice

The practice of Ardha Padmasana provides people with a flexible and functional yoga posture that they can practice throughout their entire day. The practice of morning meditation achieves its greatest results because people reach their optimal mental and physical conditions during this time. The exercise demonstrates its benefits when practitioners use it to sit down after completing a yoga session instead of needing to stand. The exercise functions well during pranayama practice because it requires practitioners to maintain a steady position, which helps them concentrate on their breathing. The stability brought by Ardha Padmasana establishes a secure base that enables practitioners to perform alternate nostril breathing and maintain continuous breath control.

The yoga practice begins or ends with this particular posture. The practitioner sets their intention through Ardha Padmasana, while the same posture provides a way for them to achieve complete inner peace. The establishment of a basic daily schedule that requires only a few minutes of sitting time will create significant results when practised consistently. The practitioner will develop their ability to maintain stillness through consistent practice, which builds their comfort, focus, and understanding of the practice. Ardha Padmasana develops into an established practice space that provides both peace and time for self-reflection and restoration of inner peace.

Mind-Body Connection in Ardha Padmasana

The body remains motionless, which produces a direct impact on the nervous system to produce feelings of tranquillity and harmonious balance. The body maintains its steady state while the person stays relaxed, which brings about breathing that becomes slower and more uniform to indicate to the mind that it should calm down. The common use of seated postures in meditation practices exists because Ardha Padmasana serves as an essential seating position. The posture enables mental stillness through its restriction of body movements, which helps people direct their focus from outside interruptions to their internal understanding.

The practice of observing your inner experiences helps you develop emotional understanding, which establishes distance between your present state and your future reactions. The practice develops a capacity for conscious response, which becomes automatic behaviour for people who practice it. The practice of Ardha Padmasana creates a safe environment for self-examination, which enables people to reach their full understanding of themselves. The process creates stronger ties between physical and mental states, which produce inner calm and equilibrium through consistent use.

women performing ardha padmasana

Role of Consistency and Patience

Consistency and patience are essential for mastering Ardha Padmasana. Regular, mindful practice allows the body to adapt safely, while avoiding comparison and maintaining discipline supports steady progress, leading to improved flexibility, balance, and long-term stability in yoga practice.

Gradual Physical Development

Ardha Padmasana develops through steady and mindful practice rather than forceful effort. The body needs time to adapt, allowing muscles, joints, and ligaments to open safely. When combined with controlled breathing and awareness, this gradual approach leads to improved stability, comfort, and long-term progress without risk of strain.

Avoiding Comparison

Every individual has a unique body structure, flexibility level, and pace of progress. Comparing your posture with others can create unnecessary pressure and lead to incorrect practice. Focusing on your own comfort, balance, and internal awareness ensures a safer and more effective learning process.

Building Daily Discipline

Consistency is built through small, regular efforts. Even a few minutes of daily practice or quiet meditation can significantly improve flexibility, focus, and body awareness. Over time, these consistent habits create a strong foundation, making it easier to hold the posture with stability and control.

Importance of Patience

Progress in yoga is gradual and requires a calm, patient mindset. Rushing or forcing the body can lead to discomfort or injury. When practitioners allow the process to unfold naturally, the benefits – such as improved flexibility, balance, and mental clarity—develop in a sustainable and lasting way.

Benefits of Mastering Ardha Padmasana

The practice of Ardha Padmasana helps to create a foundation of comfort, which enables meditation practitioners to achieve better stability during their practice. The body finds it easier to maintain the posture for extended periods when it reaches a state of comfortable rest. The mind achieves better concentration because physical interruptions happen less frequently. The continual practice of this position leads to improved body alignment for better results. The technique helps people maintain an upright spine position while decreasing stiffness that results from staying in one position or moving little throughout the day.

The Ardha Padmasana practice brings about physical advantages that also enhance mental health. The combination of a steady posture and calm breathing promotes a sense of inner calmness and improves concentration. The posture develops into a secure environment, which helps people build their ability to see things clearly. The system helps users build self-awareness, which helps them gain better control over their thoughts and feelings. The combination of physical stability and mental relaxation in Ardha Padmasana establishes the position as an important practice that helps people develop focus and inner peace.

Frequently Asked Questions (FAQ)

Is Ardha Padmasana suitable for beginners?

Beginners can start practising Ardha Padmasana after they finish their essential training. The training process should begin with gentle movements, which need to be practised without any equipment at a controlled speed. 

How is Ardha Padmasana different from Padmasana?

Ardha Padmasana requires practitioners to place one foot on their opposite thigh. The Padmasana position requires practitioners to place both of their feet on their thighs, which creates a more challenging posture than Half Lotus.

What should I do if I feel discomfort in my knee?

You need to stop your current activity because knee pain has started. Your hip joints exhibit restricted movement capabilities according to your current condition. The person should adjust their current position or select an easier seated position because they should maintain joint protection instead of completing the pose requirements.

How long should I sit in Ardha Padmasana?

The Beginners who want to learn stretching should practice for 3 to 5 minutes before they extend their practice time. The exercise requires you to concentrate on your comfort level while maintaining regular breathing patterns instead of tracking your progress through time measurements. People need to practice until they can sit for extended periods, which will become their normal way of sitting.

Can I practice Ardha Padmasana daily?

Gently executed daily practice provides multiple advantages. The program enhances your ability to stretch better while improving your body positioning and enabling you to concentrate better. Your body will provide you with signals when you need to stop, so you should rest because even brief workout sessions will help you achieve your training objectives.

Conclusion

The practice of Ardha Padmasana appears simple yet demonstrates greater complexity, which establishes its importance in yoga practice. The practice establishes a direct connection between both physical postures and inner mental states by demonstrating that true stability exists through a combination of comfortable body positions and proper body alignment. The body needs support because people can remain motionless when they feel comfortable, and their body weight is distributed evenly. The stillness includes more than physical elements because it provides mental space, which enables deeper focus.

The practice requires practitioners to maintain their current body shape instead of trying to reach their ideal body shape. The practice requires breathing to be gentle while maintaining proper body alignment, and people should take their time instead of forcing their bodies to move. Ardha Padmasana progress occurs through a step-by-step process, in which each practice session helps students build their body familiarity with the position. The body demands time to adapt because what seems difficult to handle at first becomes beneficial after several days.

The practitioner needs time and dedication to reach a state where their body transforms into a protected space that allows them to think deeply. The practice allows people to strengthen their body-mind connection while their body awareness develops without conscious effort. The essence of yoga exists beyond physical execution and visual presentation because it centres on being in the moment. Through Ardha Padmasana practice, we develop the ability to observe ourselves while moving at a slower pace, which helps us find inner balance.

Dr. Anirudh Gurupratap Singh

Founder & Head Teacher – Mrityunjay Yogpeeth Dr. Anirudh Gurupratap Singh is the founder, and the vision behind Mrityunjay Yogpeeth is to pass on the wisdom of yoga from great yoga masters to students of yoga. Dr. Singh is a beloved teacher, healer and guide whose life has been dedicated to the spiritual and physical uplifting of people through authentic yoga practice and Vedic tradition.