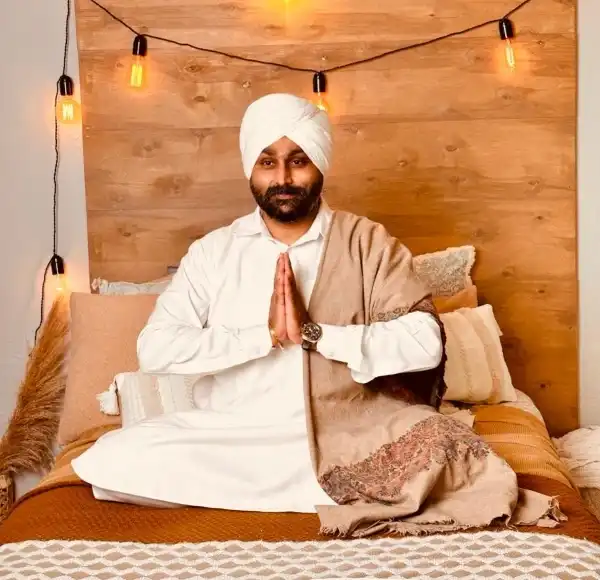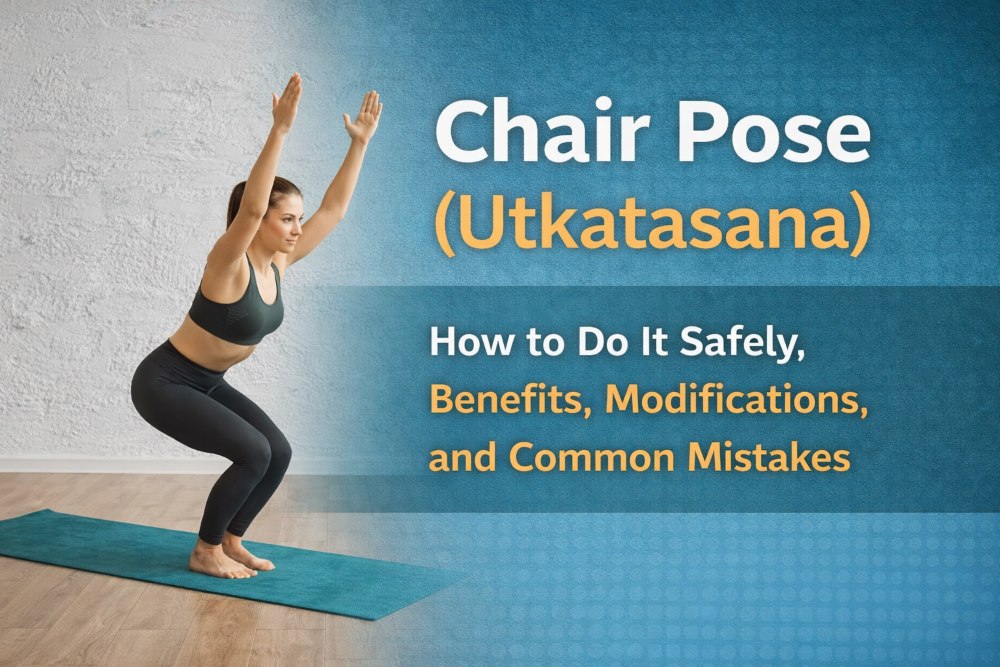
Utkatasana or Chair Pose, as you’ve probably heard it called – is a standing squat-like yoga pose where you look like you’re sitting down into an invisible chair. It’s deceptively simple: you don’t travel far across the mat, but the pose requires full-body coordination of (legs, hips, core muscles, spine, shoulders, and breath) – as well as a calm mind.
It’s sometimes translated as “Fierce Seat” or “Powerful Pose.” The Sanskrit root utkata can mean powerful or fierce, words that might come to mind as you struggle with the pose and your thighs begin to fire.
Quick facts (at a glance)
- Sanskrit name: Utkatasana
- Pronunciation: oot-kah-tash-ah-nah
- Pose type: Standing, strengthening
- Primary focus: Thighs, glutes, ankles, core, and postural muscles
- Standard duration: 3 – 10 breaths (or 30 – 60 seconds, given your style of practice)
Why Chair Pose matters (and why it’s harder than it looks)
Chair Pose is a perfect demonstration of yoga’s “simple-but-not-easy” construction:
- It attacks the legs similarly to a managed squat.
- Your torso has to remain long even as your hips sink back.
- It trains breath under effort – you learn to calm down while working hard.
Which is why teachers tend to describe Chair Pose as heat-building and a lesson in staying the course, external challenge notwithstanding.
Benefits of Chair Pose (a practical, evidence-informed view)
What Chair Pose trains directly trains
From the perspective of movement and strength, Utkatasana is known to build:
- Quadriceps strength (front thighs)
- Glute & hip stabilization (particularly with the “sit back”)
- Core bracing for spinal support
- Ankle strength and stability
- Endurance in an upright torso position and under load
What research suggests about yoga practice overall
Most studies look at yoga programs, not one pose by itself. Nevertheless, Chair Pose is frequently featured in the yoga workout menu, and studies on diet-quality-less-so-health-quality (like pattern of physical-activity) indicate benefits like strength, balance, range of motion, and flexibility can be had with consistent progressive practice.
Important: If you are utilizing yoga as a therapy for a health condition (such as knee osteoarthritis, chronic pain, or balance issues), it is safest to allow a qualified professional to work with you and use modifications because not every pose or degree of depth is appropriate for every body.

Muscles worked (and what’s happening in the body)
The chair is fundamentally gnarly, bending at the hips and the knees with the spine up. Commonly engaged areas include:
- Quadriceps (thighs) and hip flexors
- Butt (to control pelvis and support hips)
- Muscles Act Directly on the Spine for Upright Posture
- Core to keep rib flare in check and lower back in Position
A useful idea is to make energy in two directions simultaneously: use your feet to ground down, but lift with the spine and arms.
How to do Chair Pose step-by-step (safe, clear alignment)
1) Start in Mountain Pose (Tadasana)
- Balanced with feet rooted, tall.
- Press into all of the foot (not just into the toes).
2) Inhale: lift the arms
- Extend your arms straight overhead and slightly forward of your ears.
- Options: parallel arms with palms facing in, or hands together.
If your shoulders are tight: Lift only as high as you can without straining or bring your hands in prayer at the chest.
3) Exhale: sit back and bend the knees
- Bend your knees, sit your hips back as though the chair is behind you.
- Your chest will naturally lean forward aggressively a little bit—that’s fine.
- As you go deeper, your knees may travel forward of your feet depending on the length of your torso and lower limbs.
Key feeling: more “sit back” than “knees forward.”
4) Align the thighs and feet
- Inner thighs stay drawing toward parallel (don’t let the knees collapse in).
- Press down through the feet and feel as though the thigh bones sink toward your heels.
5) Support the lower back
- Hollow through the belly, draw the tailbone down and a little bit in to keep the lumbar spine long.
- Don’t arch your lower back or push out your ribs.
6) Hold and breathe
- Remain there for 3 to 10 breaths or 30 seconds to 1 minute.
- To enter: Inhale, straighten the knees, come up; exhale, release arms.

Breath + focus cues (what to think about while holding)
Chair Pose becomes more manageable when your attention is simple:
- Inhale: lengthen the spine and even lift the chest slightly (no rib flair).
- Exhale: sit it back a little more, ground those heels, soften the shoulders
Let your breath be a barometer: If you can’t breathe evenly, lessen the depth or back off.
Alignment checklist: quick self-audit
Feet
- Do you feel the entire foot grounded (not just the toes)?
- Are your arches collapsing inward? If so, spread toes and press both the inner heel and outer heel down.
Knees
- Do the knees track out the way of the toes (not caving towards each other)?
- Any sharp pain? If yes, come out and modify.
Hips + spine
- Are you sitting far enough back to keep your lower back long?
- Are ribs flaring forward? If so, gently draw the front ribs forward.
Arms + shoulders
- Are your shoulders creeping toward your ears? Slide the shoulder blades down the back.
- If arms overhead tug on your neck/shoulders, do arms forward or prayer hands.

Common mistakes (and how to fix them)
Mistake 1: Weight shifts into the toes
What it feels like: heels grow light; knees feel weighted
Fix: send the weight back towards the heels and sit those hips back a little further.
Mistake 2: Knees collapse inward
Fix: track knees to second/third toes; gently grip block (or pillow) between thighs, or just pretend you are doing so.
Mistake 3: Lower back pinches or overarches
Fix: don’t go as deep; sit back more; soften ribs down; keep the spine long.
Mistake 4: Shoulders and neck tense up
Fix: lower the arms, bring hands to the heart center, or reach arms forward; keep the breath steady.
Mistake 5: Holding the breath
Fix: reduce intensity until breathing becomes smooth again.
Also Read: Mountain Pose (Tadasana): The Complete, Detailed Guide to Yoga’s Most Foundational Posture
Beginner-friendly modifications (make Chair Pose accessible)
1) Chair Pose at the wall
This is one of the best ways to become aware of safer alignment and build endurance.
How to do it:
- Stand with your back against a wall.
- Step your feet forward and slide down to a desired depth.
- Try to align the knees more over the ankles (a handy check at a wall).
- Hold for several breaths.
2) Hands to thighs (to learn “sit back”)
Put your hands on your thighs and press your thighs back a little as you sit your hips back. That makes it easier to establish stability and find the rhythm before adding arms overhead.
3) Arms forward or prayer hands
If tightness in the shoulders or breathlessness happens:
- Arms out straight in front of you (as if holding a tray) or
- Palms together at the heart center
4) Smaller bend is still Chair Pose
Depth is optional. A chair with less depth (and a long spine) is frequently more stable and effective than “going low” with compensation.
Stronger (but still safe) progressions
Once you can hold Chair Pose with steady breath:
Progression 1: Block between thighs
By pressing a block between the thighs, you can also bring more engagement to your inner thighs and help protect yourself from letting the knees collapse inwards.
Progression 2: Longer holds
- Try:
- Week 1: 3–5 breaths
- Week 2: 6–8 breaths
- Week 3: 30–45 seconds
- Week 4: 45–60 seconds
Progression 3: Chair Pose pulses (with caution)
Some small up-and-down pulses can help to build strength, but knees must feel stable, and breath should remain smooth.
Chair Pose variations (options for different goals)
- Wall Chair (support + endurance)
- Chair with block (inner-thigh awareness)
- Prayer Chair (shoulder-friendly)
- Twisting Chair (Parivrtta Utkatasana) (advanced; adds spinal rotation—easiest to learn with a teacher’s instruction)
How to sequence Chair Pose in a yoga practice
Chair Pose comes up a lot in standing flows because it’s a good way to build energy and strength rapidly.
A simple mini-sequence (5–8 minutes)
- Mountain Pose (3 breaths)
- Upward Reach (1–2 breaths)
- Chair Pose (3–6 breaths)
- Standing Forward Fold (5 breaths)
- Half Lift (inhale), Fold (exhale)
- Downward-Facing Dog (5 breaths)
- Back to the Mountain and observe your breath
This couple’s effort with an explicit release so that your nervous system will remain steady.

Who should be cautious with the Chair Pose?
Chair Pose works the knees, hips, ankles, and lower back. Proceed with caution (or skip) if you have:
- Sudden knee injury or sharp knee pain
- Recent ankle/hip injury
- Squatting and overhead arms increase lower-back pain
- Balance limitations (use a wall)
- Rule of safety: You should feel muscular effort, not sharp joint pain.
FAQ
Q1: How long should I hold the Chair Pose?
A typical time frame is 30–60 seconds or three to 10 breaths, depending on the level you are at and during which part of the sequence the pose falls.
Q2: My knees go past my toes – is that wrong?
Not automatically. Body proportions and depth matter. Don’t pursue a “rule,” but rather:
- balanced groundedness in the feet (don’t throw all your weight into toes),
- knee alignment (in line with toes),
- and a pain-free range.
Q3: What if my heels lift?
Try:
- sitting back more,
- reducing depth,
- widening stance slightly,
- practicing at the wall.
Q4: Why does Chair Pose burn so much?
Because it loads large muscles – especially the thighs – in a sustained manner, the way a squat hold does.
Final thoughts
The Chair Pose is a classic for a reason: efficient, strength-building, and mentally clarifying. If you approach it wisely with smart alignment – sitting back, grounding the feet, lengthening the spine, and breathing – it’s no longer a “suffer pose,” but instead is a consistent practice of resilience.
This post serves as a simplified, practice-oriented overview of this knowledge aimed at the general public. Yoga is extremely individual – body proportions, mobility, injury history, and medical conditions all play a role in what is safe and effective. For more individualized support, try to find a qualified yoga teacher or physical therapist, or other health care professional who can guide you with your yoga practice toward whichever direction is best for you.
Medical + safety disclaimer
This content is for educational purposes and does not replace medical advice. If you have pain, a medical condition, or a recent injury – or if you’re pregnant – consult a qualified healthcare professional and/or a qualified yoga teacher before practicing new exercises.