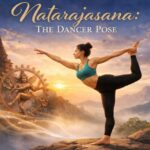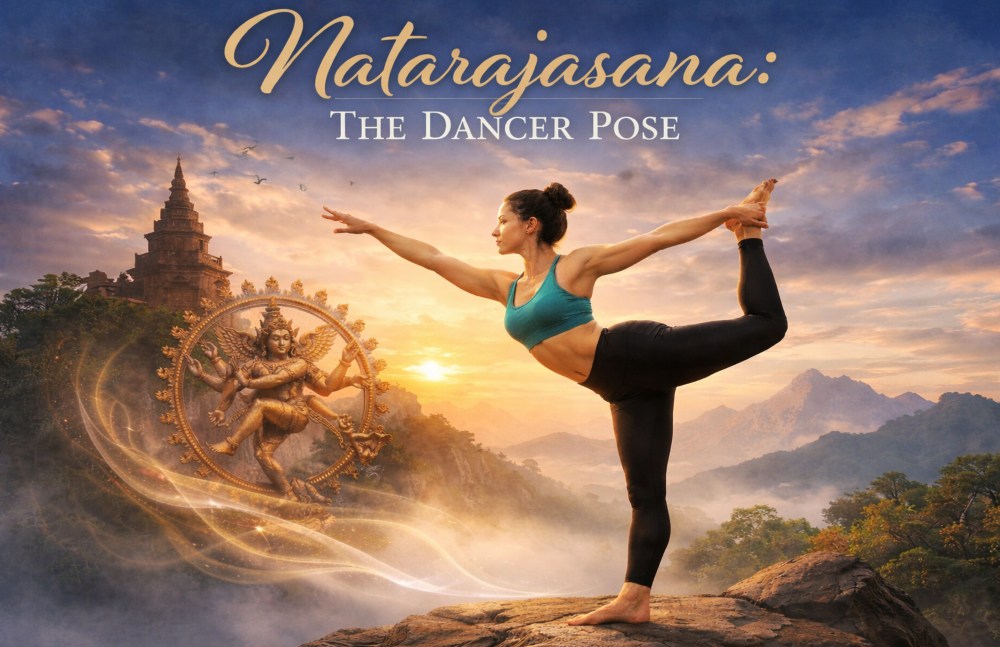
Natarajasana, also known as Dancer Pose, is one of the most iconic backbends in the standing asanas of yoga. It’s poetry in motion, too: One hand reaching forward as the other draws behind a lifted foot; chest opening; standing leg rooting; and body balancing somewhere between stability and stretch. But what happens on the outside is just a fraction of what goes on inside.
Natarajasana, Veerbhadrasana III, or Dancer Pose is a full body posture that demands strength: in essence of mind and breath as well as body. It tests the ankle and hip of the standing leg, lengthens the psoas and quadriceps of the lifted leg, opens up one’s chest and shoulders, activates the muscles in your back body, and conditions your nervous system to chill out while doing something that feels challenging. When done well, it can be exhilarating without being combative – bold but not wooden.
Let’s look at the pose from all angles: its meaning; anatomy and physiology; benefits and contraindications, preparation sequences for beginners; and step-by-step instructions including key alignment and action cues found in traditional teachings that can help elevate your practice or teaching to new levels.
The meaning and symbolism of Natarajasana
Natarajasana is a Sanskrit name:
- Nata (नट) is to dance or an actor/dancer.
- Raja (राज) means king.
- “asan“ (आसन) is a posture or a seat.
Therefore, that pose is frequently interpreted as “King of the Dancers Pose.” It is also Nataraja, the Hindu form of Shiva, you see dancing in position – dancing the universe into existence and sustaining it, then consuming again at different rhythmic intervals. Nataraja is usually depicted dancing on a rim of flames, balanced on one foot with the other raised – stillness amid dynamic change.
And even if the mythic or devotional elements are not part of your worldview or practice, the symbolism strikes you in a very pedestrian place: The posture teaches confidence in the face of life’s transit. And you are, or rather you do, balance and open – doing two opposing movements at the same time. That’s the core lesson:
- Root down without hardening.
- Reach out without collapsing.
- Open your heart, not at the expense of losing it.
- Pal with your body, even if you’re uncomfortable to begin with.
It’s not a pose of making a shape happen.” It’s a pose of integration: the whole body working together with a clear intention.

Why the Dancer Pose feels so challenging
People tend to think of Dancer Pose as “just a balance,” but it’s really more of a coordination pose. The complication is that several layers are occurring at the same time:
- Balancing: The standing foot, ankle, knee, and hip make infinitesimal adjustments constantly to keep you upright.
- Reverse backbend (just as an example). The spine lengthens, and the chest opens; we know this can destabilise the ribcage and pelvis if you’re not organised.
- Hip mechanics: Your leg wants to open and extend behind you; your pelvis wants to twist. Maintaining that more squared pelvis – somewhere between a total square and the thing you can just sort of control, call it a 10 on the scale – requires both strength and awareness.
- Shoulder mobility and stability: Reaching back to grab the foot requires shoulder extension and often external rotation – as well as stability so the shoulder doesn’t collapse forward.
- Breath and nervous system: As your brain wobbles, so uncomfortably does your breath. Balance is harder to find when breath tightens. It’s a feedback loop.
The good news is that challenge does not mean you are “bad at the pose.” In general, it means your body is telling you what needs preparation – ankle stability, quad/hip flexor length, thoracic spine mobility, or shoulder openness.
Anatomy and biomechanics: what’s working and what’s stretching
Knowing what’s going on kinesiologically makes Dancer Pose feel way less mysterious – and more manageable to progress without risking injury.
1. The standing leg: Your foundation and your stabiliser
To the standing leg, you look for strength + fine control:
- Foot and ankle stabilisers: muscles of the intrinsic foot, tibialis anterior/posterior, peroneals
- Calf pair: gastrocnemius and soleus for ankle stability
- Standing leg: prevents the knee from caving in.
- Gluteus medius and minimus: stabilise the pelvis in the frontal plane (prevent hip drop)
- These are your gluteus maximus and hamstrings at work to help you extend your hips, but also support pelvic stability.
- Muscled of the Deep Hip: assists in aligning the femur in the socket
One common collapse is for the standing hip to sink outward and the knee to turn in. When that occurs, balance can become unstable, and the knee might feel strained. The solution is usually not ‘try harder,’ but organise the foot tripod and involve the outer hip.
2. The lifted leg: mobility plus intelligent effort
The crossing leg is usually in:
- Knee flexion (heel toward glute)
- Extension from the hip (thigh moving back behind you)
- Sternum Reach with hip abduction/rotation. (unless you’re consciously keeping it in check), There’s a bit of anelement of hip abduction/external rotation.
Common types of sensations for the initial stretch in:
- Quadriceps (especially rectus femoris)
- Hip flexors (front of the hip)
- Occasionally psoas/iliacus is influenced by pelvic tilt
But the raised leg also requires active work, not merely stretching:
- The hamstrings and glute max help to lift the thigh back behind you 1
- Medial leg (adductors) can help maintain the leg from splaying out
- The core also prevents over-arching in the lower back
3. Spine and ribcage: the backbend component
A healthy Dancer Pose isn’t a “crank the lower back” pose. Ideally, you distribute extensions through:
- Trunk (mid-upper back): opening the chest
- Spine: lifting and widening the shoulder blades
- Extension of the hip is when it moves back from the place the thigh lift was.
With poor T-spine mobility, it’s common for the body to “borrow” movement from your lumbar spine, which can result in compression or pinching at the lower back. The answer is typically to shorten the reach, tighten the core, and focus on opening the upper back.
4. Shoulders and arms: the reach, hold, and lift
Holding the foot behind requires:
- Extension of the shoulder and occasionally external rotation
- Scapular stabilisation: the shoulder blade should be flat against the ribcage, not winging or collapsing forward
Muscles commonly involved:
- Rotator cuff for stabilisation
- Rear deltoid, triceps (dependent on arm position)
- Role of lower trapezius and serratus anterior in setting the scapular position.
Pectorals and the anterior deltoid could be stretched as the chest is opened deeply.

Benefits of Natarajasana: What it Can Develop Over Time
When it is practised with correct alignment and a sense of expanding freedom, Dancer Pose can offer countless physical and mental benefits. Results are not guaranteed, and everyone’s experience will be different. Many people note the following changes.
1. Balance, proprioception, and functional stability
Single-leg balancing, Natarajasana works:
- Foot strength and ankle responsiveness
- Coordination between the hips and the core
- Proprioception (your awareness of where you are in space)
That can add up to better performance in other yoga poses, athletic movements, and everyday activities that rely on stability – such as walking on an uneven surface or regaining your balance from a slip.
2. Strength in the legs, hips, and back body
Dancer Pose can build:
- Standing-leg strength (quads, glutes, calves)
- Hip stabilisation (especially glute medius)
- Core and back-body involvement, including spinal extenders and posterior chain recruitment
Unlike some strength training that isolates muscles, this pose instructs integration: many muscles working together toward one task.
3. Mobility in the front body: quads, hip flexors, chest, shoulders
You might notice increasing openness over time in:
- Front of the thighs (quadriceps)
- Protectors of the hips (Iliopsoas)
- Chest and shoulders (particularly if you work on thoracic extension)
This can provide a useful counterweight to long hours of sitting, which tend to shorten hip flexors and round the upper spine.
4. Postural awareness and heart-opening without collapse
The pose invites you to lift and expand the chest while organising internally through your ribs and pelvis. It’s a lesson in opening through the upper body without dumping into your lower back, which is key to having better posture, as well as safer and more sustainable backbending overall.
5. Focus, patience, and nervous system steadiness
Balancing poses will almost immediately tell you what’s going on in your mind. In Natarajasana, you can’t really “multitask.” You have to be where you are. Over time, it can train:
- Concentration and drishti (steady gaze)
- Breath regulation under challenge
- Emotional stability when you wobble or fall out
That’s one of the hushed superpowers of Dancer Pose: It shows you how to come back, again and again, without drama.

Who Should be Cautious: Contraindications and Important Precautions
Natarajasana is sweet, but like all wonders, it’s not meant for every season. Take extra care – or skip the full expression – if you have:
1. Knee pain or recent knee injuries
Both the standing knee and the lifted knee will require protection. Pain is a red flag. You might need to make a modification, such as with a strap, keeping the raised leg lower, or opting for a different pose.
2. Ankle instability
If the standing ankle feels wobbly or painful, get to work on your foundation and use a wall as a support if necessary. Strengthening progressions and proprioception work can help with this, but don’t force the whole pose.
3. Hip impingement or labral issues
If you feel a sharp tug in the front of the stance hip, reduce depth and square pelvis less aggressively, or try another way to open hips.
4. Low back pain or spinal issues
If backbends typically strain your lower back, keep this pose small and upright, engage your core strongly, and work more on hip extension than on lumbar compression.
5. Shoulder pain or limited shoulder mobility
The pulling of seeking back can be hard on the shoulder. Grab onto a strap or the outside of the ankle, using a soft knee flex, exposing nothing stabbing or painful.
6. Pregnancy considerations
This can be compounded by hormonal changes and ligamentous laxity that take place during pregnancy. Also, many practitioners avoid deep backbends and intense single-leg balance poses, especially as pregnancy progresses. If doing any exercise on the wall, practice and work with a well trained pre-natal teacher or health care provider.
Rule of thumb: you should feel effort and stretch, but not sharp pain or joint pinching. When in doubt, start with a simpler model and work your way up.
What to Practice Before Natarajasana: Preparation That Actually Helps
Dancer Pose Comes Together Fastest When You Work the Parts Independently. Here are the most helpful categories of preparation.
1. Warm-up for feet and ankles: your balance base
Try:
- Heel raises up and down (Calf rise)
- Ankle circles
- Standing on one foot while holding for 30-60 seconds with steady breathing.
- Spreading the toes and pressing into your “foot tripod” (the big-toe mound, little-toe mound, and heel)
When your foot caves, so does your entire pose. Because a strong foundation makes everything else easier.
2. Mobilise the hips and lengthen the quads
Helpful poses include:
- Low Lunge With Hip Flexor Stretch
- Half pigeon or figure-four stretch (if it feels good for your hips)
- Suddenly, my life was filled with quad stretch variations (standing!quad stretch, reclining! quad stretch).
- Bridge to wake up hip extension without much balance demand
The goal is not for insane flexibility. The aim is quad/hip flexor length so that you don’t have to “yank it in” to position.
3. Open the thoracic spine and shoulders
The Dancer Pose is one of those dramatic poses in which the chest looks open. Build that safely with:
- Pyramid and friendly cobra think length
- Thread-the-needle or open-book twists
- Props Required– Block/Bolster Supported fish pose. How to do: Extra mile.
- 6 -While in other circles, the puppy pose (shoulders permit)
If the shoulders are tight, use a strap in the pose. It is one of the smartest decisions you can make.
4. Core organisation for safer backbending
Core work is not the same as “crunch hard.” It’s learning how to control those ribs and pelvis:
- Dead bug variations
- Plank and side plank (modification as necessary)
- Locust for balancing core and back-side activation
- Engaging by exhaling (pulling the lower ribs in on an exhale)
Strong, responsive core that supports your backbending so you do it smart, not compressed.
Step-by-Step: How to Do Natarajasana Safely and Effectively
Below is a detailed, practical approach. You can practice it near a wall until it feels stable.
Step 1: Set your starting stance with precision
- Come into mountain pose with feet hip-width or a little closer.
- Widen the toes and feel three points where you can press down into the standing foot:
- Base of the big toe
- Base of the little toe
- Centre of heel
- Reach through the top of your head and soften/relax the shoulders.
Before you even raise a leg, get yourself balanced. This pose is the set-up for balance rather than a true balance.
Step 2: Shift weight and find your centre
- Shift the weight into your left (for instance).
- Also, try to keep the pelvis level – do not hike one hip up.
- Look at a point at your eye level that is not moving (drishti).
If you blunder on this point, wobble will scarcely fail to ensue. Allow yourself a breath or two to steady.
Step 3: Bend the lifted knee and catch the foot or strap
- Bend your right knee, drawing the heel toward the right glute.
- Bring your right hand back and hold on to the inside of your right foot or ankle.
- If the foot is out of reach, loop a belt or strap around the ball of your foot and grasp it.
Key point: Do not rotate your torso to grab the foot. Try to keep the chest towards forward.
Step 4: Align the pelvis and stabilise the standing leg
- Press into the standing thigh (kneecap lifting a little).
- Fire up the outer left hip (glute medius) to steady your seat.
- Draw the lower belly softly in and up to support the spine.
- Keep the pelvis in a modestly neutral position – no pouring the front ribs forward.
A stable standing leg is not stiff; it’s alive and reactive.
Step 5: Begin the reach: chest forward, leg back
- Inhale, come up through the chest.
- Start kicking your raised foot into your hand (or strap), finger tips touching while pressing the thigh back behind you.
- At the same time, reach your free arm out front (left arm if you are lifting your right leg).
- Then tip the torso a little bit forward, but not more than you can lengthen your back.
Think of it as a seesaw: the forward- extending arm and chest counterbalance the raised leg in back.
Step 6: Refine the shape without forcing depth
Direct the lifted knee mostly downward (in other words, don’t let it fly wide out to the side), unless your variation calls for a more open position.
- Maintain the standing knee over the centre of your foot (not caving in).
- Relax the jaw and continue to breathe.
- Depth is optional. Integrity is not.
Step 7: Hold and breathe
Stay for 3–8 steady breaths.
- Breathe in: extend and lift through the chest
- Exhale: lock the ribcage and pelvis, get rid of unnecessary tensions
Step 8: Exit with control
- Slowly reduce the kickback.
- Bring torso upright.
- Release the foot gently.
- Take a break in Mountain Pose, and feel the effects before repeating on your other side.
Part of practising well is to get out well. Don’t “drop out” of the pose.

Alignment Landmarks: What to Aim for in Your Body
Alignment is not about looking a certain way. It’s about distributing effort so the pose is sustainable.
Foot and standing leg alignment
- Apply equal pressure through the tripod of the foot.
- Keep the toes spread, avoiding grasping with them.
- Maintain a micro-bend in the standing knee if locking out is uncomfortable.
- Follow the knee cap toward your second & third toes.
- Activate the outer hip so the pelvis doesn’t sway to the side.
A useful reminder is: “Stand tall through the inner arch, strong through the outer hip.”
Pelvis and hips: controlled, not forced
- Try to keep the pelvis relatively level.
- Your “lifted” hip will want to open; do one of two things:
- Square more (back for a classical, forward-facing line), or
- Crack it open a little (for an easier version)
Either way, don’t twist so deeply that your lower back locks up. A mild intention to maintain the front of the pelvis facing forward is usually sufficient.
Spine and ribs: lift without flare
- Palms down, lift the sternum, broaden the collarbones.
- Prevent the lower ribs from popping forward.
- Find length in the waist rather than crunching into the lower back.
One big inner concept is: “Up and forward, not back and down.”
Shoulders: stable and spacious
- The arm that reaches does so without rolling the shoulder up to the ear.
- Keep the holding shoulder open and broad – don’t let it roll forward.
- If the shoulder feels pinched, strap yourself in and maintain a slight bend in the elbow.
It is the comfort, not the shape, of the shoulder that matters. Always.
Common Mistakes and How to Fix Them
Even experienced practitioners fall into these patterns, especially when trying to “get deeper.” Here are the most common issues and practical corrections.
Mistake 1: Yanking the foot and collapsing the chest
What it looks like: The foot is pulled toward the head, and this creates a cavity in the chest where the ribs flare out.
Fix: Pose from a kick into a hand instead of pulling. Begin by lifting the chest slightly forward, and let your leg rise up naturally from there.
Mistake 2: Dumping into the lower back
What it feels like: pinching or squeezing in the lower back.
Fix: Reduce the backbend. Pull lower belly in and keep ribs stacked up. When you do this, emphasise hip extension by driving the thigh back, and try not to bend only in your spine.
Mistake 3: Standing knee collapsing inward
What it looks like: your knees drift toward the big toe on the inside edge of your foot.
Fix: Press down through the outer heel and activate the outside hip. As you extend the leg and straighten it towards your partner, imagine spiralling this standing thigh (without rolling the foot) outwards.
Mistake 4: Lifted knee flaring wide
What it looks like: the raised knee tilts out to the side, flaring open the pelvis.
Fix: Take the lifted thigh farther toward the back and firm in with the inner thighs. If the quad is tight, use a strap and lower the knee.
Mistake 5: Losing breath and tensing the face
How it feels: breath held, jaws clenched, shoulders tight.
Fix: Shrink the pose and redefine breath. When you stop fighting, balance is enhanced.

Modifications That Make Dancer Pose Accessible
A “modified” Dancer Pose is not an inferior pose. This is often the smartest representation of our strength and alignment.
1. Use a wall for balance support
Stand with the side of your body facing a wall. Put your free hand gently on the wall at shoulder height. This lessens fear and wobble so you can concentrate on alignment.
You can also face the wall and gently press your fingertips into it as you reach your chest forward.
2. Use a strap to protect shoulders and knees
Wrap a strap around the top of the lifted foot. Depending on the variation, grab the strap with one or both of your hands. It gives you freedom to open the front of the thigh slowly rather than wrenching on the knee or the shoulder.
Strap version excels for:
- Tight quads or hip flexors
- Limited shoulder mobility
- Anyone recovering post-injury (under the supervision of a professional)
3. Keep the torso more upright
You do not need to lean forward. Remaining upright decreases the balance challenge and creates a milder backbend. This still works the quad stretch and hip extension.
4. Hold the ankle rather than the foot
If grabbing the foot puts stress on your shoulder, grasp the ankle or pant leg instead. The pose still works.
5. Practice the “kickstand” version
Touch the toes of your lifted leg, not to the floor behind, but touch lightly while holding the ankle. This far reduces the demand for balance to train the shape.
Variations and Progressions for Different Levels
Dancer Pose has many expressions. Choose the one that supports your body and your intention.
1. Beginner-friendly progression: strap and wall
- Strap around the foot
- Freehand on the wall
- Torso upright
- Small kickback
This is an excellent foundation for learning pelvic control and shoulder positioning.
2. Intermediate progression: classic one-hand hold
- One hand holds the foot or ankle
- Opposite arm reaches forward
- Slight forward lean
- Steady breath for multiple cycles
Focus on smooth entry and exit and consistent alignment rather than height.
3. Advanced variation: both hands to the foot
In some styles, practitioners reach both arms overhead and back to hold the lifted foot (or strap). This significantly increases shoulder mobility demand and can intensify the backbend.
If attempting this:
- Warm up your shoulders thoroughly
- Use a strap first
- Keep the ribs contained and avoid lumbar compression
- Move slowly and back off at the first sign of shoulder or low-back strain
4. Advanced stability challenge: deeper forward reach
Another advanced expression is keeping the hold but lengthening the torso forward more, creating a long line from fingertips to lifted knee. This demands tremendous standing-leg control and core organisation.
The key is to lengthen rather than collapse.

Breath, Gaze, and Mental Focus: The “Inner” Technique
The outer form is only part of the practice. It is the inner technique that makes the pose feel rooted, rather than an uncontrolled flailing.
1. Drishti: Choose one steady point
Choose a fixed point – at eye level or slightly below. Maintain a soft but steady gaze. If you do a look-around, you’ll wobble more.
2. Breath: steady rhythm over big inhalations
Dancer Pose has a way of either making people take giant inhales or going into breath-holding altogether. Instead, shoot for a uniform, steady pattern:
- Most breathe: stretch the spine and lengthen by feeling the chest expansion.
- Breathe out: allowing the belly to support you, ribs gently coming together
The breath is your metronome – your “dance rhythm.”
3. Mindset: treat wobbling as part of the pose
Instead of failing, wobbling is the nervous system’s learning. Each time you stumble and right yourself without panicking, you practice balance on a deeper level.
Being curious, not critical, is a helpful mindset. If you start to fall out of that, reset and re-enter patiently.
Sequencing Ideas: Where Natarajasana Fits in a Yoga Practice
How you position Dancer Pose within a sequence can radically alter how it feels.
1. If your goal is balance and focus
Place it after:
- Grounding standing poses (Mountain, Forward Fold)
- Light single leg prep (Tree Pose, Warrior III prep)
- Hip stability work (Chair Pose, Warrior II with engaged outer hip)
Keep the backbend aspect modest, though, so balance can remain the main focus.
2. If your goal is backbend and heart opening
Prepare with:
- Low lunge variations
- Cobra/Sphinx
- Bridge pose
- Gentle Camel pose or supported chest openers
Or practice Dancer Pose as a standing backbend that combines openness with control.
3. If your goal is flexibility in the quads and hip flexors
Use:
- Quad stretches (reclined, standing, lunge-based)
- Front leg & back leg flexibility divided by half
- Strap-assisted Dancer Pose
Finish with a neutralising forward fold or gentle twist afterwards.
4. Good poses to follow Dancer Pose
A body that has just organised itself through a strong backbend and balance often welcomes:
- Standing forward fold (soft knees)
- Downward dog
- Supine twist
- Child’s pose or a gentle seated dhamma
These aid in resetting the nervous system and decompressing the spine.
Teaching Cues That Actually Work: Simple Language for a Complex Pose
Less is often more with respect to cues (especially if you’re teaching or self-cueing). Here are some effective ones, sorted by intention.
1. Foundation cues
- “Spread your toes. And then feel the big toe mound, and feel the little toe mound, and feel the heel.”
- “Lifting your inner arch without gripping your toes.
- “Hug your outer hip in – stabilise the pelvis.
2. Pelvis and core cues
- “Pull your front ribs in a little bit.”
- “Lengthen your tailbone down as your heart lifts.”
- “Stay long in your low back.”
3. Lifted leg cues
- “Kick your foot into your hand – don’t pull your foot toward you.
- “Send the thigh back, then allow the knee to lift.
- “Let the lifted knee point mostly down.”
4. Heart and reach cues
- “Reach forward through your fingertips.”
- “Breathe into the chest and broaden the collarbones.”
- “Allow your breath to soften the effort.”
5. Nervous system cues
- “Wobble is information. Breathe and return.”
- “Pick one still point with your eyes.”
- “If breath gets stuck, make it smaller and steadier.”
Troubleshooting: What to Do When the Pose Isn’t Working
Dancer Pose sometimes feels impossible on a particular day. Here are typical “why” reasons and how to respond.
If you can’t reach your foot
Common ones are quad tightness or shoulder limitation. Use a strap immediately. Consistency is more important than a forced grab log over time.
If your standing ankle wobbles a lot
Work near a wall. Try the tree pose and basic single-leg stands. Strengthen calves and foot muscles. Wobbling tends to get better quickly when you train it softly and often.
If your low back hurts
Make the pose smaller. Keep torso more upright. Brace your core and stay away from rib flare. It’s about hip extension, not spinal compression. If pain continues, avoid deep backbends and see a qualified professional.
If your shoulder feels strained
Strap it, keep the elbow bent. Don’t force the arm behind. Shoulder pain is not something to “push through.”
If you feel a pinching in the standing hip
De-emphasise depth, soften forward lean, and instead of aggressively squaring, allow a little opening of the pelvis. Sometimes the hip requires a different angle to feel safe.
A Simple 10-Minute Practice Flow to Build Toward Natarajasana
If you want a short, effective routine that supports the pose, try this sequence:
- Mountain Pose – 5 breaths
- Standing Forward Fold – 5 breaths
- Low Lunge – 5 breaths each side
- Half Split – 5 breaths each side
- Chair Pose – 3 breaths
- Tree Pose – 5 breaths each side
- Standing Quad Stretch with Strap – 5 breaths each side
- Dancer Pose with Strap or Wall – 3–6 breaths each side
- Forward Fold – 5 breaths
- Supine Twist – 5 breaths each side
Repeat 2 – 4 times a week, and you’ll usually notice steadier balance and easier access to the pose.
Frequently asked questions about Natarajasana
1. How long should I hold Dancer Pose?
A typical range is 3 to 8 breaths per side. If you are developing strength and stability, shorter holds in good alignment will serve you much better than long holds with tension.
2. Why is one side so much harder?
99% of people will have asymmetry in the hips or ankles, and shoulder mobility. The pelvic position will tell us if quads are tighter on one side, or whether we have a weak outer hip and/or unstable ankle. Treat the strenuous side as information, not a problem – work on it with props and patience.
3. Should my lifted knee point down or out?
In many classical versions, the lifted knee points more down and back, maintaining a more forward-facing pelvis. But for some bodies, a slightly more open knee position is safer and more accessible. It should feel stable, pain-free, and not stress the low back – so whatever direction that is!
4. Is it okay if I wobble?
Yes. Wobbling itself is just the balance system learning. The trick is not “never wobble,” it’s “stay tranquil while wobbling and keep breathing.”
5. Can the Dancer Pose improve flexibility?
Over time, it can also help to create flexibility in the quads, hip flexors, chest, and shoulders — especially if you’re working with a strap and consistent breath. However, flexibility is best enhanced with strength and proper alignment.
Closing thoughts: making Dancer Pose a long-term friend
Natarajasana is a pose you can evolve with for years. At the outset, it will resemble nothing like the photos – and that’s absolutely okay. This is a practice reified, not the outer design. The real practice is learning how to balance grounding and opening, stability and expansion, effort and ease.
The key to approaching Dancer Pose is respecting where your body is at; in this sense, it can be a powerful path of learning. It reveals the places where you grip, where you rush, where you doubt, and where you can soften. It rewards consistency, not force. And it reminds you – every single time – that balance is not an end state. Balance is a dynamic dialogue with the now.