
Yoga anatomy is not about memorising every muscle or forcing every student into the same alignment. Its real purpose is to help a future teacher understand movement, recognise meaningful differences between bodies, select appropriate variations and respond responsibly when a practice is not suitable.
A competent trainee should be able to describe basic joint actions, relate them to common asanas, understand how breathing changes with position and effort, and explain why range of motion differs between people. They should also know the limits of their role. A yoga teacher can observe, ask questions, adapt, and refer. A yoga teacher should not diagnose an injury, prescribe rehabilitation, or promise that a posture will cure a medical condition unless separately qualified and legally permitted to do so.
Current Yoga Alliance standards give anatomy and physiology a defined place in foundational teacher training. The RYS 200 framework allocates 30 hours to anatomy, physiology and biomechanics, covering major bones, joint types, muscles used in asana, contraction types, the respiratory and nervous systems, joint movement, stabilisation, physical limitations, contraindications and adaptations. Completing those hours is a starting point, not mastery.
This practical guide explains which anatomy knowledge matters most, how to apply it in teaching, and when responsible teachers must slow down, modify, or refer a student to a healthcare professional.
TLDR
- Learn anatomy to make better teaching decisions, not to recite terminology or diagnose students.
- Know the major bones, joints, movement directions, and muscle actions that appear repeatedly in asana.
- Study joint structure and individual variation. Two students can follow the same instruction and safely look different.
- Replace rigid “perfect alignment” rules with clear intentions, observable options, and feedback from the student.
- Understand that flexibility, mobility, strength, control, and tolerance are related but not interchangeable.
- Treat the spine as multiple regions with different movement tendencies, not one uniform column.
- Teach the shoulder through the relationship between the upper arm, shoulder blade, collarbone, and rib cage.
- In standing poses, observe the foot, ankle, knee and hip as a connected system without assuming one visible position identifies the cause of a problem.
- Breathing is mechanical, chemical, neurological and contextual. Avoid exaggerated claims about one technique “resetting” the nervous system.
- Sensation is not a reliable measure of tissue damage. Pain is personal and complex, but sudden or concerning symptoms still require caution.
- Progress load gradually by adjusting leverage, duration, repetitions, speed, balance demands, and recovery.
- Use props and variations as legitimate teaching tools, not as signs of failure.
- Screen through conversation, informed choice, and observation. Do not perform medical tests outside your competence.
- Know urgent warning signs, pause practice when necessary, and maintain a referral network.
- Anatomy learning continues after graduation through practice, mentorship and qualified continuing education.
Why Does Anatomy Matter in Yoga Teacher Training?
Anatomy gives teachers a language for movement and a framework for making decisions. It helps answer practical questions:
- What action is this pose asking from the hip, spine, or shoulder?
- Where can the movement come from if one joint has limited range?
- Does the student need more mobility, more strength, less range, or a different task?
- How can a prop change leverage, balance, or load?
- Which sensations are expected, and which require the practice to stop?
- Is this within a yoga teacher’s scope, or should the student obtain medical advice?
Without this framework, teachers may repeat inherited cues even when they do not suit the person in front of them. With it, they can explain the purpose of a variation, offer genuine choices, and avoid presenting one body shape as universally correct.
Anatomy does not remove uncertainty. It helps a teacher manage uncertainty more responsibly.
What Should a 200 Hour Trainee Actually Know?
Yoga Alliance’s current RYS 200 standards organise the anatomy component into anatomy, physiology, and biomechanics. A practical interpretation looks like this:
Skeleton
- Learn major bones, spinal regions, and joint types.
- Understand where a movement is intended to occur.
Joint Actions
- Study flexion, extension, rotation, abduction, and adduction.
- Analyse poses without relying solely on Sanskrit names.
Muscles
- Identify major muscle groups involved in common asanas.
- Understand effort, support, and fatigue without oversimplifying.
Contraction
- Understand concentric, eccentric, and isometric muscle actions.
- Explain lifting, lowering, and holding movements.
Respiration
- Understand the diaphragm, rib movement, pressure, and voluntary breathing.
- Select positions that allow comfortable breathing and avoid coercive breath cues.
Nervous System
- Learn the basics of stress response, sensation, and motor control.
- Pace practices appropriately and interpret arousal cautiously.
Biomechanics
- Understand load, leverage, stability, balance, and adaptation.
- Progress or regress movements according to individual needs.
Safety
- Understand contraindications, limitations, and referral boundaries.
- Know when to modify, pause, or refer a student for appropriate support.
The aim is functional literacy. A trainee should be able to apply the concepts during observation, sequencing and cueing. A list memorised for an examination has little value if it cannot inform a real class.
What Anatomy Does Not Qualify a Yoga Teacher to Do?
An anatomy module does not make a graduate a doctor, physiotherapist, osteopath, chiropractor, psychologist or dietitian. A yoga-teaching certificate does not authorise clinical diagnosis or treatment.
A yoga teacher may:
- ask about relevant conditions and current medical guidance
- explain the intended movement or teaching purpose of a pose
- offer a smaller range, prop, alternative or rest
- observe how a student responds to the task
- encourage professional assessment when symptoms are unexplained or concerning
- teach general movement and relaxation practices within their competence
A yoga teacher should not:
- identify a tissue as torn, trapped, displaced, or inflamed without a diagnosis
- manipulate a student to “put a joint back” or “release scar tissue”
- promise that a pose treats a disease or repairs an injury
- advise a student to ignore medical restrictions
- interpret persistent pain solely as emotional resistance or stored trauma
- provide rehabilitation protocols without the relevant qualification
- tell a student to stop prescribed medication or treatment
Clear scope protects both student and teacher. Referral is a professional skill, not an admission of failure.
Learn the Language of Movement First
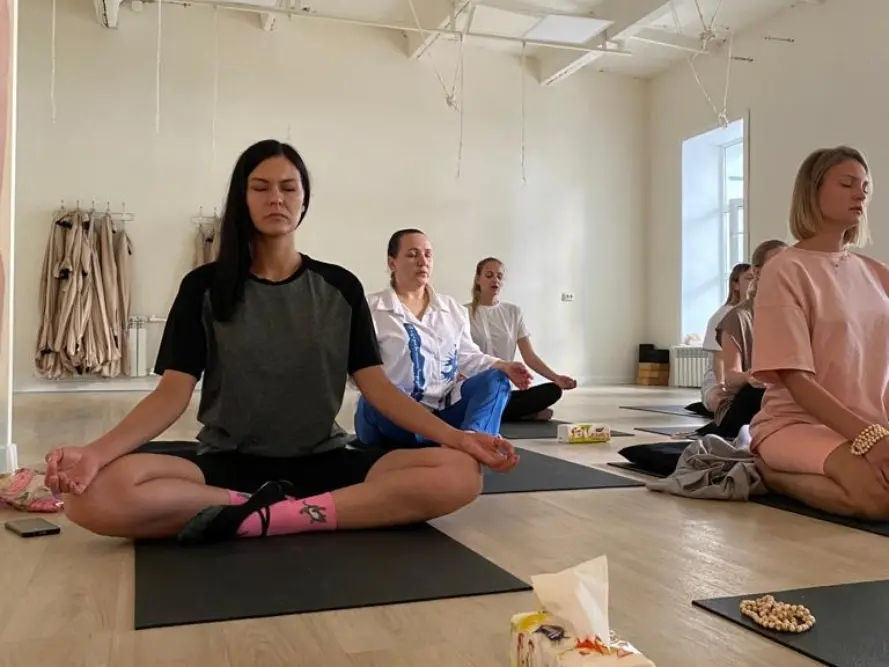
Anatomical terminology is useful because it describes movement more precisely than appearance-based instructions.
Planes of Movement
The body is commonly described in three anatomical planes:
- Sagittal plane: flexion and extension, such as folding forward or rising into a backbend.
- Frontal plane: side bending, abduction and adduction, such as moving a leg away from or toward the midline.
- Transverse plane: rotation, such as turning the trunk or rotating the thigh.
Yoga poses usually combine actions across planes. Warrior II involves hip and shoulder actions in more than one plane. A twist also includes stabilisation, breathing, and force transfer through the feet or seat.
Planes are a map, not a complete description of a living movement.
Common Joint Actions
- Flexion: Decreasing the angle at a joint; for example, hip flexion in a seated forward fold.
- Extension: Increasing the angle at a joint or moving a body part behind the body; for example, hip extension in a lunge.
- Abduction: Moving a body part away from the midline; for example, arms moving outward in Warrior II.
- Adduction: Moving a body part toward the midline; for example, drawing the inner thighs toward each other.
- Internal Rotation: Turning a limb toward the midline; for example, femur action used in some standing poses.
- External Rotation: Turning a limb away from the midline; for example, front hip action in Tree Pose.
- Lateral Flexion: Side bending of the spine; for example, a standing side bend.
- Rotation: Turning around an axis; for example, thoracic rotation in a twist.
- Plantarflexion: Pointing the ankle or foot downward; for example, the ankle action when the top of the foot presses into the floor in Cobra.
- Dorsiflexion: Bringing the top of the foot toward the shin; for example, ankle action in a squat.
Avoid treating joint actions as moral categories. Internal rotation is not bad, and external rotation is not universally protective. The question is whether the action, range, load, and control are appropriate for that person and task.
Understand Mobility, Flexibility, Stability and Strength
These terms are often used as though they mean the same thing.
Flexibility generally describes the ability of tissues and joints to move through a range, often with assistance from gravity, a strap, or another body part.
Mobility describes usable movement, including the person’s active control within a range.
Stability is the capacity to manage position and force. It is not the absence of movement. A stable joint can adapt while controlling the task.
Strength is the ability to produce force. In yoga, this can include pushing the floor, resisting gravity, slowing a transition, or holding a shape.
Motor control is how the nervous system coordinates a task. It changes with attention, experience, fatigue, pain, and the environment.
A student who cannot lift a straight leg as high as it can be moved with a strap may need active strength or control more than additional passive stretching. A very flexible student may benefit from smaller ranges and greater load tolerance rather than deeper poses.
Know the Three Main Types of Muscle Contraction
Muscles do not simply switch on or off.
- Concentric contraction: the muscle shortens while producing force, such as the elbow flexors during part of a controlled pull.
- Eccentric contraction: the muscle lengthens while producing force, such as the legs controlling a slow descent into a squat.
- Isometric contraction: force is produced with little visible change in joint position, such as holding Plank.
An asana can contain all three types in different body regions. The same muscle can behave differently depending on the position, direction, and external forces. This is why statements such as “this pose strengthens one muscle and stretches another” are often incomplete.
Why Do Bodies Look Different in the Same Pose?
Visible variation is normal. People differ in bone proportions, joint shape, muscle mass, connective-tissue properties, previous activity, injury history, pain experience, age, and skill.
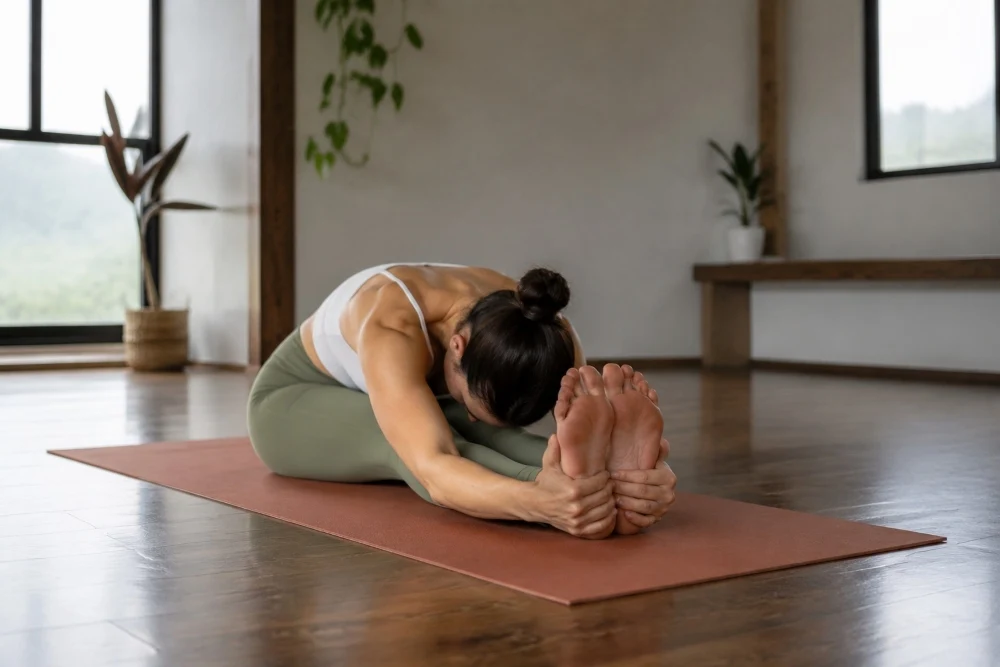
Consider a seated forward fold. One person’s pelvis may rotate forward easily while another reaches an earlier structural or tissue limit at the hip. If both are instructed to place the head on the legs, the second person may create more spinal flexion to imitate the same final shape. The external result may look similar while the internal strategy differs.
Proportions also change leverage. Longer arms can make certain balances appear more accessible. A longer torso can alter loading in Plank. Tibia and femur proportions influence squat shape. None of these differences indicates greater dedication.
Anatomically informed teaching asks: What is the intention of the pose, and what version allows this student to explore it with appropriate effort and choice?
Is There One Correct Alignment for Every Body?
No single visual alignment applies to every person in every context. Alignment remains useful when it describes a task or safety boundary, but becomes misleading when a tradition’s preferred shape is presented as a universal anatomical law.
Useful alignment language is conditional:
- “Place the feet far enough apart that you can breathe and balance.”
- “Choose a front-knee position you can control without sharp pain.”
- “Press through the hands and let the shoulder blades move with the arms.”
- “Reduce the depth if your breath becomes strained or the sensation feels threatening.”
Less useful language implies certainty without assessment:
- “Every knee must remain exactly over the ankle.”
- “Never let the spine round.”
- “Squeeze the shoulder blades down in every overhead pose.”
- “Pain means the body is releasing.”
Some constraints are important for a specific condition or training goal. The teacher should explain the reason rather than turning a context-dependent instruction into a permanent rule.
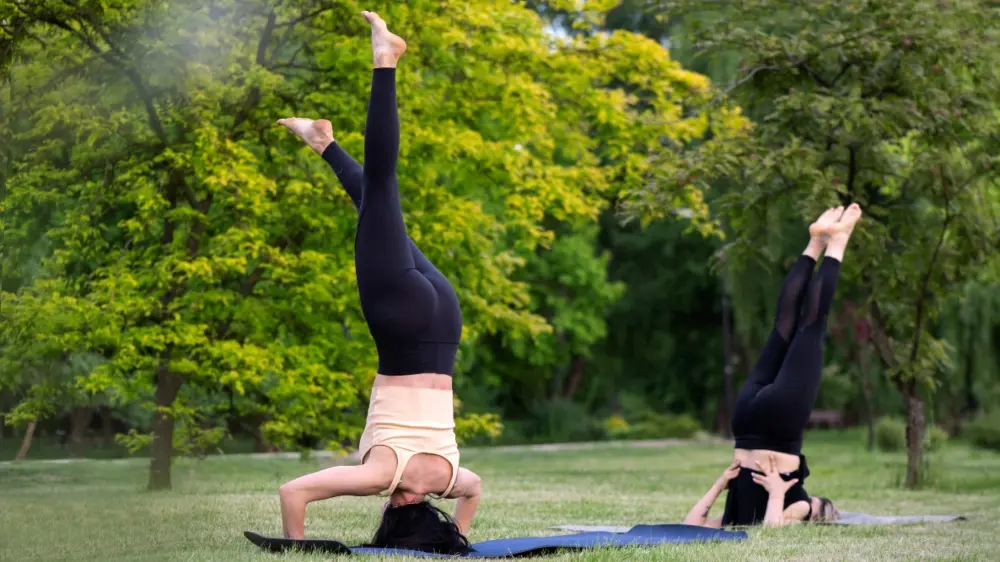
What Should Teachers Know About the Spine?
The spine consists of cervical, thoracic, lumbar, sacral, and coccygeal regions. Its vertebrae, discs, ligaments, muscles, and joints distribute load and allow movement. Different regions have different structures and movement tendencies.
Spinal Flexion
Flexion occurs when the trunk bends forward or rounds. It is a normal movement. The teaching question is not whether flexion is inherently dangerous, but whether the range, repetition, speed, and load suit the student.
For a person with osteoporosis or previous vertebral fractures, repeated or loaded end-range spinal flexion may require modification and professional guidance. The Royal Osteoporosis Society notes that bending forward is generally safe, while uncontrolled, repetitive, sudden, or heavily loaded over-flexion may increase spinal-fracture risk in vulnerable people.
Spinal Extension
Backbends distribute extension across the spine, hips, and shoulders. Students often seek range from the most mobile area, commonly the neck or lower back, when the upper back, shoulders, or hips contribute less.
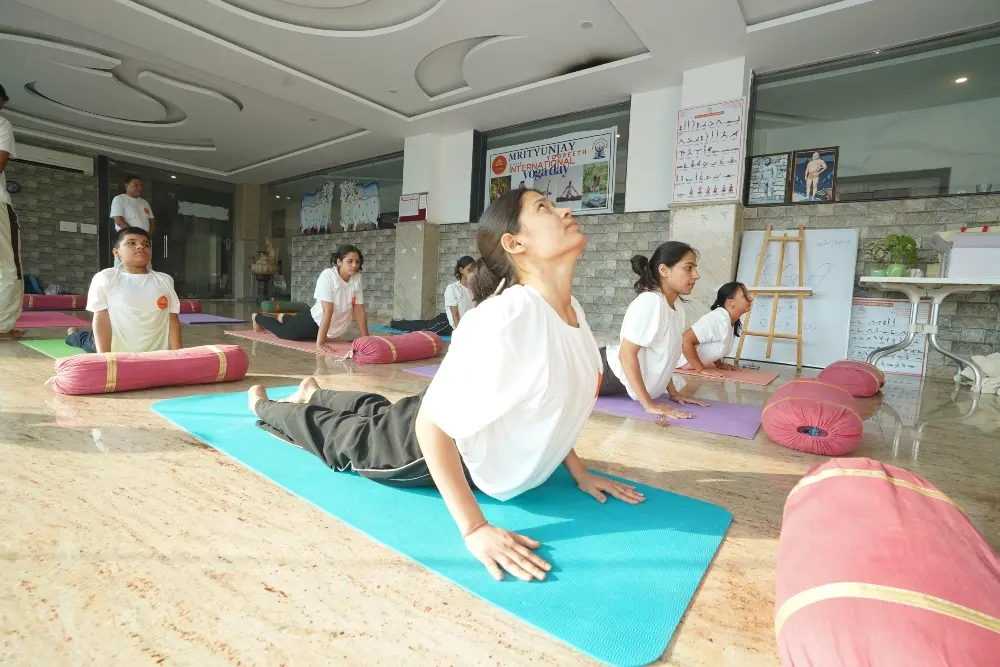
Teach backbends by adjusting leverage and load. A low Cobra with the hands light, a supported Bridge, or a smaller lunge may build useful awareness before a deeper shape. More depth is not automatically more therapeutic.
Spinal Rotation
Rotation is not spread evenly through the spine. The thoracic region is generally designed for more rotation than the lumbar region. In a twist, movement also occurs at the hips, ribs, shoulders, and neck.
Do not use forceful hands-on adjustments to create a larger twist. Encourage axial length, comfortable breathing, and a range the student can exit independently.
Neutral Spine
“Neutral” is a range rather than one exact position. Its usefulness depends on the task. A neutral or relatively neutral spine can help teach load management in some strength-based movements, but yoga also intentionally explores flexion, extension, rotation, and side bending.
The goal is not to keep the spine neutral at all times. It is to understand when and why a position is being used.
How Do the Pelvis and Hips Affect Yoga Poses?
The pelvis transfers force between the trunk and legs. The hip is a ball-and-socket joint capable of flexion, extension, abduction, adduction, and rotation. Its available range varies substantially.
Teachers often describe the pelvis as “tucked” or “untucked,” but these cues can be too vague. Name the desired action and purpose. In Bridge, for example, a slight posterior pelvic action may help a student organise the lift. In a seated forward fold, anterior pelvic movement may help distribute the fold toward the hips.
Hip sensation needs careful interpretation. A broad muscular stretch around the back or side of the hip may be expected. Sharp pinching in the front of the hip, catching, giving way, or pain that persists after practice is a reason to reduce the range and seek appropriate assessment if it continues.
Do not assume every student needs to “open the hips.” A person with high passive range may need control and strength. A person with limited range may be meeting a structural boundary that stretching will not change.
What Should Teachers Know About the Knee?
The knee primarily flexes and extends, with smaller rotational and gliding movements. It sits between the hip and ankle, so what happens at either joint can affect how a task looks and feels.
In lunges and standing poses, observe whether the student can distribute pressure through the foot, control the direction of the knee, and breathe without pain. A knee moving inward is not automatically an injury, but an uncontrolled or painful movement deserves attention.
Avoid diagnosing the source from appearance alone. A visible knee position can relate to the foot, hip, speed, load, fatigue, habit, or the particular task.
For kneeling poses, padding changes contact pressure but does not treat an underlying problem. Offer a folded blanket, reduce knee flexion, use a chair, or choose another pose. A student with swelling, locking, instability, or recent trauma should obtain medical guidance.
Why Do Feet and Ankles Matter?
The foot is an adaptable base, not a rigid tripod that must look identical in every pose. It absorbs and transfers force through many joints.
In standing practice, teach students to notice pressure across the heel, forefoot, and toes without gripping. The arch can change shape under load. Some pronunciation is normal and useful.
Ankle dorsiflexion affects squats, lunges, and transitions. If the heel lifts or the body shifts, possible options include reducing depth, widening the stance, elevating the heels, or choosing a different movement. The aim is to create a workable task, not to label the ankle as defective.
Balance depends on vision, vestibular input, sensation, attention, and strength. A wall or chair is a valid way to train balance with less fall risk.
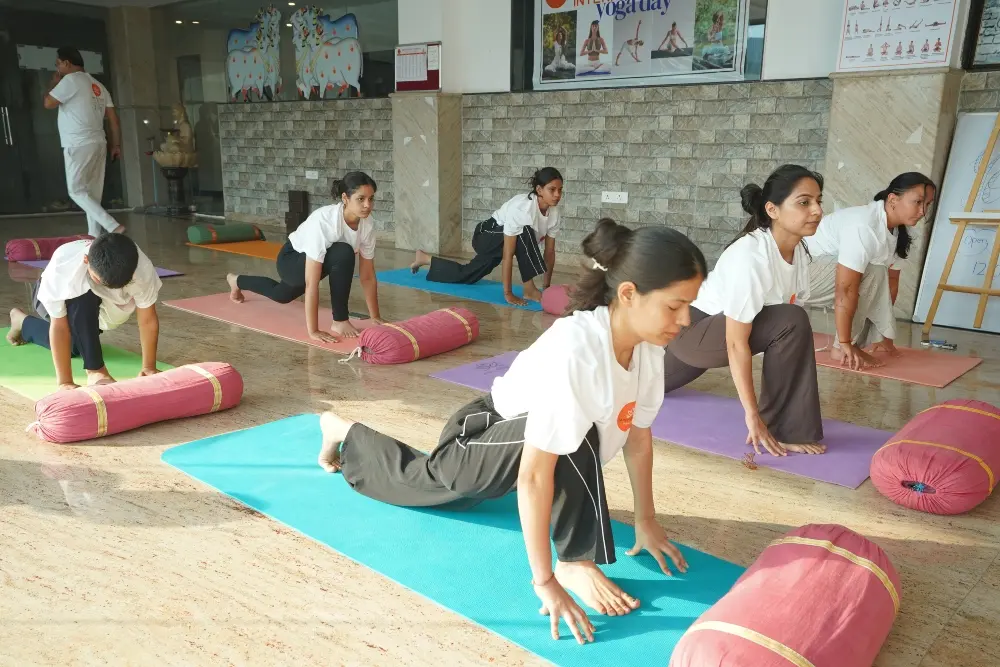
How Should Teachers Understand the Shoulder?
The shoulder is not one joint. Movement involves the upper-arm bone, shoulder blade, collarbone, rib cage, and spine. When the arm rises, the shoulder blade normally rotates and moves on the rib cage.
The repeated instruction to pull the shoulder blades “down and back” can restrict necessary movement in overhead positions. In Downward-Facing Dog or an overhead reach, allow the shoulder blades to rotate upward while the student actively pushes through the hands or reaches through the arms.
In weight-bearing poses, progress gradually. The shoulder experiences different demands in Tabletop, Plank, Chaturanga, arm balances, and inversions. A student who can hold Plank comfortably may not be ready for repeated low Chaturanga or a long handstand practice.
Use symptom response rather than aesthetic depth as the main guide. Reduce load if there is sharp pain, instability, loss of strength, numbness, or symptoms travelling down the arm.
What Should Teachers Know About Wrists and Hands?
Many modern classes place substantial repeated load through the hands. Wrist tolerance varies according to history, occupation, mobility, strength and total weekly load.
Useful options include:
- spreading pressure across the palm rather than collapsing into one point
- reducing the number or duration of weight-bearing poses
- practising at a wall or on a raised surface
- using fists or handles when appropriate and comfortable
- strengthening gradually rather than avoiding all load indefinitely
- substituting forearm-based positions when they suit the goal
A wedge may reduce the angle of wrist extension but can also change hand pressure and shoulder mechanics. Treat it as an experiment, not a guaranteed correction.
Persistent wrist pain, swelling, night symptoms, numbness, or weakness require assessment rather than repeated stretching.
How Does Breathing Work in Yoga?
At rest, inhalation is driven mainly by contraction of the diaphragm. The diaphragm descends, the rib cage changes shape, and pressure differences draw air into the lungs. Exhalation at rest is usually more passive, although abdominal and other muscles contribute during forceful breathing.
Breathing is both automatic and voluntarily modifiable. Posture, effort, speech, emotion, illness, and expectation can change it. A teacher should therefore avoid claiming that every student must breathe with one fixed pattern.
Practical Breath Teaching
- Begin with observation before correction.
- Use a comfortable pace and avoid demanding maximum inhalations.
- Let students return to ordinary breathing at any time.
- Avoid prolonged retention for beginners or anyone who becomes distressed.
- Stop if a student feels faint, develops chest pain, or cannot recover comfortably.
- Teach forceful pranayama separately from basic asana and explain its demands.
Slow breathing may feel calming for some people, but it does not guarantee a particular nervous-system state. For a student with respiratory, cardiovascular, neurological, or anxiety-related concerns, comfort and medical guidance matter more than achieving a prescribed count.
What Is the Role of the Nervous System?
The nervous system receives information, coordinates movement, and helps regulate internal functions. In yoga teaching, it is relevant to balance, breathing, attention, pain, arousal, and learning.
Terms such as sympathetic and parasympathetic are useful, but they are often oversimplified. A vigorous practice is not purely “fight or flight,” and a forward fold does not automatically activate one specific state. A student’s response depends on context, expectation, breathing, effort, history, and perceived safety.
Offer predictable instructions, choice, and gradual exposure. These teaching behaviours may help students feel more secure without claiming to “reset the vagus nerve” or release stored trauma through a posture.
Yoga teachers can create supportive conditions. Mental-health diagnosis and trauma treatment belong to qualified professionals.
What Is Pain and How Should a Teacher Respond?
Pain is a personal sensory and emotional experience. It is influenced by biological, psychological, and social factors and cannot be inferred solely from posture or a scan. This does not mean pain is imaginary. It means that pain is more complex than a simple damage meter.
Teachers should not tell students to push through pain. They should also avoid alarming explanations such as “your spine is unstable” or “your hips are out of alignment.” Fear can reduce confidence and movement.
Use a simple response:
- Stop or reduce the provoking task.
- Ask the student to describe the sensation and whether it changes.
- Offer rest or a clearly different alternative.
- Do not repeatedly test the painful movement in class.
- Recommend professional assessment when symptoms persist, recur, or concern the student.
What Sensations Require Immediate Caution?
Pause practice and seek appropriate help for symptoms such as:
- sudden severe pain after a fall or forceful movement
- chest pain, severe shortness of breath or fainting
- new one-sided weakness, facial droop or difficulty speaking
- new numbness, marked weakness or loss of coordination
- loss of bladder or bowel control, saddle-area numbness or severe neurological symptoms
- a hot, swollen joint or inability to bear weight after injury
- severe headache, visual change or neurological symptoms during or after an inversion
- any symptom the student experiences as urgent or frightening
A teacher is not expected to determine the diagnosis. Follow emergency procedures and local requirements.
How Do Load Leverage and Progression Affect Safety?
The body adapts to appropriate challenge and recovery. Risk can increase when load rises faster than the person’s current capacity.
In yoga, load is changed by more than added weight:
Leverage: Knees down in Plank – Full Plank or longer body lever.
Range: Smaller lunge – Deeper lunge.
Duration: Brief hold – Longer hold.
Repetitions: One controlled round – Repeated flows.
Speed: Slow transition – Faster transition.
Stability: Wall support or wider base – Freestanding or narrow base.
External Load: Body weight partly supported – More body weight through the arms.
Complexity: One action at a time – Combined balance, rotation, and reach.
Progress one or two variables at a time. A student may tolerate a deep pose once but not repeated quickly. Another may manage a long hold but lose control during transitions. Capacity is task-specific.
How Should Anatomy Change Cueing?
Good cues state an intention and leave room for feedback.
Use External and Action-Based Cues
“Press the floor away” is often clearer than naming several shoulder muscles. “Move the pelvis back as the knees bend” gives a task. Anatomical language can then explain why, if the audience benefits.
Give One Priority at a Time
Too many cues can overload attention. Name the main task, allow time to explore, and add detail only when it changes the result.
Offer Choice Without Ranking It
Say “option” or “variation,” not “beginner version.” A chair-supported balance may be the most intelligent version for a student who is fatigued, pregnant, recovering, or working on steadier control.
Cue Sensation Carefully
Do not promise where every student will feel a pose. Say “you may notice effort through the legs” rather than “you should feel this only in the hamstrings.” Invite the student to report pressure, pinching, numbness, or pain.
Avoid False Precision
Exact angles are rarely necessary in a general class. “Bend the knee to 90 degrees” may not suit the person’s proportions or the pose’s purpose. Use observable functional criteria such as balance, breath, control, and symptom response.
How Should Teachers Use Hands-On Adjustments?
Touch does not become safe merely because the teacher understands anatomy. Consent, power, context, force, and the student’s history all matter.
Before touching:
- use a clear consent system that allows a genuine refusal
- explain the purpose and approximate area of contact
- consider whether verbal or visual teaching would be sufficient
- avoid using force to increase range
- never surprise a student from behind
- respect cultural, personal and trauma-related boundaries
- stop immediately if consent changes
Hands-on teaching should provide information or support, not push a body toward an ideal image. A teacher cannot reliably feel a joint “out of place” through routine class contact.
How Does Anatomy Apply to Major Pose Families?
Standing Poses: Can the student balance and organise the foot, knee, and hip? Shorten the stance or use a wall.
Forward Folds: Where is motion occurring, and is the range comfortable? Bend the knees or elevate the seat.
Backbends: Is extension distributed, and can the student breathe? Reduce leverage or support the pose.
Twists: Is rotation controlled without force or breath holding? Use a smaller range and rotate from a stable base.
Arm Balances: Has wrist and shoulder load been prepared progressively? Practise component tasks or use supports.
Inversions: Are pressure, balance, neck load, and exit strategy appropriate? Use a wall, alternative inversion, or omit the pose.
Seated Poses: Does the pelvis have a workable base? Sit on a folded blanket or chair.
Restorative Poses: Is the student adequately supported and able to settle? Add or remove props according to comfort.
Pose names do not determine risk on their own. Dose, transition, environment, student history, and teacher competence also matter.
What Should Teachers Know About Common Populations?
Pregnancy
Pregnancy changes balance, circulation, fatigue, joint tolerance, and comfort. NCCIH advises medical evaluation and appropriate modification, including avoiding long periods lying on the back when relevant. Prenatal teaching requires specific training. Do not use a general anatomy module as a substitute for prenatal qualification.
Osteoporosis
Students with osteoporosis or previous fragility fractures may need to avoid uncontrolled, repetitive, or loaded end-range spinal flexion and other high-risk tasks. Obtain individual guidance and use smooth, controlled movement. Do not remove all spinal movement without reason.
Hypermobility
High range does not guarantee stability or comfort. Emphasise controlled mid-range strength, gradual loading and proprioception rather than repeatedly seeking end range. A student with suspected connective-tissue disorder should be assessed by an appropriate clinician.
Older Adults
Age alone does not determine ability. Consider balance, bone health, vision, hearing, medication effects, recovery and confidence. Use chairs, walls and slower transitions where useful without making the class infantilising.
Existing Pain or Recent Injury
Ask what the student’s healthcare professional has advised and what activities currently aggravate symptoms. Teach within the agreed boundaries. A general class is not the place to test an undiagnosed injury.
Cardiovascular or Respiratory Conditions
Avoid demanding breath retention, rapid breathing, or abrupt position changes without appropriate clearance and competence. Encourage students to keep medication and emergency plans accessible when relevant.
How Can Trainees Study Anatomy Effectively?
Begin With Movements, Not Lists
Choose a pose and identify the major joint actions. Then explore what changes when the stance, support, or leverage changes.
Use Palpation Carefully
Palpation can help trainees locate their own bony landmarks or observe movement. It is not a diagnostic tool. Obtain consent before partner work and avoid intimate or painful contact.
Compare Variations
Practise a pose with a block, wall, chair, shorter stance and smaller range. Record what changed in balance, effort, breath and sensation. There is no need to declare one version universally superior.
Draw and Teach Back
Simple sketches reveal whether a trainee understands relationships. Teaching the concept to a peer is more useful than copying a labelled diagram.
Use Cases
Ask what you would do if a student reports wrist pain in Plank, dizziness after standing, or front-hip pinching in a lunge. Cases connect anatomy, communication, scope and referral.
Revisit the Same Concept
Anatomy is retained through spaced repetition. Return to the shoulder during Downward Dog, Plank, Chaturanga, arm balances and inversions rather than teaching it once in isolation.
A Practical Anatomy Competency Checklist
A trainee is developing useful competence when they can:
- identify major bones and joint regions relevant to common asanas
- describe flexion, extension, rotation, abduction and adduction accurately
- distinguish passive range from actively controlled range
- recognise concentric, eccentric and isometric demands in a task
- explain basic breathing mechanics without unsupported claims
- analyse a pose by joint actions and load rather than appearance alone
- offer at least two meaningful variations and explain their purpose
- avoid diagnosing from posture or pain behaviour
- identify situations that require medical clearance or referral
- use consent-based teaching and respect a student’s refusal
- progress load through range, leverage, duration, repetitions and support
- teach a mixed group without presenting one shape as the standard of success
The final assessment should include application, not only a written test. Observation, case discussion, sequencing and supervised teaching show whether the trainee can use the knowledge responsibly.
A Four Week Anatomy Integration Plan
Week 1: Movement Language and Observation
- Learn anatomical position, planes, and major joint actions.
- Analyse five familiar poses without using value judgments.
- Observe how proportions change visible shape.
- Practise giving one action-based cue at a time.
Week 2: Spine, Hips and Lower Limb
- Study spinal regions, pelvis, hip, knee, ankle and foot.
- Compare squat, lunge, forward-fold and balance variations.
- Practice adapting stance, support and range.
- Discuss osteoporosis, knee symptoms and fall risk within scope.
Week 3: Shoulder, Wrist and Breath
- Study scapular movement, shoulder load and wrist extension.
- Compare Tabletop, Plank, Downward Dog and Chaturanga.
- Observe breathing in supine, seated, prone and standing positions.
- Teach breath choice without forced counts or retention.
Week 4: Integration Safety and Teaching
- Work through pain and red-flag scenarios.
- Practise consent language and non-forceful alternatives.
- Build a sequence with at least three levels of load.
- Teach a short class and explain the anatomical purpose of each variation.
Common Anatomy Mistakes in Yoga Teacher Training
Memorising Without Applying
Knowing muscle names is not enough. Trainees need to connect anatomy to observation, cueing, sequencing, and adaptation.
Treating Alignment as Universal
One visible shape cannot account for individual structure, history, and purpose. Teach functional options.
Explaining Pain as Damage
Pain can occur without clear tissue damage, and tissue change can exist without pain. Do not diagnose or catastrophise.
Chasing Flexibility Without Capacity
End range is not the only measure of progress. Strength, control, confidence and recovery matter.
Using Anatomy to Sound Authoritative
Complex language can hide uncertainty. Prefer an accurate simple explanation to a confident but unsupported claim.
Assuming Props Make a Pose Easier
A prop changes the task. It may reduce load, increase reach, improve feedback, or sometimes make a pose more demanding. Explain its purpose.
Ignoring Transitions
Students can tolerate a final pose but struggle while entering or leaving it. Teach the full movement, including a controlled exit.
Frequently Asked Questions
How Much Anatomy Is Included in a 200 Hour Yoga Teacher Training?
Yoga Alliance’s current RYS 200 framework allocates 30 hours to anatomy and physiology, including anatomy, physiology, and biomechanics. Individual schools may organise and teach those hours differently.
Do Yoga Teachers Need to Memorise Every Muscle?
No. Future teachers should know major structures and actions relevant to their classes, but practical application matters more than exhaustive memorisation. Learn relationships, load and movement first.
Can a Yoga Teacher Diagnose an Injury?
Not on the basis of ordinary yoga-teacher training. A teacher can observe, modify and refer, but diagnosis and rehabilitation require the appropriate clinical qualification and legal authority.
Is There One Correct Alignment for Each Yoga Pose?
No single alignment suits every body and every purpose. Useful alignment describes an intention, boundary, or strategy while allowing for individual structure and feedback.
Should the Knee Always Stay Directly Above the Ankle?
No universal rule requires this in every pose. Knee position depends on the task, proportions, ankle mobility, load, and control. Painful or uncontrolled movement should be modified, but a forward-moving knee is not automatically unsafe.
Is Rounding the Spine Dangerous?
Spinal flexion is a normal movement. Risk depends on the person, load, speed, repetition, range, and condition. Students with osteoporosis or previous vertebral fractures may need specific precautions.
What Is the Difference Between Flexibility and Mobility?
Flexibility refers broadly to available range, often with assistance. Mobility includes the ability to access and control movement actively. A student can have high passive flexibility but limited active control.
Should Yoga Teachers Tell Students to Push Through Discomfort?
No. Mild effort or stretching sensation may be expected, but sharp pain, numbness, instability, dizziness, or alarming symptoms require the task to stop or change. Persistent symptoms warrant professional assessment.
Are Hands-On Adjustments Necessary?
No. Effective teaching can be verbal, visual, demonstrative, or supported with props. Touch requires specific consent and should not force a student into greater range.
Can Yoga Anatomy Prevent Every Injury?
No. Anatomy knowledge can improve decisions and risk management but cannot remove all uncertainty. Appropriate progression, communication, environment, and referral are also important.
What Anatomy Should Be Learned Before Teaching Inversions?
Teachers should understand shoulder and scapular movement, wrist or forearm loading, spinal and neck considerations, balance, blood-pressure-related precautions, progression, and safe exits. They should also know when an alternative is more appropriate.
Does Slow Breathing Always Activate the Parasympathetic Nervous System?
Not in a simple or guaranteed way. Slow breathing may feel settling and can influence physiology, but individual response depends on context, technique, health, and perception. Avoid promising a specific nervous-system outcome.
How Can I Remember Anatomy After Training?
Study through movement, teach concepts to peers, revisit one body region across several pose families, and use case discussions. Regular application and continuing education are more effective than a single period of memorisation.
When Should a Yoga Teacher Refer a Student?
Refer when symptoms are severe, persistent, unexplained, worsening, or outside your competence. Urgent symptoms such as chest pain, fainting, new neurological loss, or bladder and bowel changes require immediate action according to local emergency procedures.
Conclusion
Yoga anatomy is valuable when it improves observation, communication and choice. A future teacher does not need to become a clinician, but does need enough knowledge to understand movement, vary load, recognise limitations and stay within scope.
The most responsible anatomy teaching moves away from rigid ideals. It recognises that bodies differ, sensation is personal, and a pose is a task rather than a picture. It also treats props, smaller ranges and alternative movements as legitimate ways to practise.
Learn the major structures and actions. Apply them to real poses. Ask what a cue is intended to achieve. Progress load gradually. Listen when a student reports pain or concern. Refer when the question exceeds your training.
That combination of knowledge and humility is what makes anatomy useful in yoga teacher training.
Your Next Step
Choose five poses from a class you already practise or teach. For each pose, write down:
- the main joint actions
- where the external load comes from
- which areas need active control
- two ways to reduce the demand
- one way to increase the demand
- expected sensations that may occur
- symptoms that would make you stop
- a variation that preserves the purpose of the pose
- whether any health condition would require individual guidance
Then teach the five poses to a peer without using “perfect,” “wrong,” “always,” or “never.” This exercise turns anatomy from memorised information into responsible teaching practice.