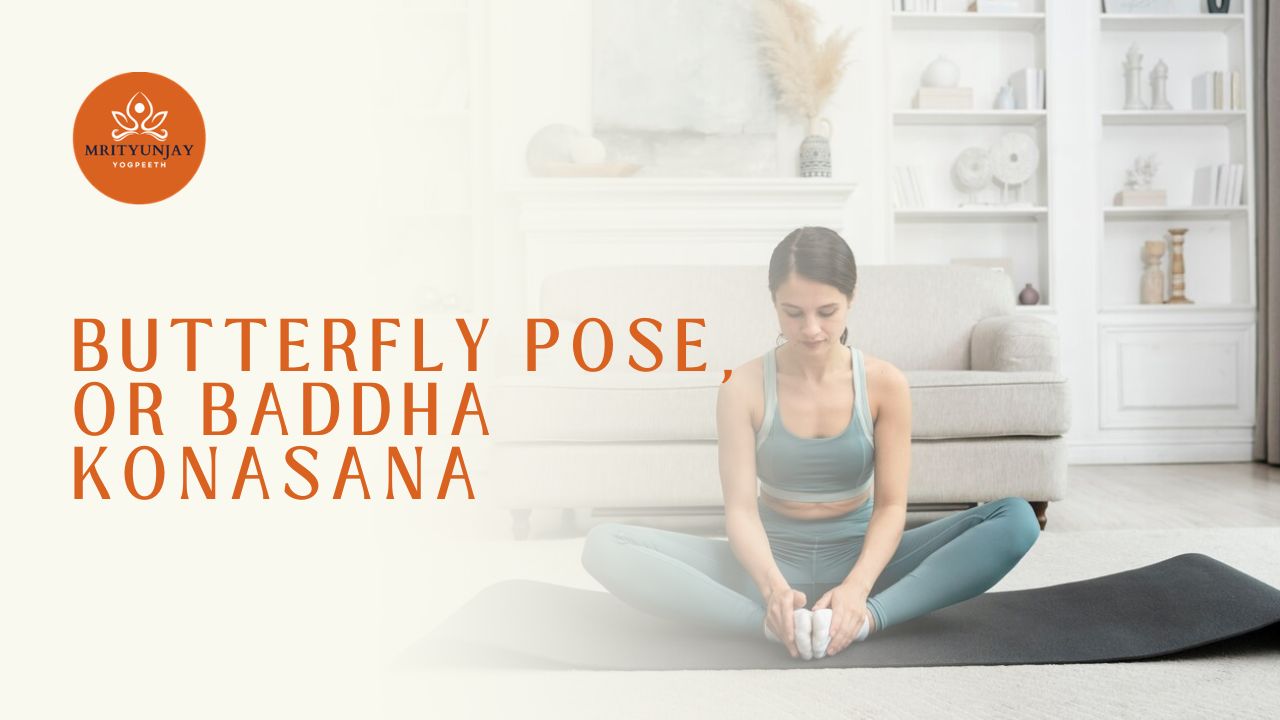
What Is Butterfly Pose, or Baddha Konasana?
Butterfly Pose, or Baddha Konasana, is a seated yoga posture where the soles of the feet come together, the knees open out to the sides, and the spine stays tall. It is also commonly called the Bound Angle Pose, Cobbler’s Pose, or the butterfly stretch. In Sanskrit, “Baddha” means bound, “Kona” means angle, and “Asana” means posture.
This pose is widely practiced in yoga, mobility routines, warm-ups, cool-downs, prenatal yoga, meditation, and stretching sessions because it targets the hips, groin, inner thighs, and lower back. Yoga Journal describes Baddha Konasana as a go-to posture for opening the hips and stretching the inner thighs, while also encouraging an upright spine and active core engagement.
At first glance, Butterfly Pose looks simple. You sit down, bring your feet together, and let your knees fall open. But when practiced mindfully, it becomes much more than a basic stretch. It teaches you how to sit with awareness, lengthen the spine, soften unnecessary tension, breathe into tight areas, and create more comfort in the hips and pelvis.
For many people, especially those who sit for long hours, drive frequently, work at a desk, or exercise intensely, the hips and inner thighs can become stiff. Cleveland Clinic notes that tight hips are common and that stretching and strengthening the hips can help improve flexibility and relieve pressure. Butterfly Pose is one of the most accessible ways to begin working with that tightness.
This guide explains everything you need to know about Butterfly Pose, or Baddha Konasana: how to do it safely, what muscles it affects, its benefits, common mistakes, variations, contraindications, and how to include it in your yoga practice.
What Is Butterfly Pose Good For?
Butterfly Pose is mainly used to stretch the inner thighs, groin, hips, and lower back. It may help improve hip mobility, support better seated posture, reduce stiffness from prolonged sitting, and prepare the body for meditation or deeper yoga poses. It is beginner-friendly, but people with knee, hip, groin, or lower-back injuries should practice with props or guidance.
The pose is especially useful for:
- Tight hips
- Inner thigh stiffness
- Groin mobility
- Seated posture awareness
- Gentle lower-body stretching
- Relaxation and breath awareness
- Preparation for meditation
- Beginner yoga practice
However, Butterfly Pose should not be forced. The knees do not need to touch the floor. The goal is not to “look flexible,” but to create a safe, sustainable stretch.

How to Do Butterfly Pose, or Baddha Konasana: Step-by-Step Instructions
Step 1: Sit on the floor
Begin seated on a yoga mat or firm surface. Extend your legs forward in front of you. Sit evenly on both sitting bones. If your lower back rounds or your knees lift very high, sit on a folded blanket, cushion, or yoga block.
This small lift can make the pose much more comfortable because it tilts the pelvis slightly forward and helps the spine lengthen.
Step 2: Bend your knees
Bend both knees and bring the soles of your feet together. Let your knees open out to the sides. Your legs will form a diamond-like shape.
Do not push your knees down with your hands. Let gravity and breath do most of the work.
Step 3: Adjust the distance of your feet
Bring your heels toward your pelvis only as much as feels comfortable. The closer the heels are to the body, the more intense the stretch may feel in the groin and inner thighs. Moving the feet farther away usually makes the pose gentler.
A common beginner-friendly version is to keep the feet slightly forward, creating a wider diamond shape.
Step 4: Hold your feet or ankles
Hold your feet, ankles, or shins. Choose the position that allows your shoulders to relax and your spine to stay upright.
Avoid pulling aggressively on the feet. Your hands are there for support, not force.
Step 5: Lengthen your spine
Sit tall. Imagine the crown of your head rising upward. Keep your chest open, shoulders relaxed, and neck long.
Yoga Journal emphasizes the role of the core and back muscles in this pose, especially because they help prevent the spine from rounding and the chest from collapsing.
Step 6: Relax the thighs and hips
Allow the knees to soften toward the floor naturally. They do not need to touch the ground. For many bodies, the knees will remain high, and that is completely normal.
Use blocks, cushions, or folded blankets under the knees if there is strain.
Step 7: Breathe slowly
Take slow, steady breaths. Inhale to lengthen the spine. Exhale to soften the hips, inner thighs, and jaw.
Stay for 30 seconds to 2 minutes if you are a beginner. More experienced practitioners may hold the pose longer, especially in restorative or yin-style practices.
Step 8: Come out gently
To exit, use your hands to help bring your knees together. Extend your legs forward and gently shake them out.
Avoid snapping the knees closed or rushing out of the pose, especially if you have held it for a long time.
Proper Alignment in Butterfly Pose
Good alignment in Butterfly Pose is not about forcing the knees down. It is about creating a stable, comfortable, and spacious position.
Here are the main alignment points:
Spine: Keep the spine long rather than collapsed. If your lower back rounds, sit on a height.
Pelvis: Try to sit on the front edge of the sitting bones. A slight forward tilt of the pelvis helps reduce strain in the lower back.
Feet: Press the outer edges of the feet gently together. The soles may face upward slightly, but avoid twisting the ankles uncomfortably.
Knees: Let the knees open naturally. Support them if they hover high or feel strained.
Shoulders: Keep the shoulders soft and away from the ears.
Neck: Keep the head balanced over the spine instead of jutting the chin forward.
Breath: Keep breathing smoothly. If the breath becomes tight, the pose is probably too intense.

Muscles Worked and Stretched in Butterfly Pose
Butterfly Pose primarily stretches and mobilizes the lower body. It is especially known as a hip-opening posture.
The main areas involved include:
Inner thighs
The inner thigh muscles, also called the adductors, are strongly involved. These muscles help draw the legs toward the midline of the body. When the knees open outward in Butterfly Pose, the inner thighs lengthen.
Groin
The groin area receives a noticeable stretch. This is why many athletes, runners, dancers, and people with tight hips use the butterfly stretch in mobility routines.
Hips
The pose encourages external rotation at the hips. This makes it useful for people who feel restricted in cross-legged sitting, squats, lunges, or seated meditation.
Lower back
When practiced with proper support, Butterfly Pose may help ease general lower-back stiffness by encouraging a more balanced seated position. But if the spine rounds heavily or the practitioner forces forward, it may aggravate discomfort. Support is important.
Pelvic floor region
Some physical therapy and movement resources describe the butterfly stretch as relevant for the groin and pelvic floor region, though individual needs vary, and anyone with pelvic pain should seek professional guidance. Hinge Health describes the butterfly stretch as a movement that can improve flexibility in the inner thighs, groin, and pelvic floor region.
Benefits of Butterfly Pose, or Baddha Konasana
1. Stretches the inner thighs and groin
The most obvious benefit of Butterfly Pose is the stretch it provides to the inner thighs and groin. This can be especially helpful for people who feel tight after sitting, running, cycling, strength training, or long travel.
Because the pose is seated and easy to modify, it is accessible for many beginners.
2. Improves hip mobility
Butterfly Pose encourages the hips to externally rotate. Over time, this may support better mobility in other movements, such as squats, lunges, seated poses, and cross-legged sitting.
Cleveland Clinic highlights hip-opening stretches as a way to improve flexibility and reduce pressure in tight hips. Butterfly Pose fits naturally into that category.
3. Supports better posture
Although many people think of Baddha Konasana only as a hip stretch, it also teaches upright sitting. To sit tall in the pose, the spine, core, and back muscles must participate.
If you collapse the chest, round the back, and drop the head, the pose becomes less effective and may strain the lower back. But when practiced with height under the hips, it can encourage better awareness of spinal alignment.
4. Helps counteract prolonged sitting
Long hours of sitting can contribute to tight hips, stiff inner thighs, and poor posture. Butterfly Pose offers a simple way to open the front and inner hip region after a sedentary day.
This does not mean one stretch can erase all the effects of sitting. Movement variety matters. But adding Butterfly Pose to a daily routine can be a useful starting point.
5. May help with relaxation
Butterfly Pose can be practiced actively or passively. In a more restorative version, you can support the knees with cushions and focus on slow breathing. This makes the pose calming and grounding.
The National Center for Complementary and Integrative Health notes that yoga research suggests possible benefits for stress management, mental and emotional health, sleep, balance, and general wellness. Butterfly Pose, when practiced gently, can be part of a calming yoga routine.
6. Prepares the body for meditation
Many meditation postures require comfortable hip opening and an upright spine. Baddha Konasana can help prepare the body for seated meditation by gradually opening the hips and training postural awareness.
For people who struggle to sit cross-legged, Butterfly Pose with props can be a useful alternative.
7. Useful in warm-ups and cool-downs
Butterfly Pose can be used before a yoga flow to prepare the hips, or after exercise to stretch the inner thighs and groin. Cleveland Clinic notes that stretching can support flexibility and balance when used as part of a routine or warm-up and cool-down.
For a warm-up, keep it dynamic and gentle. For a cool-down, hold it still and breathe slowly.
8. Beginner-friendly and easy to modify
One reason Butterfly Pose is so popular is that it can be adapted for different bodies. You can sit on a blanket, place blocks under the knees, move the feet farther forward, practice against a wall, or try a reclined version.
The pose does not require advanced strength or balance, making it suitable for many beginners when practiced carefully.

Common Mistakes in Butterfly Pose
Mistake 1: Forcing the knees down
This is the most common mistake. Many people press their knees toward the floor, thinking that deeper is better. This can strain the knees, hips, groin, or inner thighs.
Instead, let the knees descend naturally. Support them with blocks or cushions if needed.
Mistake 2: Rounding the lower back
If your pelvis tilts backward, your lower back may round. This can create discomfort and reduce the benefits of the pose.
Sit on a folded blanket or cushion to elevate the hips. This often makes the pose immediately more accessible.
Mistake 3: Pulling the feet too close
Bringing the heels close to the pelvis creates a stronger stretch. But for tight hips, it may be too intense. Move the feet farther away to reduce pressure.
Mistake 4: Holding the breath
Tension in the hips often causes people to hold their breath. Keep the breath smooth. If you cannot breathe comfortably, reduce the intensity.
Mistake 5: Bouncing aggressively
Some people flap their knees rapidly like butterfly wings. A gentle dynamic movement may be fine as a warm-up, but aggressive bouncing can irritate the joints or muscles.
Use slow, controlled movement instead.
Mistake 6: Ignoring pain
A stretch may feel intense, but it should not feel sharp, pinching, burning, or painful. Pain is a signal to stop, adjust, or come out of the pose.
Butterfly Pose for Beginners
If you are new to yoga or have tight hips, practice Butterfly Pose with support from the beginning. You do not need to wait until you feel discomfort.
Try this beginner version:
- Sit on a folded blanket or firm cushion.
- Bring the soles of your feet together.
- Move your feet slightly away from your pelvis.
- Place yoga blocks, pillows, or rolled blankets under your knees.
- Hold your ankles or shins.
- Sit tall and breathe for 30 seconds.
- Come out slowly and stretch your legs forward.
Repeat 2 to 3 times.
The key is consistency. A gentle version practiced regularly is usually more effective than an intense version practiced occasionally.
Butterfly Pose Variations
1. Supported Butterfly Pose
This is the best variation for beginners, tight hips, knee sensitivity, or restorative practice.
Place cushions, yoga blocks, or folded blankets under both knees. Sit on a folded blanket if the lower back rounds. Let the body relax while maintaining a comfortable upright position.
This variation reduces strain and allows the nervous system to settle.
2. Dynamic Butterfly Pose
In this version, you gently move the knees up and down like butterfly wings.
Sit tall, hold the feet or ankles, and slowly lift and lower the knees. Keep the movement small and controlled. Do not bounce forcefully.
The Dynamic Butterfly Pose can be useful as a warm-up before deeper hip-opening postures.
3. Forward Fold Butterfly Pose
From seated Butterfly Pose, inhale to lengthen the spine. As you exhale, hinge slightly forward from the hips.
Keep the back long at first. Do not force the head toward the feet. You can rest your elbows on your thighs or place a bolster in front of you for support.
This variation intensifies the stretch, so it is not necessary for beginners.
4. Reclined Butterfly Pose
Lie on your back and bring the soles of your feet together. Let the knees open out to the sides. Support the knees with pillows or blocks.
This version is often called Supta Baddha Konasana, or Reclined Bound Angle Pose. It is commonly used in restorative yoga and relaxation practices.
5. Wall-Supported Butterfly Pose
Sit with your back against a wall. Bring the soles of the feet together and let the knees open.
The wall helps keep the spine upright, making this a useful option for people who tend to slump.
6. Chair Butterfly Variation
Sit on the edge of a chair. Bring the soles of the feet together if possible, or place the feet wider than hip-width and let the knees open outward.
This is a gentler option for people who cannot comfortably sit on the floor.

How Long Should You Hold Butterfly Pose?
For beginners, hold Butterfly Pose for 30 seconds to 1 minute. As comfort improves, you can gradually increase to 2 to 5 minutes, especially in restorative or yin-style practice.
A practical guideline:
- Warm-up: 20 to 30 seconds with gentle movement
- Cool-down: 1 to 2 minutes still
- Restorative practice: 3 to 5 minutes with props
- Meditation prep: 2 to 5 minutes with support
Longer is not automatically better. The quality of breath, comfort, and alignment matter more than duration.
When Is the Best Time to practice the Butterfly Pose?
You can practice the Butterfly Pose at different times depending on your goal.
Morning
Use it gently in the morning to loosen the hips and prepare the body for the day. Keep the hold shorter because the body may feel stiffer after sleep.
After sitting
Practice Butterfly Pose after long work sessions, travel, or driving. It can help you reconnect with the hips and lower back.
Before yoga
Use a dynamic version to warm up the hips before seated poses, lunges, or hip-opening sequences.
After exercise
Use a supported still version after workouts to stretch the inner thighs and groin.
Before meditation or sleep
Use a supported or reclined version with slow breathing to calm the body and mind.
Butterfly Pose Breathing Technique
Breathing is what turns Butterfly Pose from a stretch into a yoga posture.
Try this simple breathing pattern:
- Inhale through the nose and lengthen the spine.
- Exhale slowly and soften the inner thighs.
- Inhale and broaden the chest.
- Exhale and relax the jaw, shoulders, and hips.
- Continue for 5 to 10 breaths.
Avoid forcing the stretch during the exhale. Think of releasing tension rather than pushing the knees down.

Precautions and Contraindications
Butterfly Pose is beginner-friendly, but it is not automatically suitable for everybody. Practice with care if you have any of the following:
- Knee injury or knee pain
- Hip injury or hip replacement history
- Groin strain
- Severe sciatica
- Lower-back pain aggravated by sitting
- Pelvic pain
- Recent surgery
- Pregnancy-related discomfort
- Arthritis affecting the hips or knees
NCCIH advises that older adults and people with medical issues should talk with their healthcare providers and yoga teachers before starting yoga, especially to learn appropriate modifications and safe form.
Also remember that yoga is a complementary wellness practice, not a substitute for medical diagnosis or treatment. If you have persistent pain, numbness, tingling, swelling, or injury-related symptoms, consult a qualified healthcare professional.
Is Butterfly Pose Safe During Pregnancy?
Butterfly Pose is often used in prenatal yoga, but pregnancy changes the body significantly. Hormonal changes, pelvic pressure, balance changes, and individual medical conditions all matter.
A supported version may feel comfortable for some pregnant practitioners, especially when sitting on a cushion and supporting the knees. However, deep forward folding, forcing the knees down, or holding intense stretches for too long may not be appropriate.
Pregnant practitioners should work with a qualified prenatal yoga teacher and consult their healthcare provider, particularly if they have pelvic girdle pain, symphysis pubis dysfunction, bleeding, high-risk pregnancy, or medical restrictions.
Butterfly Pose for Tight Hips
If you have tight hips, Butterfly Pose may feel intense even before you begin folding forward. That is normal.
Use these tips:
- Sit higher on a blanket or cushion.
- Move the feet farther away from the pelvis.
- Place support under both knees.
- Keep the spine upright instead of folding forward.
- Hold for shorter periods.
- Practice consistently rather than aggressively.
Many people make the mistake of trying to “open” the hips quickly. Hip mobility develops gradually. Forcing can cause irritation or injury.
A good tight-hip practice might look like this:
- Seated Butterfly Pose with support – 1 minute
- Gentle dynamic knee movement – 30 seconds
- Supported still hold – 1 minute
- Rest with legs extended – 30 seconds
Repeat daily or several times per week.
Butterfly Pose for Knee Pain: What to Know
If you feel Butterfly Pose in your knees more than your hips or inner thighs, adjust immediately. The knees should not be the main site of sensation.
Try these modifications:
- Place blocks or pillows under the knees.
- Move the feet farther forward.
- Sit on a higher support.
- Avoid pressing the knees down.
- Keep the stretch mild.
- Come out if there is sharp or twisting pain.
The knees are hinge joints, and they do not like being forced into positions created by tight hips. If the hips are restricted, the knees may take the pressure. Support prevents this.

Butterfly Pose vs. Cobbler’s Pose vs. Bound Angle Pose
These names are often used interchangeably:
Butterfly Pose: The common fitness and yoga name. It often refers to the seated posture with soles together and knees open. Sometimes it includes gentle knee movement.
Baddha Konasana: The Sanskrit name used in yoga traditions.
Bound Angle Pose: The English translation of Baddha Konasana.
Cobbler’s Pose: A traditional name inspired by the seated position associated with cobblers.
In many modern yoga classes, all four terms refer to the same basic posture.
Active vs. Passive Butterfly Pose
Butterfly Pose can be practiced actively or passively.
Active Butterfly Pose
In the active version, you sit tall, engage the core, lengthen the spine, and maintain an alert posture. This version is useful for building postural strength and awareness.
Passive Butterfly Pose
In the passive version, you use props and allow the body to soften. This version is common in restorative and yin yoga. It is useful for relaxation and longer holds.
Neither version is better. Choose based on your goal.
Use the active Butterfly Pose when you want posture and strength. Use the passive Butterfly Pose when you want release and relaxation.
A 10-Minute Butterfly Pose Practice for Beginners
Here is a simple beginner-friendly practice:
Minute 1: Easy seated breathing
Sit on a blanket or cushion. Cross the legs or extend them forward. Breathe slowly.
Minutes 2 – 3: Gentle hip warm-up
Bend and straighten the knees. Move the legs side to side. Keep everything gentle.
Minutes 4 – 5: Supported Butterfly Pose
Bring the soles of the feet together. Place blocks or cushions under the knees. Sit tall and breathe.
Minute 6: Dynamic Butterfly
Gently lift and lower the knees in a small range. Move slowly.
Minutes 7 – 8: Still Butterfly Hold
Return to stillness. Inhale to lengthen the spine. Exhale to soften the hips.
Minute 9: Optional gentle forward hinge
Hinge forward slightly only if comfortable. Keep the spine long.
Minute 10: Release and rest
Bring the knees together. Extend the legs forward. Shake them out and notice how the hips feel.
Who Should Practice Butterfly Pose?
Butterfly Pose may be helpful for:
- Beginners learning seated yoga
- Desk workers with tight hips
- Runners and cyclists with inner thigh stiffness
- People preparing for meditation
- Yoga practitioners working on hip mobility
- Anyone wanting a gentle lower-body stretch
It may not be appropriate, or may require professional guidance, for:
- People with acute knee injuries
- People with hip joint injuries
- People recovering from groin strains
- People with severe lower-back pain
- People with pelvic pain conditions
- Pregnant practitioners with complications
- Older adults with mobility limitations, unless modified
Yoga can be broadly beneficial for wellness, but safety and individualization matter. NCCIH notes that yoga may support multiple areas of wellness, but people with health conditions should practice appropriately and seek guidance when needed.

Expert Tips for Better Practice
Use props before you need them
Props are not a sign of weakness. They help the body relax and align safely.
Keep the pose pain-free
A mild stretch is fine. Sharp pain is not.
Prioritize the spine
If sitting upright is difficult, elevate the hips. A tall spine is more important than low knees.
Let gravity work
Do not push. Over time, the hips may soften naturally.
Practice regularly
Short, consistent practice is usually better than occasional intense stretching.
Combine with strengthening
Flexibility is useful, but the hips also need strength. Pair Butterfly Pose with gentle hip and glute strengthening for balanced mobility.
Frequently Asked Questions About Butterfly Pose, or Baddha Konasana
Is Butterfly Pose good for beginners?
Why do my knees stay high in Butterfly Pose?
Should my knees touch the floor?
Can I do Butterfly Pose every day?
How long should I hold Butterfly Pose?
Is Butterfly Pose good for hip flexibility?
Can Butterfly Pose help lower-back pain?
Is Butterfly Pose the same as Baddha Konasana?
Can I fold forward in Butterfly Pose?
What should I feel in Butterfly Pose?
Final Thoughts
Butterfly Pose, or Baddha Konasana, is one of the most useful seated yoga postures for beginners and experienced practitioners alike. It stretches the inner thighs, opens the hips, encourages upright posture, and can help the body settle into stillness. It is simple enough to practice at home, yet subtle enough to teach patience, body awareness, and breath control.
The most important lesson of Butterfly Pose is not how close your knees get to the floor. It is how well you listen to your body. A safe, supported version of the pose is far more valuable than a forced version that creates strain.
Use props generously. Keep the spine long. Breathe slowly. Let the hips open gradually. Whether you practice it after a long day of sitting, before meditation, after a workout, or as part of a yoga sequence, Baddha Konasana can become a grounding and reliable posture in your wellness routine.