One World, One Breath: Celebrating International Yoga Day

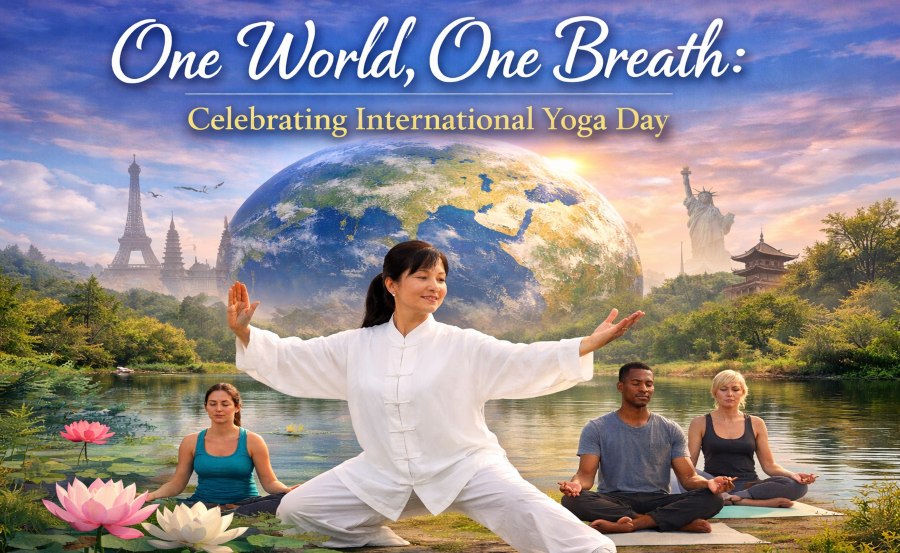
One World, One Breath: Celebrating International Yoga Day

Every year on June 21, people around the world roll out a mat – or simply stand up barefoot on the ground – and practice yoga together. International Yoga Day is more than a date on the calendar; it’s an invitation to remind everyone around you that wellness is deeply personal as well as profoundly shared.

And in a world that so often seems to be divided by borders, timelines, and screens, yoga provides a surprisingly easy bridge: one breath – in, out, connecting one world.

Why June 21 Matters

International Day of Yoga: Founded in 2015, the United Nations (UN) adopted a resolution to join people worldwide and raise awareness of the many benefits that yoga practice has to offer. It is aimed to galvanize all people by positive body, mind, and spirit! The day (June 21) is not picked out of a hat; it is the summer solstice in the Northern Hemisphere. It’s the longest day of the year; a celebration of light, awareness, and equilibrium. This timing also suits the broader understanding of yoga as more than just a form of exercise, but as a process whereby body and mind are brought into alignment with natural cycles that encourage steadiness and clarity.

June 21 has become more than just a symbolic date over the years. It is now a world invitation to simply stop and reconnect, no matter our experience or lifestyle. The day is about encouraging people to embrace yoga in a way that feels sustainable and personal – whether that’s taking a full class, doing a few gentle stretches at home, or just sitting quietly for mindful breathing. It is not about intensity or perfection, it’s about community and being here for all of us; It allows the masses to experience wellness all over the world.

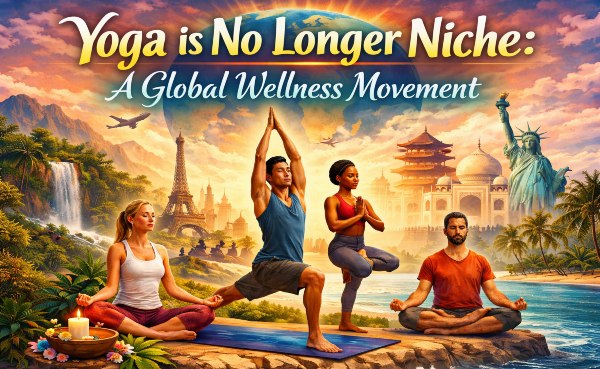
Yoga is No Longer Niche: a Global Wellness Movement

Yoga has spread far beyond the walls of studios. Now, it is part of a sweeping wellness culture – apps, home practice, retreats, clothes, and community groups, as well as hedge funds and schools. This boom is not just about fitness fads; it’s a response to an essential need that people share all over:

  • To cope with stress and anxiety in daily life
  • To move more frequently and non-impactly
  • To increase power, flexibility, and ease as time goes on
  • To make a schedule that hits physical and mental health goals

Yoga is special in that it meets you where you are. It can be vigorous or soothing, formatted or free-flowing, done in a group or alone.

Yoga is No Longer Niche: a Global Wellness Movement

“One breath” is the Real Mechanism

Breath is the most accessible tool for well-being that we possess. You don’t need equipment, experience, or a perfect environment – just a few quiet minutes to get started.

When you slow your breath, your body frequently follows towards calm. When your breath is steady, your focus generally follows. That is why breathing practices are at the core of yoga: They help shift the mind from “rush” to “reset.”

This is why themes for International Yoga Day celebrations also address mindfulness, balance, and a healthier relationship with ourselves as well as the environment.

Evidence Informed Benefits (Without the Hype)

Yoga is not a cure – all, and it’s not a substitute for medical treatment. But many people get a lot out of having a regular yoga practice, such as:

  • Improved stress management and ability to regulate emotions
  • Improved mobility and posture
  • Increased body awareness and balance
  • More of a schedule and self-care
  • Supportive benefits for overall wellness when used along with a healthy lifestyle

The value of yoga practice is frequently found in its consistency: small, repetitive practices that accumulate into an approach for long-term resilience.

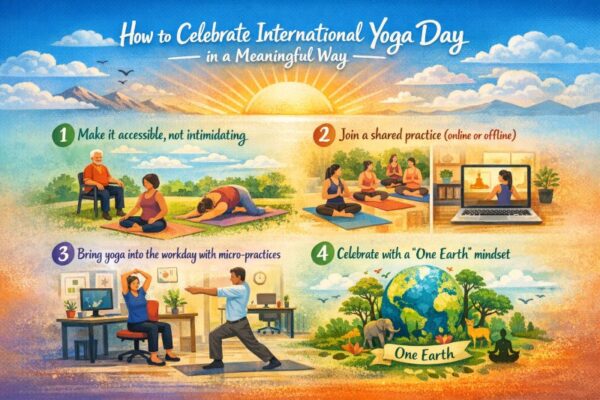
How to celebrate International Yoga Day in a meaningful way

1) Make it accessible, not intimidating

The best celebrations welcome beginners. Consider:

  • A gentle or beginner-friendly flow
  • Chair yoga or easy mobility exercises
  • Modifications for all ages and fitness levels
  • Strong advice to listen to the body (not forcing poses)

2) Join a shared practice (online or offline)

Community makes “self-care” into collective care. Being in the group session – whether it’s out at a park, studio, workplace, or school, or during a video call – a shared moment feels bigger than just an individual workout.

3) Bring yoga into the workday with micro-practices

No one has time for a full class. Even five to 10 minutes can still make an impact. Try:

  • 2 minutes of breathing
  • 2 minutes of neck and shoulder stretches
  • 1–2 min of EASY To stand stretches
  • 1 minute of stillness

Also Read: Rishikesh in February: Why This Month Is the Sweet Spot for Your Next Trip

4) Celebrate with a “One Earth” mindset

Yoga is a wonderful match for basic, sustainable decisions:

  • Play outside and keep it pristine
  • Reapply what you have (no new gear required)
  • Keep events low-waste and refill-friendly
  • Combine yoga with a local clean-up or act of kindness
How to celebrate International Yoga Day in a meaningful way

History Behind International Yoga Day: Why June 21 Became a Global Pause

Indian Prime Minister Narendra Modi is at the forefront of efforts to popularize and promote the ancient practice, which dates back 5,000 years to India’s Vedic period. International Yoga Day became an official holiday in 2014 after being approved by the United Nations as a practice that “provides a holistic approach to health and well-being.” While yoga, an ancient Indian practice thousands of years old, is its own reward for anyone practicing it today, what’s most interesting about yoga now isn’t just the way it places you in your life, but also how organically it belongs here today. “June 21st is symbolic (of) light, of balance and renewal,” it reads. Rather than celebrating performance or perfection, the day encourages people around the world to take a few minutes out of their busy schedules to pause and reconnect with themselves.

The scale of events has never been what makes International Yoga Day meaningful; it is the shared intention that underpins them. The day offers a window into everything from huge public gatherings with many thousands of people to intimate private practices in the home, and it reveals how one simple act – mindful breathing and movement – can serve as a kind of universal language. In an accelerated, digitally fueled world, this observance serves as a collective pause. Wellness, it teaches us, is not about where you come from or who you are; it’s simply awareness and repetition, done as a group but transitioned individually.

What International Yoga Day Truly Represents:

  • A reminder that wellness is preventive, not reactive
  • A global moment of mindfulness beyond borders and cultures
  • An invitation to make yoga accessible to all bodies and lifestyles
  • A shift from performance-driven fitness to sustainable well-being
  • A shared pause that connects millions through breath and presence

This extension will ensure your “One World, One Breath” concept remains vibrant and incorporates history seamlessly throughout without making it read like a history book.

A Quick and Easy 10 - Minute “One World, One Breath” Workout

Before you start: Keep the fire in your comfort zone. The pain, injuries, and diseases should be consulted with a doctor.

0:00–2:00 — Breath anchor

  • Inhale slowly through the nose
  • Exhale slightly longer than you inhale.
  • Keep shoulders relaxed
  • Repeat, unhurried

2:00–4:00 — Neck + shoulder release

  • Gentle neck side stretches
  • Slow shoulder circles
  • Easy movements, no strain

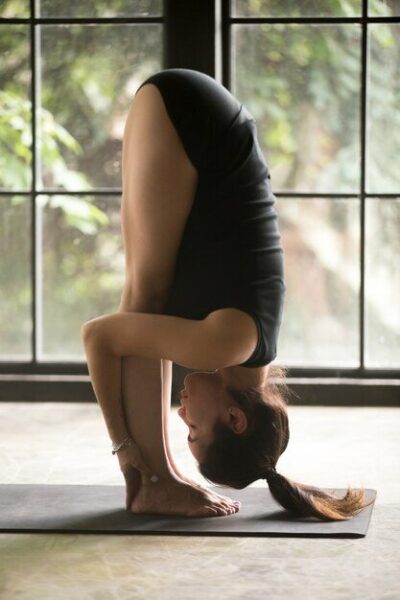
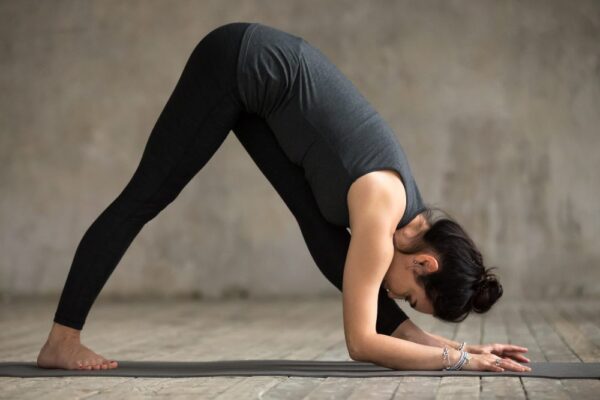
4:00–6:00 — Standing stretch + forward fold

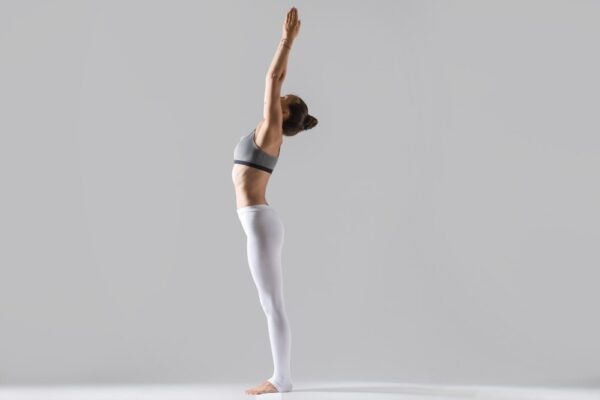
  • Reach up (inhale)
  • Fold forward (exhale)
  • Bend knees as needed

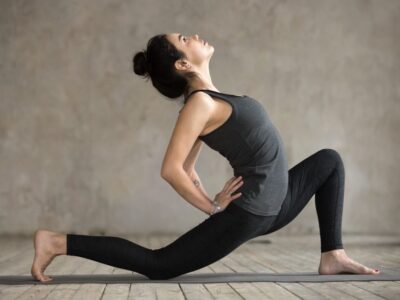
6:00–8:00 — Supported lunge

  • Step one foot back
  • Hands on the front thigh or pelvis
  • Stay steady, breathe
  • Switch sides

8:00–10:00 — Stillness

  • Sit or stand comfortably
  • One deep breath in, one deeper out
  • Let the breath settle naturally

That’s it. Short, manageable, repeatable – the shot of practice people actually undertake.

Closing: The Real Celebration

International Yoga Day is not about getting into the coolest pose, though. It’s a reminder that wellness is not a luxury – it’s a practice. And shared practices become strong.

So if only for a moment, when you are at home, in the office, at your studio, or outside in the park – wherever you may be on June 21 – take one slow breath.

One world. One breath.

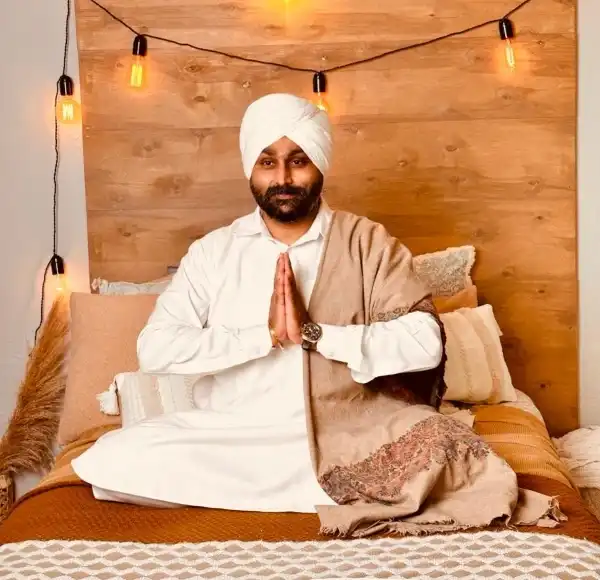
Dr. Anirudh Gurupratap Singh

Founder & Head Teacher – Mrityunjay Yogpeeth Dr. Anirudh Gurupratap Singh is the founder, and the vision behind Mrityunjay Yogpeeth is to pass on the wisdom of yoga from great yoga masters to students of yoga. Dr. Singh is a beloved teacher, healer and guide whose life has been dedicated to the spiritual and physical uplifting of people through authentic yoga practice and Vedic tradition.

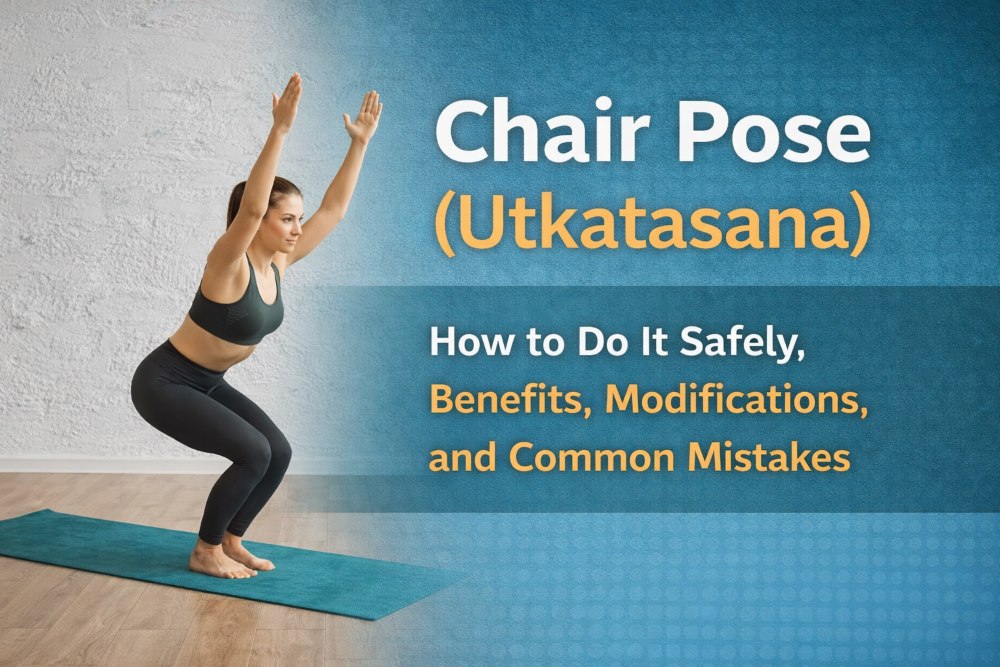
Chair Pose (Utkatasana): How to Do It Safely, Benefits, Modifications, and Common Mistakes

Chair Pose (Utkatasana)

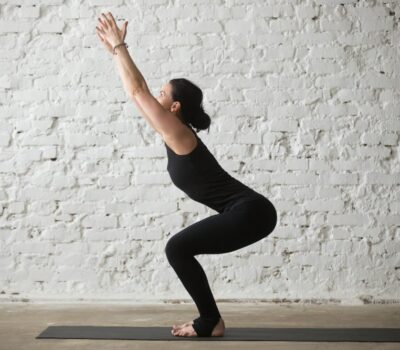
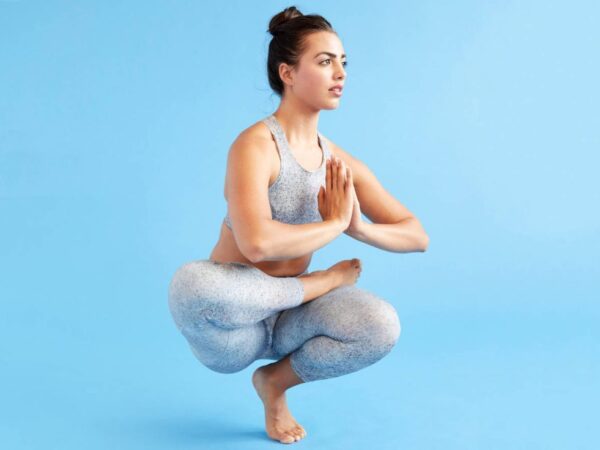
Utkatasana or Chair Pose, as you’ve probably heard it called – is a standing squat-like yoga pose where you look like you’re sitting down into an invisible chair. It’s deceptively simple: you don’t travel far across the mat, but the pose requires full-body coordination of (legs, hips, core muscles, spine, shoulders, and breath) – as well as a calm mind.

It’s sometimes translated as “Fierce Seat” or “Powerful Pose.” The Sanskrit root utkata can mean powerful or fierce, words that might come to mind as you struggle with the pose and your thighs begin to fire.

Quick facts (at a glance)

  • Sanskrit name: Utkatasana
  • Pronunciation: oot-kah-tash-ah-nah
  • Pose type: Standing, strengthening
  • Primary focus: Thighs, glutes, ankles, core, and postural muscles
  • Standard duration: 3 – 10 breaths (or 30 – 60 seconds, given your style of practice)

Why Chair Pose matters (and why it’s harder than it looks)

Chair Pose is a perfect demonstration of yoga’s “simple-but-not-easy” construction:

  • It attacks the legs similarly to a managed squat.
  • Your torso has to remain long even as your hips sink back.
  • It trains breath under effort you learn to calm down while working hard.

Which is why teachers tend to describe Chair Pose as heat-building and a lesson in staying the course, external challenge notwithstanding.

Benefits of Chair Pose (a practical, evidence-informed view)

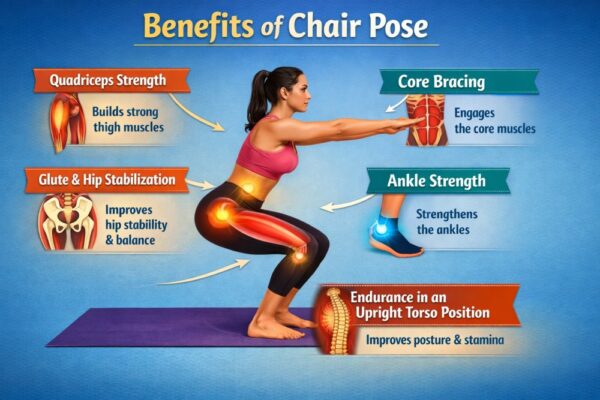
What Chair Pose trains directly trains

From the perspective of movement and strength, Utkatasana is known to build:

  • Quadriceps strength (front thighs)
  • Glute & hip stabilization (particularly with the “sit back”)
  • Core bracing for spinal support
  • Ankle strength and stability
  • Endurance in an upright torso position and under load

What research suggests about yoga practice overall

Most studies look at yoga programs, not one pose by itself. Nevertheless, Chair Pose is frequently featured in the yoga workout menu, and studies on diet-quality-less-so-health-quality (like pattern of physical-activity) indicate benefits like strength, balance, range of motion, and flexibility can be had with consistent progressive practice.
Important: If you are utilizing yoga as a therapy for a health condition (such as knee osteoarthritis, chronic pain, or balance issues), it is safest to allow a qualified professional to work with you and use modifications because not every pose or degree of depth is appropriate for every body.

Benefits of Chair Pose

Muscles worked (and what’s happening in the body)

The chair is fundamentally gnarly, bending at the hips and the knees with the spine up. Commonly engaged areas include:

  • Quadriceps (thighs) and hip flexors
  • Butt (to control pelvis and support hips)
  • Muscles Act Directly on the Spine for Upright Posture
  • Core to keep rib flare in check and lower back in Position

A useful idea is to make energy in two directions simultaneously: use your feet to ground down, but lift with the spine and arms.

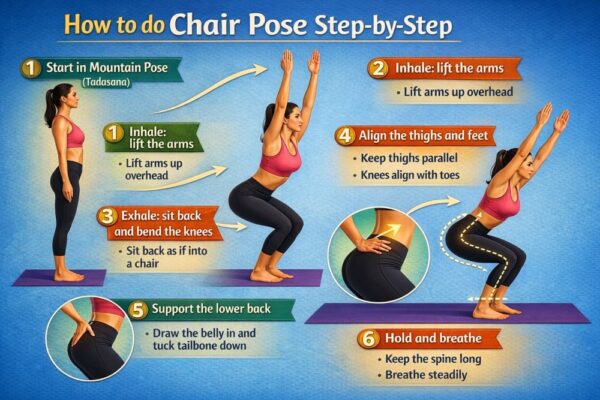
How to do Chair Pose step-by-step (safe, clear alignment)

1) Start in Mountain Pose (Tadasana)

  • Balanced with feet rooted, tall.
  • Press into all of the foot (not just into the toes).

2) Inhale: lift the arms

  • Extend your arms straight overhead and slightly forward of your ears.
  • Options: parallel arms with palms facing in, or hands together.

If your shoulders are tight: Lift only as high as you can without straining or bring your hands in prayer at the chest.

3) Exhale: sit back and bend the knees

  • Bend your knees, sit your hips back as though the chair is behind you.
  • Your chest will naturally lean forward aggressively a little bit—that’s fine.
  • As you go deeper, your knees may travel forward of your feet depending on the length of your torso and lower limbs.

Key feeling: more “sit back” than “knees forward.”

4) Align the thighs and feet

  • Inner thighs stay drawing toward parallel (don’t let the knees collapse in).
  • Press down through the feet and feel as though the thigh bones sink toward your heels.

5) Support the lower back

  • Hollow through the belly, draw the tailbone down and a little bit in to keep the lumbar spine long.
  • Don’t arch your lower back or push out your ribs.

6) Hold and breathe

  • Remain there for 3 to 10 breaths or 30 seconds to 1 minute.
  • To enter: Inhale, straighten the knees, come up; exhale, release arms.
How to do Chair Pose step-by-step

Breath + focus cues (what to think about while holding)

Chair Pose becomes more manageable when your attention is simple:

  • Inhale: lengthen the spine and even lift the chest slightly (no rib flair).
  • Exhale: sit it back a little more, ground those heels, soften the shoulders

Let your breath be a barometer: If you can’t breathe evenly, lessen the depth or back off.

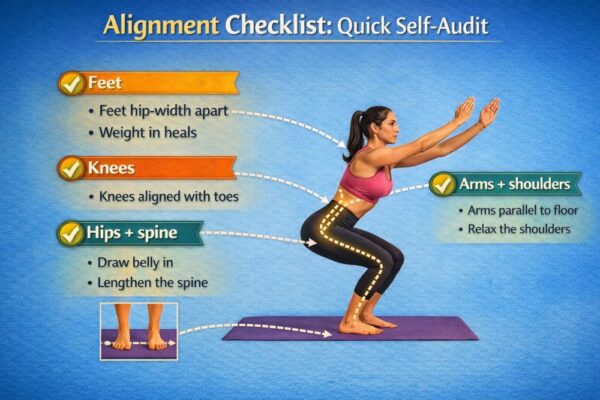
Alignment checklist: quick self-audit

Feet

  • Do you feel the entire foot grounded (not just the toes)?
  • Are your arches collapsing inward? If so, spread toes and press both the inner heel and outer heel down.

Knees

  • Do the knees track out the way of the toes (not caving towards each other)?
  • Any sharp pain? If yes, come out and modify.

Hips + spine

  • Are you sitting far enough back to keep your lower back long?
  • Are ribs flaring forward? If so, gently draw the front ribs forward.

Arms + shoulders

  • Are your shoulders creeping toward your ears? Slide the shoulder blades down the back.
  • If arms overhead tug on your neck/shoulders, do arms forward or prayer hands.
Alignment checklist: quick self-audit

Common mistakes (and how to fix them)

Mistake 1: Weight shifts into the toes

What it feels like: heels grow light; knees feel weighted

Fix: send the weight back towards the heels and sit those hips back a little further.

Mistake 2: Knees collapse inward

Fix: track knees to second/third toes; gently grip block (or pillow) between thighs, or just pretend you are doing so.

Mistake 3: Lower back pinches or overarches

Fix: don’t go as deep; sit back more; soften ribs down; keep the spine long.

Mistake 4: Shoulders and neck tense up

Fix: lower the arms, bring hands to the heart center, or reach arms forward; keep the breath steady.

Mistake 5: Holding the breath

Fix: reduce intensity until breathing becomes smooth again.

Also Read: Mountain Pose (Tadasana): The Complete, Detailed Guide to Yoga’s Most Foundational Posture

Beginner-friendly modifications (make Chair Pose accessible)

1) Chair Pose at the wall

This is one of the best ways to become aware of safer alignment and build endurance.

How to do it:

  • Stand with your back against a wall.
  • Step your feet forward and slide down to a desired depth.
  • Try to align the knees more over the ankles (a handy check at a wall).
  • Hold for several breaths.

2) Hands to thighs (to learn “sit back”)

Put your hands on your thighs and press your thighs back a little as you sit your hips back. That makes it easier to establish stability and find the rhythm before adding arms overhead.

3) Arms forward or prayer hands

If tightness in the shoulders or breathlessness happens:

  • Arms out straight in front of you (as if holding a tray) or
  • Palms together at the heart center

4) Smaller bend is still Chair Pose

Depth is optional. A chair with less depth (and a long spine) is frequently more stable and effective than “going low” with compensation.

Stronger (but still safe) progressions

Once you can hold Chair Pose with steady breath:

Progression 1: Block between thighs

By pressing a block between the thighs, you can also bring more engagement to your inner thighs and help protect yourself from letting the knees collapse inwards.

Progression 2: Longer holds

  • Try:
  • Week 1: 3–5 breaths
  • Week 2: 6–8 breaths
  • Week 3: 30–45 seconds
  • Week 4: 45–60 seconds

Progression 3: Chair Pose pulses (with caution)

Some small up-and-down pulses can help to build strength, but knees must feel stable, and breath should remain smooth.

Chair Pose variations (options for different goals)

  • Wall Chair (support + endurance)
  • Chair with block (inner-thigh awareness)
  • Prayer Chair (shoulder-friendly)
  • Twisting Chair (Parivrtta Utkatasana) (advanced; adds spinal rotation—easiest to learn with a teacher’s instruction)

How to sequence Chair Pose in a yoga practice

Chair Pose comes up a lot in standing flows because it’s a good way to build energy and strength rapidly.

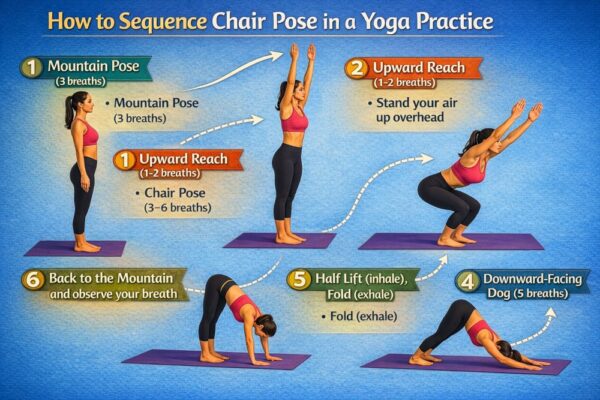
A simple mini-sequence (5–8 minutes)

  • Mountain Pose (3 breaths)
  • Upward Reach (1–2 breaths)
  • Chair Pose (3–6 breaths)
  • Standing Forward Fold (5 breaths)
  • Half Lift (inhale), Fold (exhale)
  • Downward-Facing Dog (5 breaths)
  • Back to the Mountain and observe your breath

This couple’s effort with an explicit release so that your nervous system will remain steady.

How to sequence Chair Pose in a yoga practice

Who should be cautious with the Chair Pose?

Chair Pose works the knees, hips, ankles, and lower back. Proceed with caution (or skip) if you have:

  • Sudden knee injury or sharp knee pain
  • Recent ankle/hip injury
  • Squatting and overhead arms increase lower-back pain
  • Balance limitations (use a wall)
  • Rule of safety: You should feel muscular effort, not sharp joint pain.

FAQ

Q1: How long should I hold the Chair Pose?

A typical time frame is 30–60 seconds or three to 10 breaths, depending on the level you are at and during which part of the sequence the pose falls.

Q2: My knees go past my toes – is that wrong?

Not automatically. Body proportions and depth matter. Don’t pursue a “rule,” but rather:

  • balanced groundedness in the feet (don’t throw all your weight into toes),
  • knee alignment (in line with toes),
  • and a pain-free range.

Q3: What if my heels lift?

Try:

  • sitting back more,
  • reducing depth,
  • widening stance slightly,
  • practicing at the wall.

Q4: Why does Chair Pose burn so much?

Because it loads large muscles – especially the thighs – in a sustained manner, the way a squat hold does.

Final thoughts

The Chair Pose is a classic for a reason: efficient, strength-building, and mentally clarifying. If you approach it wisely with smart alignment – sitting back, grounding the feet, lengthening the spine, and breathing it’s no longer a “suffer pose,” but instead is a consistent practice of resilience.

This post serves as a simplified, practice-oriented overview of this knowledge aimed at the general public. Yoga is extremely individual – body proportions, mobility, injury history, and medical conditions all play a role in what is safe and effective. For more individualized support, try to find a qualified yoga teacher or physical therapist, or other health care professional who can guide you with your yoga practice toward whichever direction is best for you.

Medical + safety disclaimer

This content is for educational purposes and does not replace medical advice. If you have pain, a medical condition, or a recent injury – or if you’re pregnant – consult a qualified healthcare professional and/or a qualified yoga teacher before practicing new exercises.

Dr. Anirudh Gurupratap Singh

Founder & Head Teacher – Mrityunjay Yogpeeth Dr. Anirudh Gurupratap Singh is the founder, and the vision behind Mrityunjay Yogpeeth is to pass on the wisdom of yoga from great yoga masters to students of yoga. Dr. Singh is a beloved teacher, healer and guide whose life has been dedicated to the spiritual and physical uplifting of people through authentic yoga practice and Vedic tradition.

Standing Yoga Poses: The Complete Guide to Strength, Balance, and Alignment

standing yoga poses

Summary

Fundamental standing yoga poses are classic, weight-bearing postures that will still get your heart pounding while simultaneously cultivating functional strength, balance, coordination, postural integrity and mental focus. They are designed to recruit major muscle groups, create joint stability and provide the foundation for all strong Yoga moves! This guide describes what standing poses are and why they are important, how to practice them safely, and how to approach them intelligently with the help of both modern movement science and real teaching experience.

What Are Standing Yoga Poses?

Standing yoga poses are practiced on your feet and involve both – or one, depending – feet rooted to the earth (i.e. yoga mat) and a spine that is in an upright position rather than horizontal or inverted. These poses demand that the practitioner support their body weight against gravity, which makes them very different from seated, prone or supine yoga postures.

Standing yoga poses require continuous muscle work, whereas floor-based yoga postures do not. The legs, hips, core and postural muscles are coordinated to stabilise the body while balancing and controlling movement. This dynamic engagement of leg muscles in standing poses, adds functional/weight bearing exercises which better represent activities of daily living such as standing, walking, climbing stairs and carrying/lifting objects.

Standing poses also work on the dynamic interplay of strength and alignment. Feel your weight settling down through the feet into the ground and then moving back up through legs, pelvis, spine and out the crown of the head–showing your body how to bear load evenly! It is this upward integration that contributes to why standing poses are often suggested as the basis for all other practice of yoga.

Structurally, The Standing Yoga Poses:

  • Teach good joint stacking (ankles, knees, hips and spine)
  • Posture awareness and body symmetry enhancement
  • Develop balance, coordination, and proprioception
  • Involve stabilizing muscles, work the big muscle groups.

Standing poses are often found early in the sequence of a traditional or vinyasa style class because they bring students an understanding of alignment, breath control and muscular engagement long before attempting deeper stretches, backbends and inversions or sitting for longer periods of meditation.

Much more than a series of positions that you do with your body, standing yoga poses are the means by which your body learns to stand properly, on and off the mat. They’re really a foundation movement pattern for healthy posture – and more generally long-term health, stability and awareness in our movements on (AND off) the mat!

Standing Yoga Pose

Key Characteristics

  • Upright spinal orientation
  • Weight-bearing through feet and legs
  • Continuous engagement of stabilizing muscles
  • Balancing and Breath intertwined in space

Why They Are in Yoga Systems

The age-old tradition of emphasis on standing poses is intended to:

  • Ready the body for extended meditation
  • Strengthen the musculoskeletal system
  • Build mental steadiness and discipline

Contemporary yoga adopts standing poses as the door to physical practice because they are functional, available, and teach concepts that we can take with us in our lives.

The Biomechanics of Standing Yoga Poses

Postural positions are bio-mechanically complicated due to the necessity of multiplex system excitation.

Muscular Systems Involved

  • Bottom half: Quads, hamstrings, glutes, calves
  • Primary: Transverse abdominis, obliques, other spinal stabilizers
  • Upper body: Shoulders, trapezius, latissimus dorsi  

Joint Actions

  • Hip flexion, extension, abduction
  • Knee stabilization
  • Ankle proprioception
  • Spinal elongation and rotation

This is why standing poses develop functional strength more than isolated work.

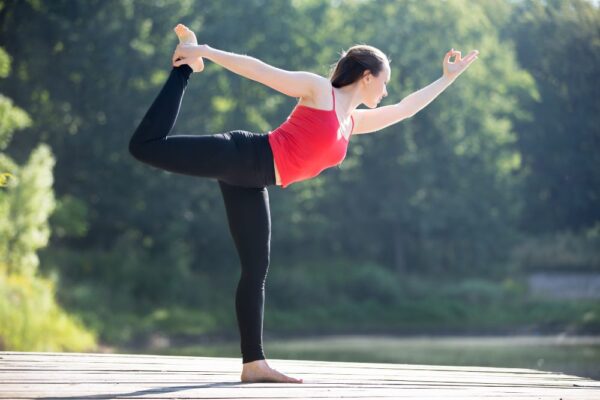
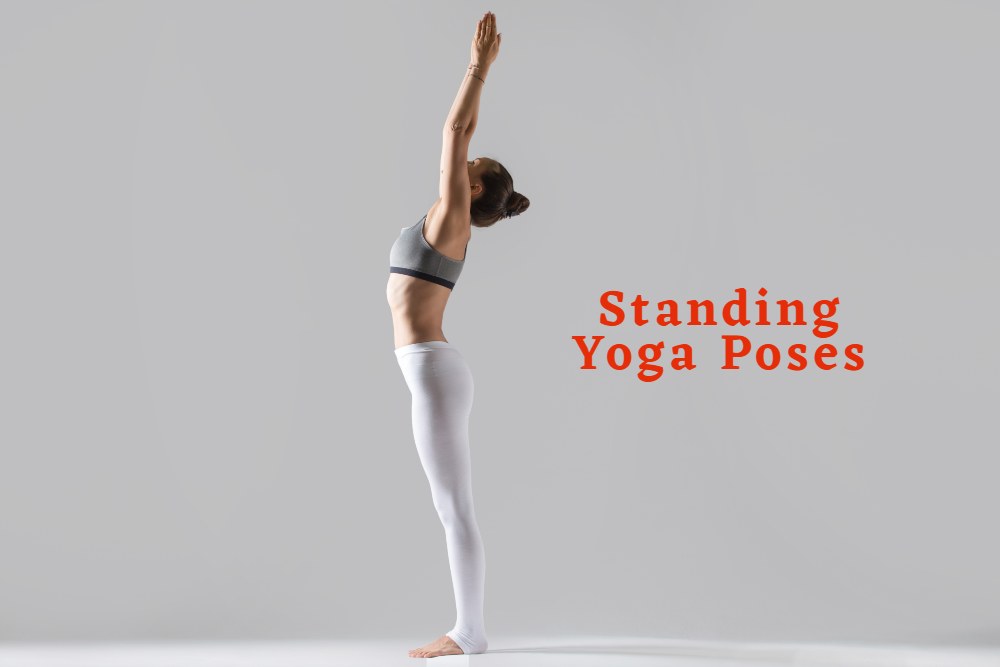
women-performing-standing-yoga-pose

Why Standing Yoga Poses Are Essential

Functional Strength Development

Strength Standing postures build strength that mirrors patterns of movement you use in real life – walking, climbing, lifting and balancing.

Unlike gym machines:

  • Multiple muscle groups work together
  • Stabilizers are trained
  • Strength: Can be applied off the mat

Balance and Neuromuscular Control

Balancing standing poses train:

  • Inner ear (vestibular system)
  • Visual focus (drishti)
  • Proprioceptive feedback

This improves:

  • Athletic performance
  • Injury prevention
  • Aging-related balance decline

Correction of Posture and Spine Health

Standing poses teach:

  • Neutral pelvic alignment
  • Even weight distribution
  • Spinal length without compression

Regular practice helps reduce:

  • Forward head posture
  • Rounded shoulders
  • Lower back strain

Cardiovascular and Metabolic Benefits

When sequenced dynamically:

  • Heart rate increases
  • Caloric burn improves
  • Blood circulation enhances

So standing postures can help control weight and regulate energy.

Detailed Explanation of Essential Standing Yoga Poses

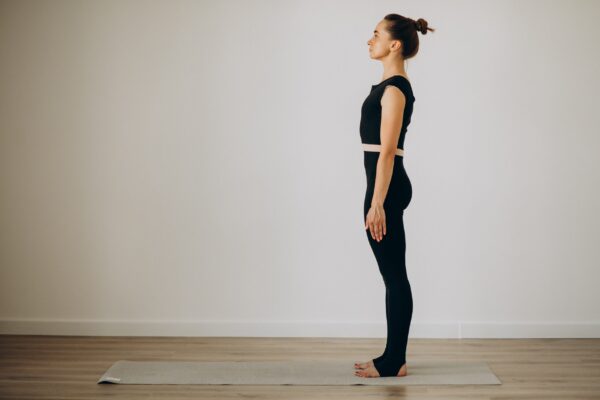
1. Mountain Pose (Tadasana)

Purpose: Postural awareness and alignment blueprint

How It Works:

  • Activates postural muscles
  • Aligns joints vertically
  • Trains stillness and awareness

Common Mistakes:

  • Locking knees
  • Overarching lower back

Why It Matters:

(Note: You read more about the Mountain Pose by clicking here).Each standing pose is really just a Mountain Pose in action.

2. Chair Pose (Utkatasana)

Purpose: Strength and endurance

Muscles Targeted:

  • Quadriceps
  • Glutes
  • Core stabilizers

Biomechanical Insight:

Replicates a squat with spine in neutral.

3. Warrior I (Virabhadrasana I)

Purpose: Strength + hip mobility

Key Focus:

  • Hip flexor stretch
  • Leg strength
  • Upright torso control

Teaching Insight:

Good from Marko: Most students do well with a shortened stance to balance and protect the lower back.

4. Warrior II (Virabhadrasana II)

Purpose: Glute endurance & lateral hip strength

Benefits:

  • Knee stability
  • Hip opening
  • Mental stamina

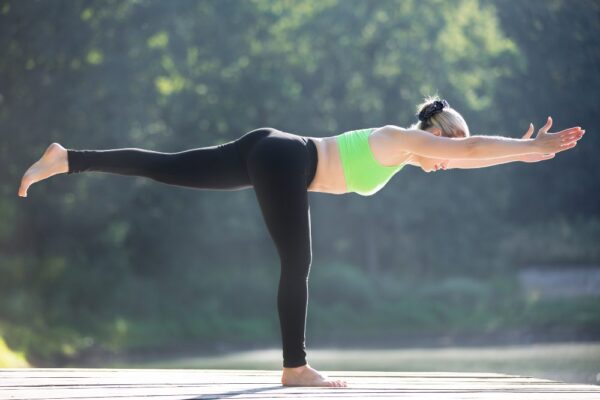
5. Warrior III (Virabhadrasana III)

Purpose: Posterior chain activation

Challenges:

  • Balance
  • Hip leveling
  • Core engagement

Why It’s Advanced:

It obliterates visual steadiness as it asks for total body coordination.

Also Read: The Complete Guide to Meditation: Exploring Types, Techniques & Transformative Benefits

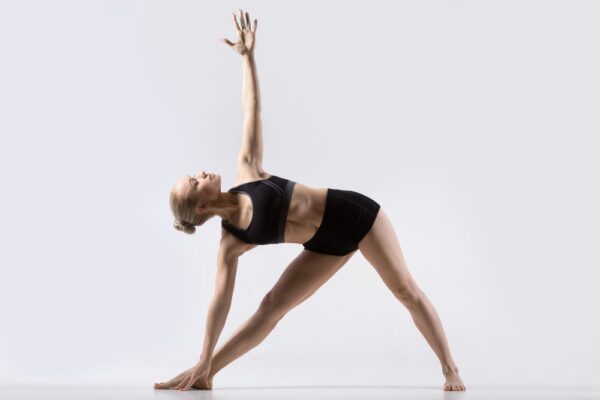
6. Triangle Pose (Trikonasana)

Objective: Stretch laterally and mobility of the joint

Key Concept:

Long before deep—don’t fall down into your hip.

7. Side Extended Angle Pose (Utthita Parsvakonasana Parivrtti)

Purpose: Strength with spinal extension

Functional Benefit:

Increases side body flexibility and strength in the legs.

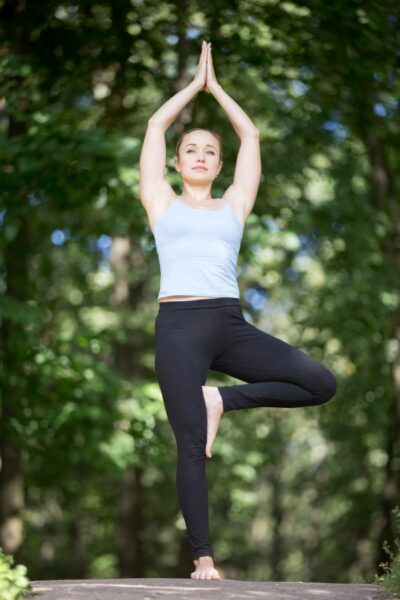
8. Tree Pose (Vrksasana)

Purpose: Balance and focus

Neurological Benefit:

Enhances concentration and mental clarity.

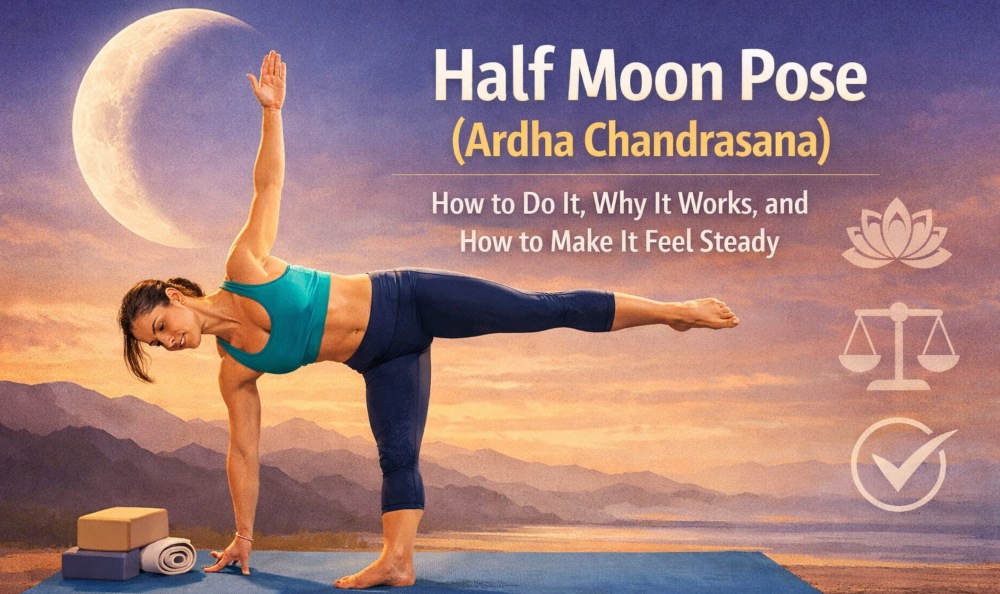
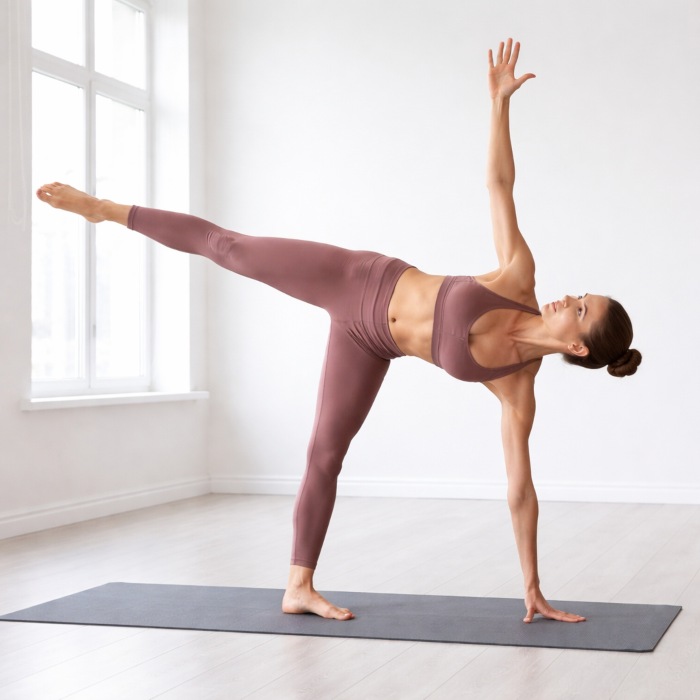
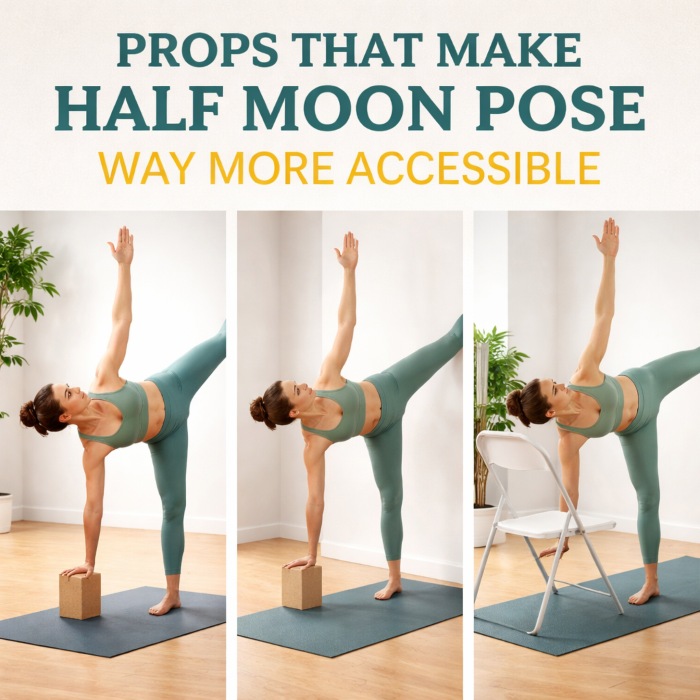
9. Half Moon Pose (Ardha Chandrasana)

Key Points: To challenge dynamic balance and extension in the spine

Teaching Tip:

It’s safer and allows for better alignment with a block.

10. Goddess Pose (Utkata Konasana)

Purpose: Hip and pelvic strength

Why It’s Important:

Develops stability in the wide positions neglected by other daily movements.

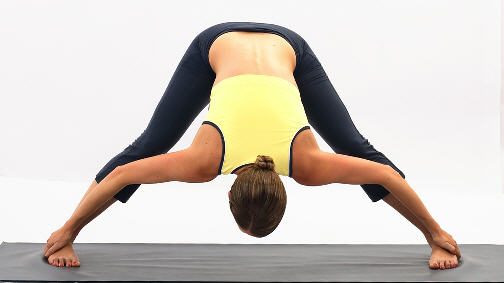
11. Five-Pointed Star (Prasarita Tadasana)

Purpose: Grounding and circulation

Energy Effect:

Creates expansion while maintaining stability.

Standing Yoga Poses for Beginners (Step-by-Step Progression)

Beginner Strategy

  • Learn alignment first
  • Use props freely
  • Hold poses briefly
  • Rest when needed

Safe Weekly Frequency

  • 3–5 sessions per week
  • 20–40 minutes per session
yoga-student-performing-tadasana

Common Mistakes and Injury Prevention

Mistake 1: Forcing Depth

Solution: Emphasize stability at the expense of range of motion

Mistake 2: Holding Breath

Solution: Use slow nasal breathing

Mistake 3: Ignoring Pain Signals

Solution: Modify or rest immediately

How Standing Poses Fit Into a Complete Yoga Practice

Standing poses act as:

  • Warm-up
  • Strength phase
  • Transition to deeper postures

They prepare the nervous system for stillness and meditation.

FAQs

1. Can I do standing yoga poses every day?

When applying good form and proper recovery, yes.

2. Do standing yoga poses tone muscles?

They develop muscles that are lean and functional as opposed to bulky.

3. What is the most difficult standing yoga position?

Warrior III and Half Moon are deemed the most challenging postures for balance, coordination and control.

4. Will standing yagonataloga poses improve one’s balance and coordination?

Yes. They increase stability, body consciousness and neuromuscular control.

5.Do standing yoga poses enhance flexibility without the risk of injury?

Yes. They help challenge and improve with active range of motion while challenging with joint stability.

Final Conclusion

Standing yoga poses are not just an option — they are the base. They create the neuromuscular coordination, joint stability and postural awareness strength that creates a safe sustainable practice on or off mat. From firing up deep stabilising muscles, to training the balance system and developing better biomechanical alignment - these poses are the building blocks of a full-on yoga session.

Scientific studies continue to support the correlation between a superior standing position and improving proprioception, load strength, pelvic floor activation and to lowering injury risk. They help to prepare the body for other and more challenging postures, they protect the spine and joints, and practice directly translate into better posture, movement and gait in everyday life.

In essence, progress in yoga does not come from skipping fundamentals, but from refining them. Commit to standing poses, and the entire practice—strength, balance, alignment, and longevity—follows.

Dr. Anirudh Gurupratap Singh

Founder & Head Teacher – Mrityunjay Yogpeeth Dr. Anirudh Gurupratap Singh is the founder, and the vision behind Mrityunjay Yogpeeth is to pass on the wisdom of yoga from great yoga masters to students of yoga. Dr. Singh is a beloved teacher, healer and guide whose life has been dedicated to the spiritual and physical uplifting of people through authentic yoga practice and Vedic tradition.

The Complete Guide to Meditation: Exploring Types, Techniques & Transformative Benefits

The Complete Guide to Meditation

A practice that originated in ancient spiritual tradition, meditation has become a staple of contemporary wellness. Whether you’re looking for stress release, increased focus, or healing salve for emotional pain, meditation has the tools to change your brain and re-organize your mind and body.

If you’ve ever wanted to know what the heck meditation is, which kind might be most “you,” or how to actually begin, this ultimate guide – has drip-by-drip coverage of every single thing from the definition of it to specific methods and real-world benefits.

What Is Meditation?

Meditation is mental training; it’s a way to train attention and awareness, patience and kindness. Although grounded in Buddhism, Hinduism and Taoism (or perhaps because of it), meditation today is taught as a secular practice for mental well-being.

Put another way, meditation is the practice of observing your own thoughts instead of being dominated by them. It’s like the gym, but for your mind – helping you exercise it so that it gets stronger and calmer and clearer.

Here’s what makes meditation unique:

  • It promotes a sense of being present.
  • It helps take you out of your mind, racing in all the directions your thoughts whirl.
  • It’s something you can do while sitting or walking, and even while eating mindfully.
  • Its simple aim, after all, is to bring body and mind together via breath or movement or focus.

Ultimately, meditation is less about “stopping your thoughts” and more about changing your relationship to them – seeing them without judgment.

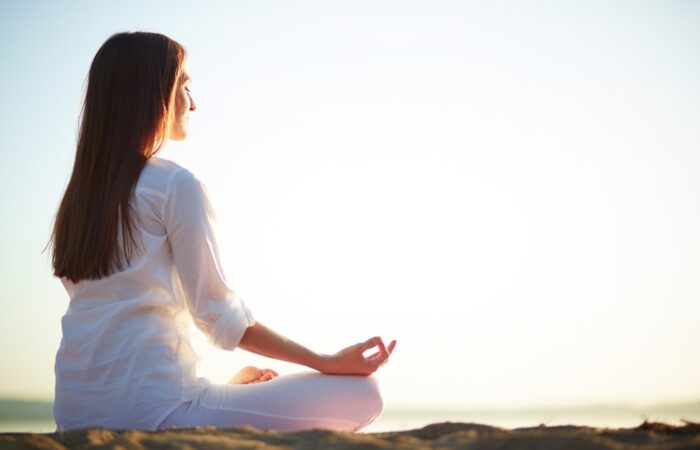
Yoga Student Practicing Meditation

The Science-Backed Benefits of Meditation

In the last decade or two thousands of studies have looked at how meditation affects the brain and body. The evidence is clear: regular meditation brings a host of benefits beyond just feeling more relaxed.

Mental and Emotional Benefits

  • Reduces stress & anxiety: Meditation lowers cortisol (the stress hormone) levels and fosters your body’s relaxation response.
  • Increase focus & concentration: Daily meditation can decrease short term and long term attention deficits.
  • Improves self-awareness: It gives you the power to spot thought patterns and emotional triggers, which means you can respond instead of react.
  • Enhances emotional health: Some forms of meditation can lead to an improved outlook on life and you’re likely to experience more positive feelings and better mood, in addition, your ability to manage stress will improve.

Promotes creativity & problem solving Meditation clears away the information overload that sometimes leads to poor decisions.

Physical Benefits

  • Reduces blood pressure: When you breathe deeply and relax, it helps circulation and decreases the work on your heart.
  • It can help you sleep: Meditation can reduce insomnia and improve sleep quality by calming racing thoughts.
  • Boosts immunity: Lowering stress allows the body to stay healthier.
  • Reduces chronic pain: Mindfulness meditation reduces the brain’s perception of pain by teaching patients with chronic pain to accept that they are in pain.

Spiritual and Lifestyle Benefits

  • It fosters a sense of connection and empathy.
  • Promotes mindful living – Becoming conscious of each moment.
  • Aids in aligning your personal values with day to day actions.
  • Fosters gratitude, patience, and resilience.

A Gentle Reminder

Meditation is helpful for most people, but not as a replacement for medical treatment or therapy. If you have trauma or intense emotions, it’s best to start slowly and consult a qualified teacher or therapist.

Major Types of Meditation

Meditation is not one technique – it’s a family of practices intended to improve attention, concentration and balance in various ways. Below are some of the popular and effective ones you can try out.

1. Mindfulness Meditation

Focus: Present-moment awareness.

How it works: You sit in silence and try to notice your breath, the feelings in your body or the sounds around you. When thoughts emerge, you softly guide attention back to the present moment.

Benefits: Reduces stress, improves focus, and builds emotional resiliency.

Best for: Those new to meditation, or anyone trying to find peace and clarity.

2. Focused Attention Meditation

Focus: One object – the breath, a candle flame, a sound.

How to do it: When your mind strays, gently return it to your focal point.

Advantages: Enhances focus, and mental discipline.

Good for: People with racing minds or those looking to boost focus and self-control.

3. Mantra or Transcendental Meditation

Meditation Focus: Repeating word, phrase or sound (mantra)

How it helps: Reciting or silently repeating a chosen mantra (such as “Om” or “I am calm”) will help steady the mind.

Advantages: Deep relaxation is brought about by rhythmic repetition.

Best for: Those who lean into more structured and sound-based practices.

4. Loving-Kindness (Metta) Meditation

Focus: Cultivating compassion and goodwill.

How it works: You receive phrases like “May I be happy. May you be healthy. Cat Purrs for a Peaceful World: “May all beings dwell in peace.”

Benefits: Increases empathy, forgiveness and emotional warmth.

Best for: Individuals focusing on emotional health, kindness or self-love.

5. Body-Scan Meditation

Focus: Awareness of physical sensations.

How it works: You mentally “scan” your entire body from head to toe, noticing feelings without judging them.

Advantages: Helps calm the mind, tension release and connects back to yourself.
Best for: Anyone coping with stress, insomnia or physical discomfort.
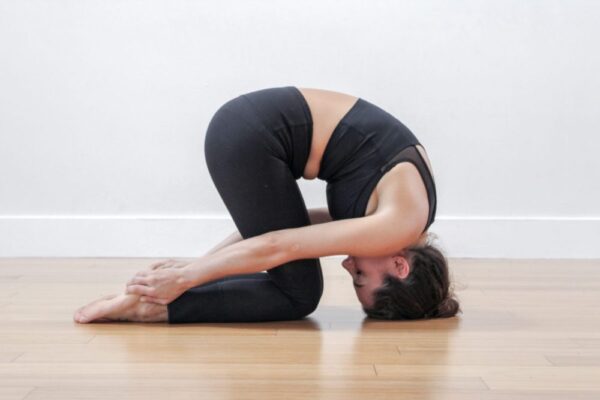
6. Movement Meditation

Focus: Awareness in motion.

How it works: Involves practices such as walking meditation, yoga or tai chi — moving at a slower pace and paying attention to each movement and breath.

Pros: Encourages the practice of mindfulness with motion, calms restlessness, and aids balance.

The best type of yoga for: Busy people, whether you work long hours or are a go-getter on the move.

7. Visualization Meditation

Object of thought: Guided visualization (imagery).

How to do it: You visualize scenes of peace, places that represent well-being, goals or a healing light encircling your body.

Pros: Relaxes focus and boosts motivation.

Best for: People who respond well to imagination or creative visualization.

8. Open-Monitoring or Insight Meditation

Meditation object: Mindfulness of thoughts, emotions and physical sensations without attachment.

How to do it: Rather than concentrating on a single point, you widen your attention to include everything within your field of experience.

Benefits: Awareness, equanimity and emotional regulation.

Best for: Experienced meditators seeking to deepen their internal awareness.

Also Read: Why Rishikesh Is Known as The Yoga Capital of The World

How to Start a Meditation Practice

Meditation does not require special equipment or hours of practice. What you need to do: A few minutes of quiet, consistent intent.

Create the Right Environment

  • Get in a quiet place: Select somewhere that is quiet, where there is not too much interference.
  • Find a comfortable seat: A chair, pillow or floor mat will do the trick — comfort is more important than perfect posture.
  • Pick a time: Consistency is key to either before bed or first thing in the morning.
  • Keep it simple: Begin with short sessions (5–10 minutes per day).

A Simple Step-by-Step Meditation Routine

  1. Sit cozy with a straight spine.
  2. Close your eyes and breathe deeply, a few times.
  3. Concentrate on your breathing – feel every breath in, every breath out.
  4. Bring your attention back when your mind wanders (and it will).
  5. Finish with a deep breath, feeling gratitude for your practice.

Tips for Consistency

  • Little by little: Just two minutes a day are sufficient to start.
  • Give it a buddy: Meditate right after brushing your teeth, or before you go to get the morning coffee.
  • Patience is a virtue: The benefits multiply by degrees, not by the bushel.
  • Track your progress: Journaling or a meditation app can track it for you.

Remain curious: Experiment with different styles until you find one that speaks to you.

Common Challenges and How to Overcome Them

Challenge

“I can’t stop thinking.”

“I fell asleep.”

“I don’t have time.”

“I get restless.”

“I feel bored.”

Solution

Don’t fight your thoughts. Simply observe them and return to your breath.

Try sitting upright or meditating earlier in the day.

Start with 3–5 minutes daily. Consistency matters more than duration.

Try movement-based meditation or walking mindfulness.

Remind yourself that each session is progress – boredom is part of the process.

Integrating Meditation Into Daily Life

You don’t need to be a meditator on a cushion. One way is to take mindfulness with you.

  • Conscious mornings: Begin the day with three conscious breaths before reaching for your phone.
  • Eat slowly: Enjoy each bite without distracting and eat slowly.
  • Walking mindfully: Pay attention to your steps, your breath and the world around you.
  • Mindful Work Breaks: Take a stretch and deep breath break every hour.
  • Conscious nights: Thoughts of the day with thankfulness as a prelude to repose.

You inject consciousness into the everyday and suddenly it’s possible to make a mundane day sacred, a weekly chore mindfulness meditation.

Frequently Asked Questions

Q1. What is the ideal duration to meditate every day?

Begin by doing it for 5–10 minutes per day and gradually build up to 20–30 minutes as it feels good to do so.

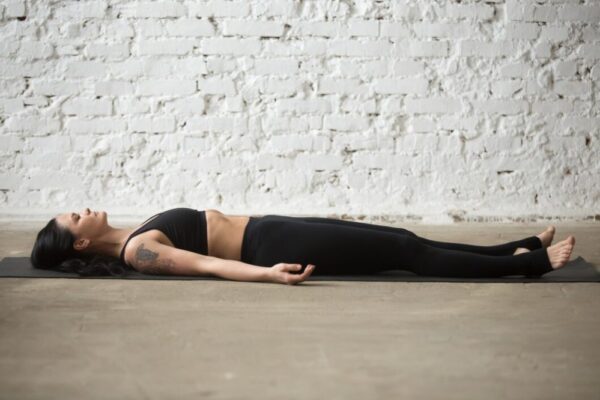
Q2. Can I meditate lying down?

Yes, but watch out for falling asleep. Lying meditation is great for relaxation and for before sleep.

Q3. Do I have to let my mind go blank?

No. Meditation is not about having no thoughts — it’s about observing them dispassionately.

Q4. Is guided meditation good for beginners?

Yes, guided sessions can help organize your focus and may make practicing simpler to follow.

Q5. What if I miss a day?

That’s okay. Gently return the next day — meditation is about progress, not perfection.

Long-Term Impact of Meditation

With devotion to the practice, you can transform your experience of life through meditation in lasting ways:

  • You are less reactionary and more peaceful in your response.
  • You become more empathic and patient.
  • You are enabled to work more, dream more, focus.
  • You feel a greater sense of self-acceptance and inner peace.

The practice of us here and now: Over time, meditation remolds the brain — strengthening regions responsible for attention and emotional processing, while dialing down activity in those involved with anxiety and stress. It is one of the most sustainable self-care practices you can develop.

Final Thoughts

More than a form of relaxation, meditation is the quest for inner balance and clarity that lasts a lifetime. Whether you prefer mindfulness, mantra, loving-kindness or movement meditation doesn’t matter; the utter is being committed to a spiritual practice and losing patience and openness.

You don’t need perfection or silence – just the readiness to start. Begin developing it today, even if for just a few minutes. And as time goes by, those moments of stillness can become a profound spiritual practice that enriches not only your mind but also your body and soul.

Meditation is like the path from chaos to calm, from reaction to with reflection. Whatever your background or lifestyle, there’s a meditation method that is tailored for you. Start small, and remain consistent; allow mindfulness to lead you to a more centered, serene life.

Dr. Anirudh Gurupratap Singh

Founder & Head Teacher – Mrityunjay Yogpeeth Dr. Anirudh Gurupratap Singh is the founder, and the vision behind Mrityunjay Yogpeeth is to pass on the wisdom of yoga from great yoga masters to students of yoga. Dr. Singh is a beloved teacher, healer and guide whose life has been dedicated to the spiritual and physical uplifting of people through authentic yoga practice and Vedic tradition.