TL;DR
Surya Namaskar, or Sun Salutation, is a complete yoga practice made up of 12 powerful asanas performed in a flowing sequence with breath awareness. It is not just a warm-up – it improves flexibility, strengthens the body, supports weight management, balances the nervous system, and prepares the mind for meditation.
For beginners, 3-4 rounds daily are enough. With practice, you can gradually increase to 6, 12, or more rounds depending on your health and fitness goals. The most important part of Surya Namaskar is not speed, but coordination between breath, movement, and awareness.
Traditionally practised at sunrise while facing east, Surya Namaskar is a beautiful combination of physical exercise, breathwork, gratitude, and spiritual discipline.
Surya Namaskar Asanas at a Glance
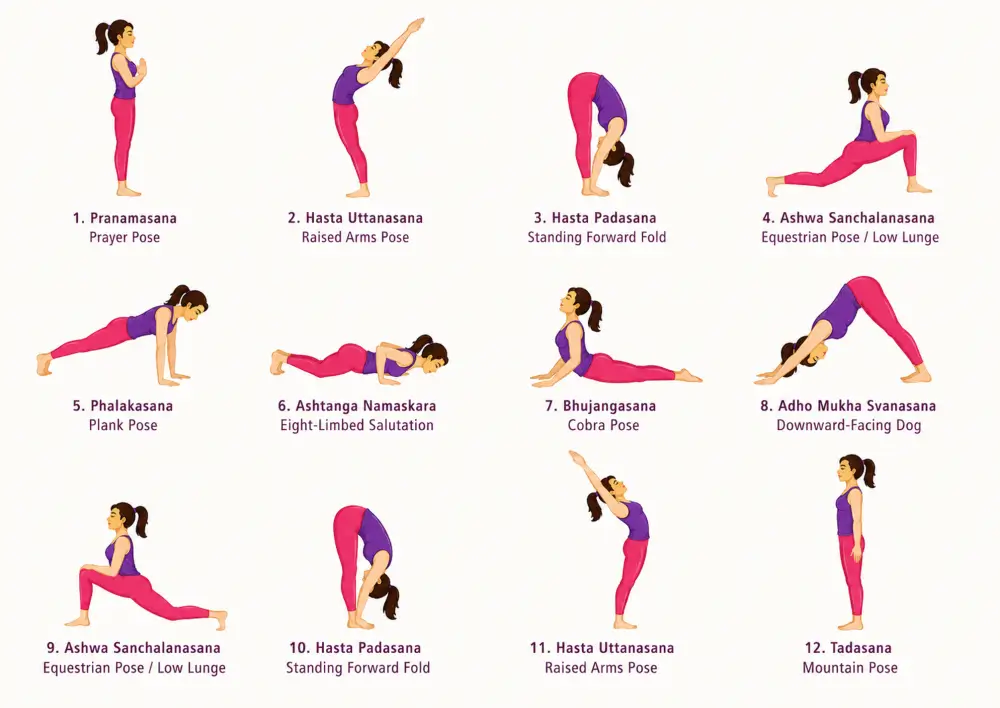
| Step | Sanskrit Name | English Name |
| 1 | Pranamasana | Prayer Pose |
| 2 | Hasta Uttanasana | Raised Arms Pose |
| 3 | Hasta Padasana | Standing Forward Fold |
| 4 | Ashwa Sanchalanasana | Equestrian Pose / Low Lunge |
| 5 | Phalakasana | Plank Pose |
| 6 | Ashtanga Namaskara | Eight-Limbed Salutation |
| 7 | Bhujangasana | Cobra Pose |
| 8 | Adho Mukha Svanasana | Downward-Facing Dog |
| 9 | Ashwa Sanchalanasana | Equestrian Pose / Low Lunge |
| 10 | Hasta Padasana | Standing Forward Fold |
| 11 | Hasta Uttanasana | Raised Arms Pose |
| 12 | Tadasana | Mountain Pose |
Introduction
If there is one yoga practice that almost every beginner hears about first, it is Surya Namaskar.
Some people come to it because they want flexibility. Some come because they want weight loss. Some want a morning routine that wakes up the body. And some simply want to understand why this ancient sequence is practised in almost every yoga school across India.
But Surya Namaskar is much more than 12 physical movements.
It is a complete practice where the body moves, the breath guides, and the mind becomes steady. When performed correctly, each posture prepares the body for the next one. Each inhale creates expansion. Each exhale creates surrender. Slowly, the sequence becomes less like exercise and more like meditation in motion.
What Is Surya Namaskar?
Surya Namaskar means “salutation to the sun.”
The word “Surya” means sun, and “Namaskar” means greeting, bowing, or offering respect. Traditionally, Surya Namaskar is practised early in the morning, facing the rising sun. It is a way of expressing gratitude to the sun, which is considered the source of light, energy, and life.
In yogic tradition, the sun is not only seen as something outside us. It also represents inner energy, clarity, discipline, vitality, and consciousness.
That is why Surya Namaskar works on many levels:
It strengthens the physical body.
It improves the breath.
It awakens energy.
It calms the mind.
It builds discipline.
It prepares the body for deeper yoga practice.
Although many modern yoga classes use Sun Salutation as a warm-up, traditional Hatha and Ashtanga yoga consider it a complete practice in itself.
A single round of Surya Namaskar includes forward bends, backbends, lunges, plank, cobra, and downward dog. This means the entire body is stretched, strengthened, and energised in one continuous sequence.
Why Surya Namaskar Is More Than a Warm-Up
Many beginners think Surya Namaskar is only a preparation before yoga asanas. But when practised with awareness, it becomes a full-body practice.
It includes spinal movement, leg strengthening, arm balance, chest opening, core engagement, hamstring stretching, hip mobility, and breath control.
In one round, you move the body through:
Forward bending
Backward stretching
Lunging
Plank strengthening
Chest opening
Hip extension
Shoulder activation
Spinal lengthening
This is why Surya Namaskar is often called a complete yogic workout.
But its deeper benefit comes from breath coordination. Without proper breathing, the sequence becomes only physical exercise. With correct breathing, it becomes yoga.
The breath is what changes Surya Namaskar from movement into meditation.
Before You Begin: Important Preparation Notes
Before practising Surya Namaskar, keep these points in mind.
Practise on an empty stomach. Ideally, wait 3 to 4 hours after a meal.
Morning is the best time. Practising at sunrise is considered most beneficial.
Face east if possible. This follows the traditional method of greeting the rising sun.
Warm up gently. Rotate the neck, shoulders, wrists, hips, knees, and ankles before starting.
Use a non-slip yoga mat. This helps protect the wrists, knees, and feet.
Move slowly in the beginning. Speed should come only after proper alignment and breathing are learned.
Do not practise with pain. Mild stretching is fine, but sharp pain is a warning sign.
If you have high blood pressure, heart disease, hernia, recent injury, pregnancy, or severe back problems, consult a doctor and a qualified yoga teacher before practising.
The 12 Steps of Surya Namaskar
Let us now understand each posture in detail.
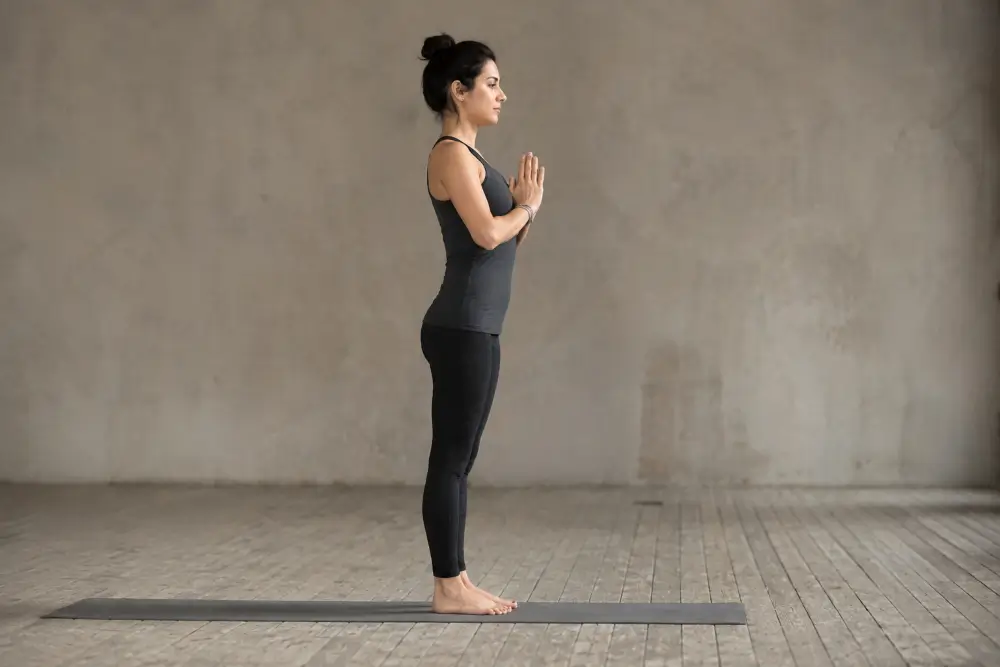
Step 1: Pranamasana - Prayer Pose
Steps
Stand at the front of your mat with your feet together.
Distribute your body weight equally on both feet.
Keep your spine straight and shoulders relaxed.
Bring your palms together in front of your chest in Namaskar Mudra.
Exhale gently and become aware of your breath.
Benefits
Calms the nervous system.
Improves balance and posture.
Creates focus before beginning the sequence.
Develops a feeling of gratitude and awareness.
Common Mistake
Many beginners stand casually in this pose. Keep the body active but relaxed. The feet should be grounded, the spine should be tall, and the mind should be present.
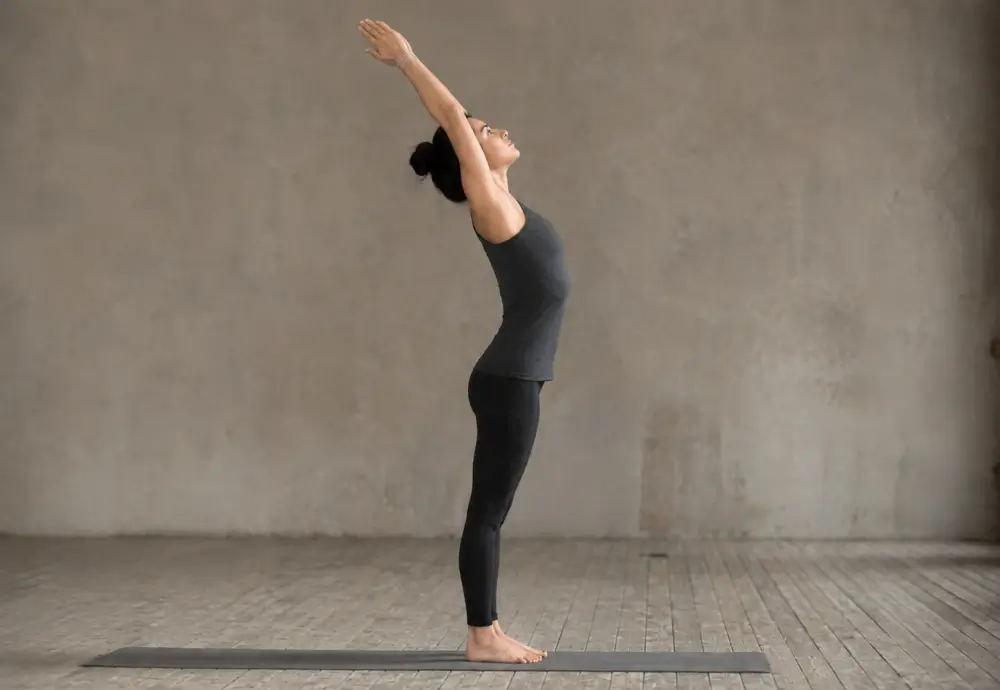
Step 2: Hasta Uttanasana - Raised Arms Pose
Steps
Inhale and lift both arms above your head.
Keep your biceps close to your ears.
Stretch upward through your fingertips.
Gently arch the upper back.
Push the pelvis slightly forward without compressing the lower back.
Benefits
Opens the chest and lungs.
Stretches the abdomen and spine.
Improves breathing capacity.
Energises the body.
Common Mistake
Do not bend only from the lower back. Lengthen the whole spine first, then gently move into the backbend.
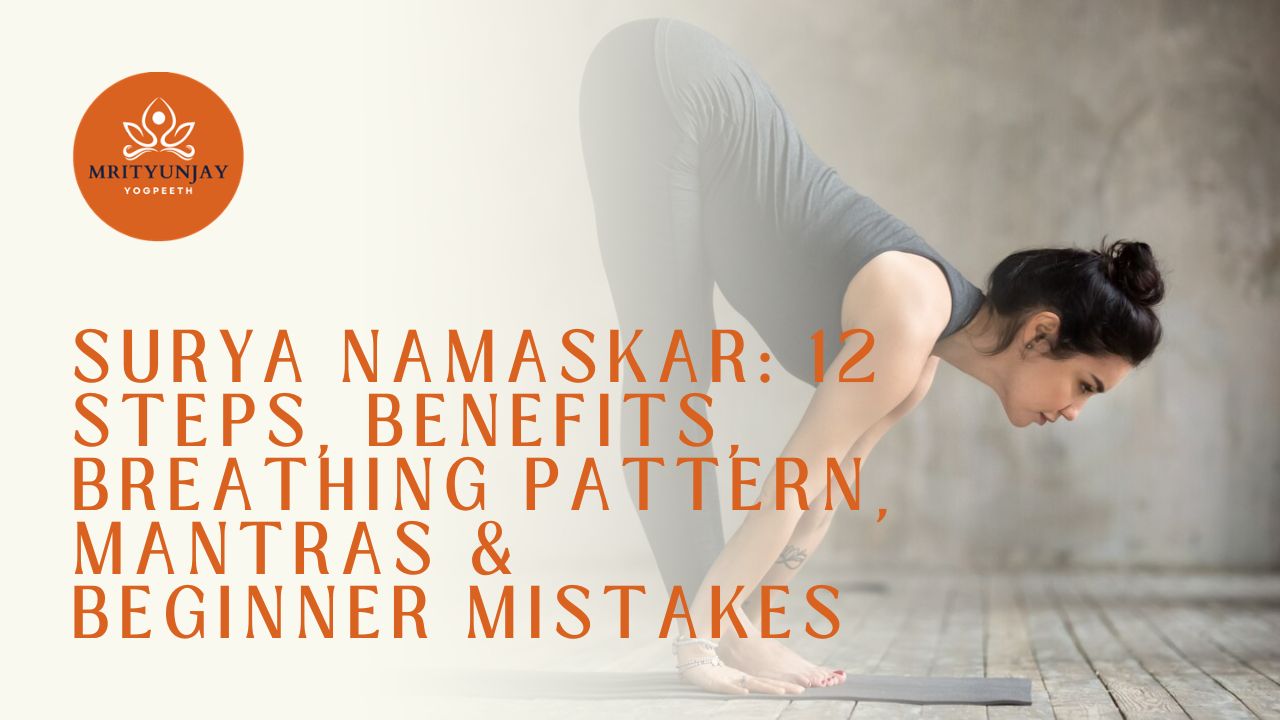
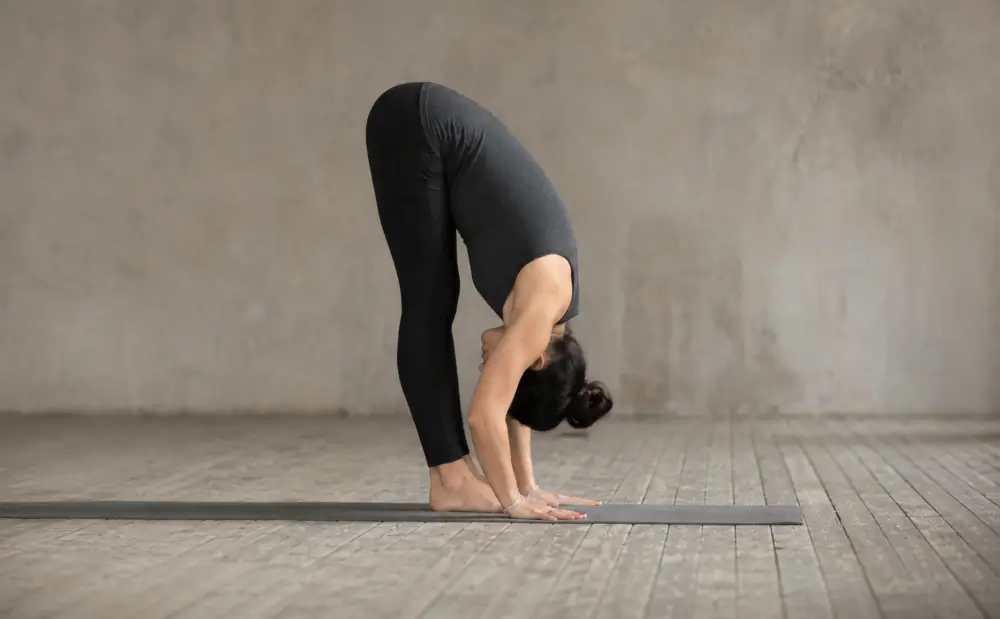
Step 3: Hasta Padasana - Standing Forward Fold
Steps
Exhale and bend forward from the hips.
Keep the spine long as you fold down.
Place your palms beside your feet if possible.
Bend your knees slightly if your hamstrings feel tight.
Relax the head and neck.
Benefits
Stretches the hamstrings, calves, and back.
Tones the abdomen.
Improves blood circulation toward the head.
Helps reduce stiffness in the spine.
Common Mistake
Do not force your palms to the floor by rounding the back aggressively. A long spine is more important than touching the ground.
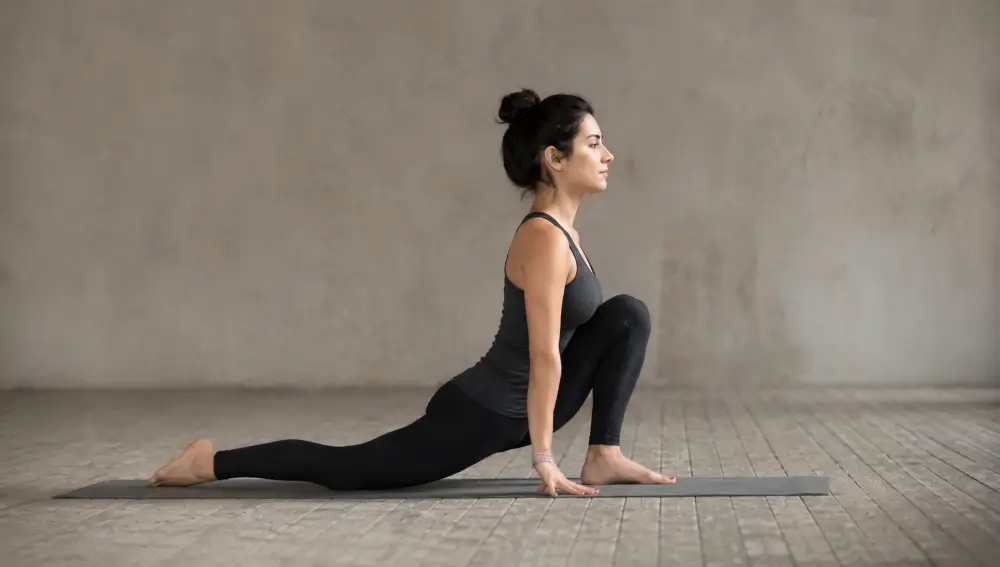
Step 4: Ashwa Sanchalanasana - Equestrian Pose
Steps
Inhale and take your right leg back.
Place the right knee on the floor.
Keep the left foot between your palms.
Lift the chest forward.
Look slightly upward without straining the neck.
Benefits
Stretches the hip flexors.
Improves flexibility in the legs and spine.
Opens the chest.
Supports digestion and abdominal function.
Common Mistake
Do not let the front knee move too far beyond the ankle. Keep the knee aligned with the heel for better stability.
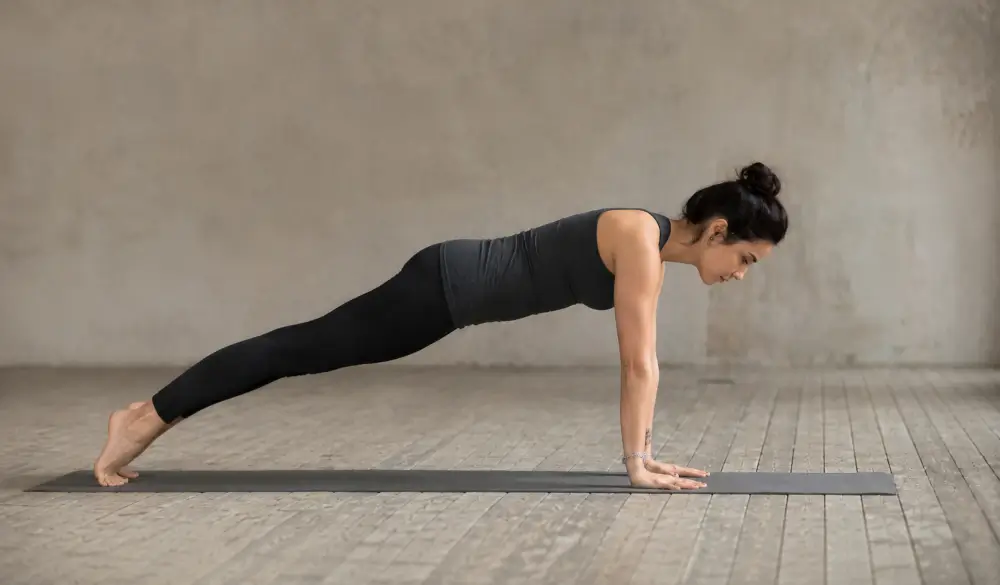
Step 5: Phalakasana - Plank Pose
Steps
Hold the breath gently or inhale as you take the left leg back.
Keep both legs straight.
Place the shoulders above the wrists.
Keep the body in one straight line from head to heels.
Engage the abdomen lightly.
Benefits
Strengthens the arms, shoulders, core, and legs.
Improves posture.
Builds stamina.
Supports spinal stability.
Common Mistake
Avoid dropping the hips too low or lifting them too high. The body should stay straight and strong.
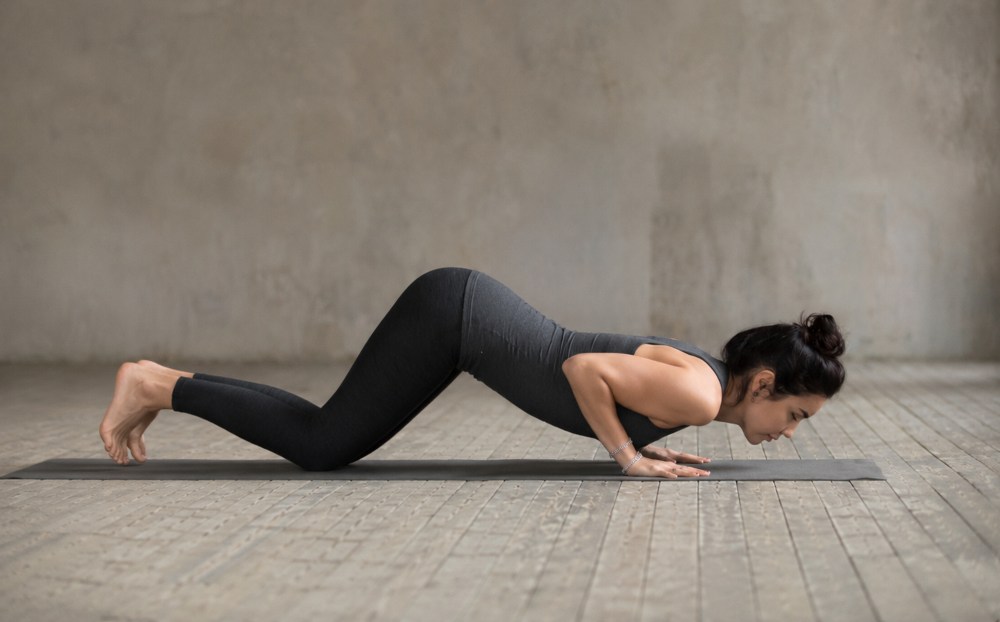
Step 6: Ashtanga Namaskara - Eight-Limbed Salutation
Steps
Exhale and lower your knees to the floor.
Bring the chest and chin down to the mat.
Keep the hips slightly raised.
Eight parts of the body touch the floor: two feet, two knees, two hands, chest, and chin.
Keep the abdomen slightly lifted.
Benefits
Strengthens the arms, shoulders, and chest.
Improves spinal flexibility.
Builds body control.
Prepares the body for Cobra Pose.
Common Mistake
Do not collapse the whole body flat on the floor. The hips should remain slightly lifted, and the abdomen should not rest fully on the mat.
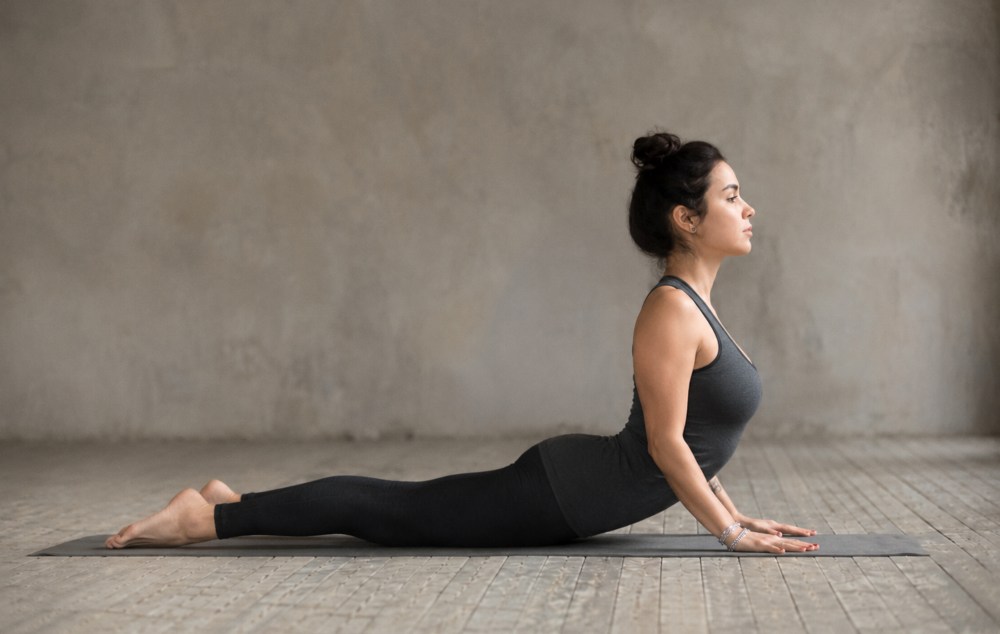
Step 7: Bhujangasana - Cobra Pose
Steps
Inhale and slide the chest forward.
Place the legs flat on the mat.
Keep the elbows bent and close to the body.
Lift the chest gently.
Keep the shoulders away from the ears.
Look forward or slightly upward.
Benefits
Strengthens the back muscles.
Opens the chest and shoulders.
Improves spinal flexibility.
Stimulates abdominal organs.
Helps reduce fatigue and dullness.
Common Mistake
Do not push too hard with the hands. Cobra should be lifted with support from the back muscles, not by forcing the spine.
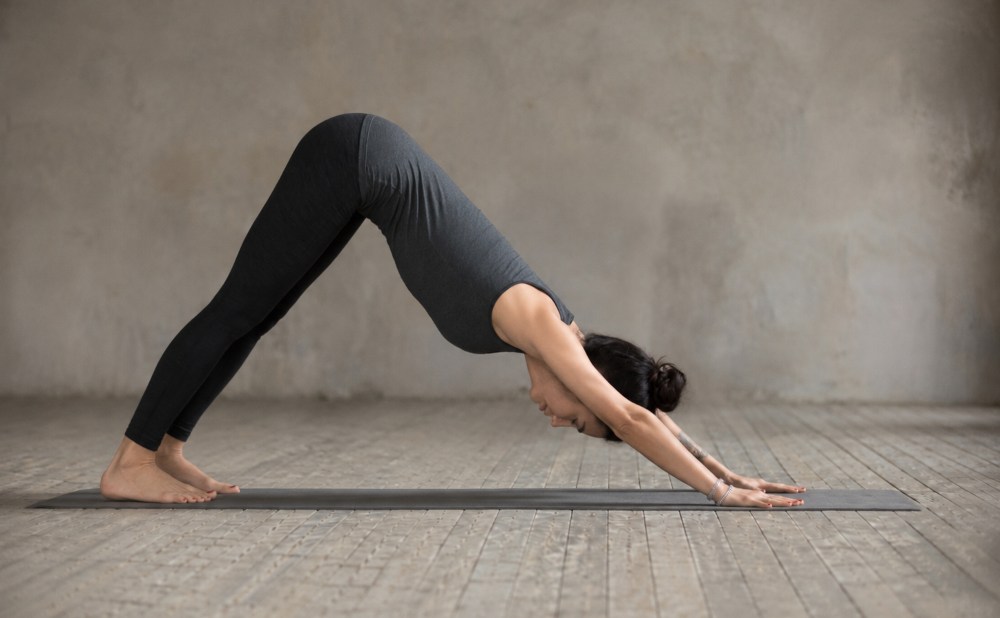
Step 8: Adho Mukha Svanasana - Downward-Facing Dog
Steps
Exhale and lift the hips upward.
Form an inverted V shape with the body.
Press the palms firmly into the mat.
Lengthen the spine.
Try to move the heels toward the floor, but do not force them.
Benefits
Stretches the spine, hamstrings, calves, and shoulders.
Improves blood flow toward the head.
Strengthens the arms and legs.
Relieves stiffness in the back.
Common Mistake
Do not round the spine just to bring the heels down. Keep the spine long. Bent knees are acceptable for beginners.
Step 9: Ashwa Sanchalanasana - Equestrian Pose
Steps
Inhale and bring the right foot forward between your palms.
Lower the left knee to the floor.
Lift the chest.
Look forward gently.
Keep the front knee aligned with the ankle.
Benefits
Opens the opposite hip flexor.
Improves balance and coordination.
Stretches the thighs and groin.
Stimulates digestion.
Common Mistake
Beginners often struggle to bring the foot forward in one step. It is completely fine to use the hand to adjust the foot position.
Step 10: Hasta Padasana - Standing Forward Fold
Steps
Exhale and bring the left foot forward.
Keep both feet together.
Place the palms beside the feet if possible.
Relax the head and neck.
Keep the knees bent if needed.
Benefits
Stretches the back body.
Improves flexibility in the legs.
Massages the abdominal region.
Calms the mind.
Common Mistake
Do not lock the knees forcefully. Soft knees protect the lower back and allow a safer forward fold.
Step 11: Hasta Uttanasana - Raised Arms Pose
Steps
Inhale and slowly rise.
Lift the arms above the head.
Stretch the whole body upward.
Gently arch back from the upper spine.
Keep the core lightly engaged.
Benefits
Opens the chest.
Improves lung expansion.
Stretches the abdomen.
Restores energy after the forward fold.
Common Mistake
Do not come up too quickly. Rise slowly with the inhale to avoid dizziness.
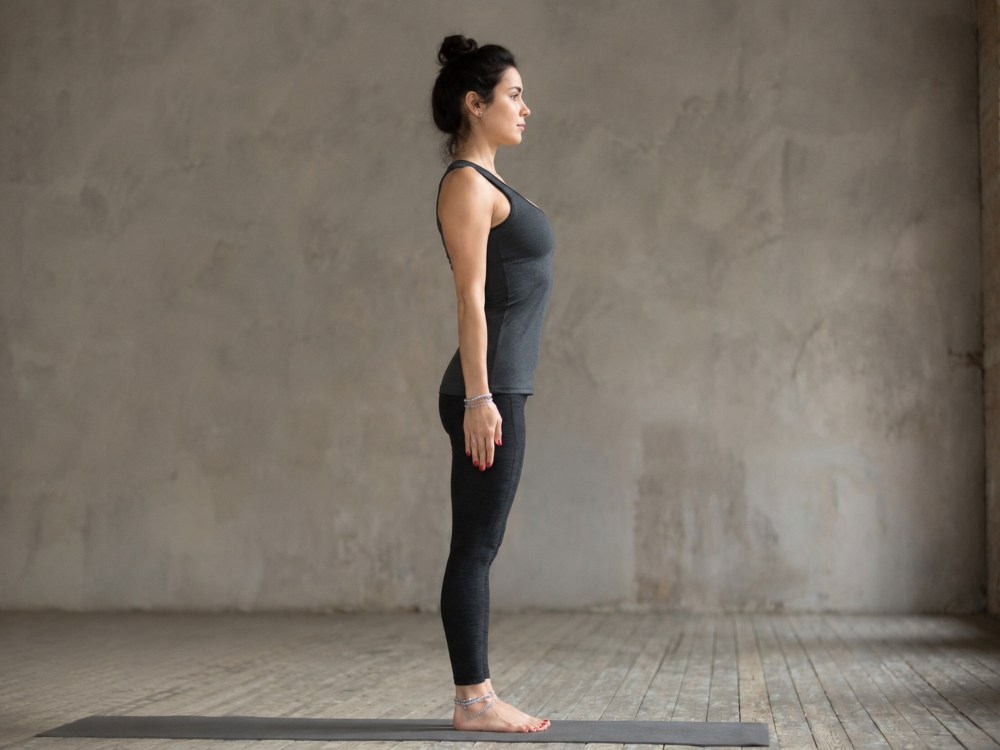
Step 12: Tadasana - Mountain Pose
Steps
Exhale and bring the arms down beside the body.
Stand tall with feet grounded.
Relax the shoulders.
Observe the breath and body sensations.
Allow the round to complete.
Benefits
Balances the body.
Relaxes the nervous system.
Improves posture.
Helps you feel the effect of the sequence.
Common Mistake
Do not immediately rush into the next round. Take a brief pause and let the breath settle.
Complete Breathing Pattern of Surya Namaskar
Breathing is the soul of Surya Namaskar. The general rule is simple:
Inhale when the body opens or expands.
Exhale when the body folds or contracts.
| Step | Pose | Breath |
| 1 | Pranamasana | Exhale |
| 2 | Hasta Uttanasana | Inhale |
| 3 | Hasta Padasana | Exhale |
| 4 | Ashwa Sanchalanasana | Inhale |
| 5 | Phalakasana | Hold / Inhale |
| 6 | Ashtanga Namaskara | Exhale |
| 7 | Bhujangasana | Inhale |
| 8 | Adho Mukha Svanasana | Exhale |
| 9 | Ashwa Sanchalanasana | Inhale |
| 10 | Hasta Padasana | Exhale |
| 11 | Hasta Uttanasana | Inhale |
| 12 | Tadasana | Exhale |
When the breath becomes smooth, the movement becomes smooth. When the movement becomes smooth, the mind becomes calm.
That is the real beauty of Surya Namaskar.
How Many Rounds of Surya Namaskar Should You Do?
The number of rounds depends on your experience, strength, and purpose.
For beginners: 3 to 4 rounds daily are enough.
For general health: 6 to 12 rounds can be practised regularly.
For weight management: 12 to 24 rounds may be helpful when combined with proper diet and lifestyle.
For advanced practitioners: 54 or 108 rounds may be practised occasionally under guidance.
Do not increase rounds too quickly. The body needs time to adapt.
It is better to practise 4 mindful rounds every day than 20 rushed rounds once a week.
Best Time to Practise Surya Namaskar
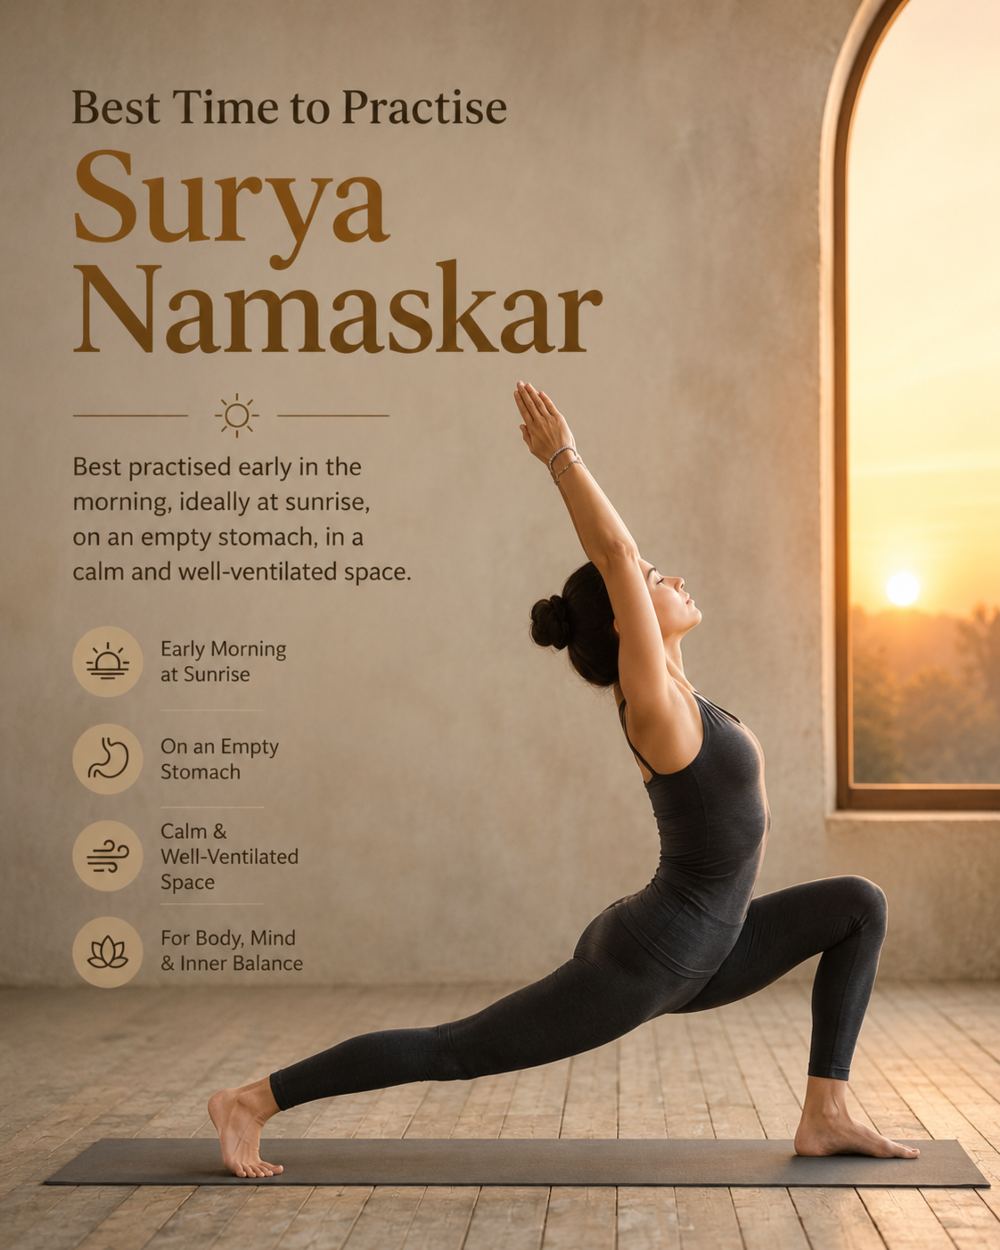
The best time to practise Surya Namaskar is early morning, preferably during sunrise.
Morning practice helps awaken the body, activate circulation, improve digestion, and create mental clarity for the day.
Traditionally, it is practised facing east to honour the rising sun.
You can also practise in the evening, but avoid doing it immediately after meals or when the body is extremely tired.
12 Surya Namaskar Mantras
Each step of Surya Namaskar can be connected with a mantra dedicated to the sun. These mantras add a spiritual and meditative dimension to the practice.
- Om Mitraya Namaha – Salutations to the friend of all
- Om Ravaye Namaha – Salutations to the shining one
- Om Suryaya Namaha – Salutations to the source of energy
- Om Bhanave Namaha – Salutations to the one who illuminates
- Om Khagaya Namaha – Salutations to the one who moves through the sky
- Om Pushne Namaha – Salutations to the giver of strength
- Om Hiranyagarbhaya Namaha – Salutations to the golden cosmic self
- Om Marichaye Namaha – Salutations to the rays of the sun
- Om Adityaya Namaha – Salutations to the son of Aditi
- Om Savitre Namaha – Salutations to the stimulating power of the sun
- Om Arkaya Namaha – Salutations to the one worthy of praise
- Om Bhaskaraya Namaha – Salutations to the giver of wisdom and light
You do not need to chant loudly. Beginners can simply repeat the mantras mentally or practise with awareness of gratitude.
Health Benefits of Surya Namaskar
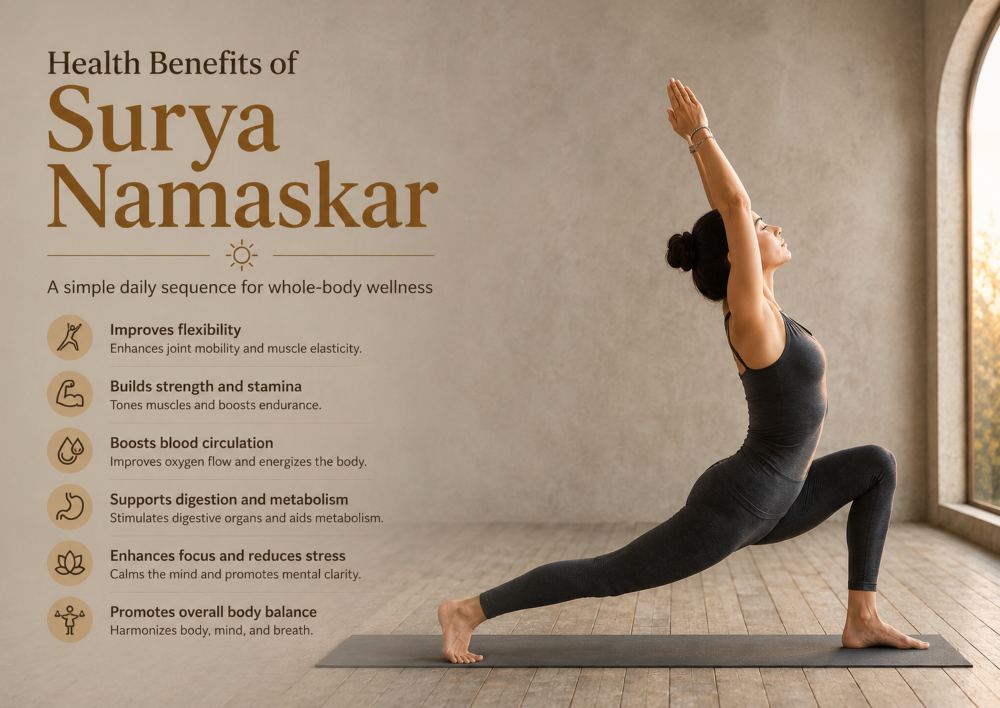
Physical Benefits
- Strengthens the full body.
- Improves flexibility in the spine, hips, hamstrings, and shoulders.
- Tones the abdomen, arms, legs, and back.
- Supports healthy weight management.
- Improves posture and body alignment.
- Enhances blood circulation.
- Supports digestion and metabolism.
- Improves cardiovascular endurance when practised regularly.
Mental Benefits
- Improves focus and concentration.
- Reduces stress and restlessness.
- Creates mental clarity.
- Balances the nervous system.
- Builds discipline and consistency.
- Helps develop breath awareness.
Spiritual Benefits
- Creates gratitude toward the sun.
- Builds awareness of body and breath.
- Prepares the mind for meditation.
- Connects movement with mantra and intention.
- Encourages inner discipline and self-observation.
Is Surya Namaskar Good for Weight Loss?
Yes, Surya Namaskar can support weight loss when practised consistently along with a balanced diet and healthy lifestyle.
Because it involves continuous movement, it increases heart rate, improves metabolism, strengthens muscles, and burns calories. But the real benefit is not only calorie burning.
Surya Namaskar also supports digestion, hormonal balance, discipline, and body awareness — all of which are important for long-term weight management.
For weight loss, beginners can start with 4 to 6 rounds and slowly increase to 12 rounds or more as stamina improves.
Never sacrifice alignment for speed. Fast but incorrect practice can lead to injury.
Who Should Avoid or Modify Surya Namaskar?
Surya Namaskar is powerful, but it is not suitable for everyone in the same way.
Be cautious if you have:
Recent wrist injury
Knee pain
Lower back pain
Slip disc
High blood pressure
Heart condition
Hernia
Glaucoma
Pregnancy
Severe arthritis
Recent surgery
Pregnant women should avoid traditional Surya Namaskar after the first trimester unless guided by an experienced prenatal yoga teacher.
People with medical conditions should consult a doctor before starting.
Yoga should heal the body, not strain it.
5 Common Mistakes Beginners Make in Surya Namaskar
1. Moving Too Fast
Many beginners rush through the sequence because they think faster means better. But speed without awareness turns Surya Namaskar into a mechanical exercise.
Move slowly first. Speed can come later.
2. Forgetting the Breath
The breath is what connects the postures. Without breath awareness, the practice loses its yogic quality.
Remember: inhale when opening, exhale when folding.
3. Forcing Flexibility
You do not need to touch the floor in Forward Fold or bring the heels down in Downward Dog on the first day.
Use modifications. Bend the knees. Respect your body.
4. Collapsing the Lower Back
In Raised Arms Pose and Cobra Pose, many students compress the lower back. Keep the core active and lengthen the spine before bending.
5. Practising Inconsistently
One intense session a week will not give the same benefit as a few mindful rounds daily.
Consistency is more important than intensity.
Beginner Modifications for Surya Namaskar
If you are new to the practice, use these simple modifications:
- Bend your knees in Hasta Padasana.
- Keep the back knee down in Ashwa Sanchalanasana.
- Hold Plank for a shorter time.
- Keep Cobra low instead of lifting high.
- Bend the knees in Downward-Facing Dog.
- Move slowly between poses.
- Rest after each round if needed.
These modifications do not make the practice less effective. They make it safer and more intelligent.
FAQs About Surya Namaskar
What is Surya Namaskar?
Surya Namaskar is a sequence of 12 yoga poses performed in a flowing order with coordinated breathing. It is also known as Sun Salutation and is traditionally practised at sunrise.
How many steps are there in Surya Namaskar?
There are 12 steps in one round of Surya Namaskar. These include Prayer Pose, Raised Arms Pose, Forward Fold, Low Lunge, Plank, Eight-Limbed Salutation, Cobra, Downward-Facing Dog, and returning poses.
Can beginners do Surya Namaskar?
Yes, beginners can practise Surya Namaskar. Start with 3 to 4 slow rounds and use modifications such as bending the knees or keeping Cobra low.
What is the best time to do Surya Namaskar?
The best time is early morning during sunrise, preferably on an empty stomach and facing east.
Is Surya Namaskar good for weight loss?
Yes, regular practice can support weight loss by improving metabolism, burning calories, strengthening muscles, and improving digestion.
How many rounds of Surya Namaskar should I do daily?
Beginners can start with 3 to 4 rounds. For general fitness, 6 to 12 rounds are good. Advanced practitioners may do more under guidance.
Can I do Surya Namaskar every day?
Yes, Surya Namaskar can be practised daily if your body feels comfortable and you do not have any medical restrictions.
Should Surya Namaskar be done fast or slow?
Beginners should practise slowly with correct breathing and alignment. Faster rounds can be done later for stamina and fitness.
Who should not do Surya Namaskar?
People with serious back pain, wrist injury, knee injury, hernia, high blood pressure, heart problems, or pregnancy should consult a doctor or yoga teacher before practising.
What is one complete round of Surya Namaskar?
One complete round usually includes the 12 poses performed once, beginning with one leg going back and then repeating with the opposite leg for balance.
Conclusion
Surya Namaskar is one of the most complete and powerful practices in yoga. It strengthens the body, improves flexibility, balances the breath, calms the mind, and builds inner discipline.
But to receive its full benefits, it must be practised with awareness.
Do not rush. Do not force. Do not compare your body with anyone else.
Start with a few rounds. Learn the correct alignment. Coordinate each movement with the breath. Over time, Surya Namaskar becomes more than a morning routine — it becomes a daily ritual of energy, gratitude, and self-connection.
Whether your goal is fitness, flexibility, weight loss, or spiritual growth, Surya Namaskar gives you a complete foundation for a balanced yoga practice.